Do you love an easy project that uses what you already have and takes just a little time and effort? How about one that you can use every day and is friendly to the environment as well? Today’s little DIY checks all of those boxes.
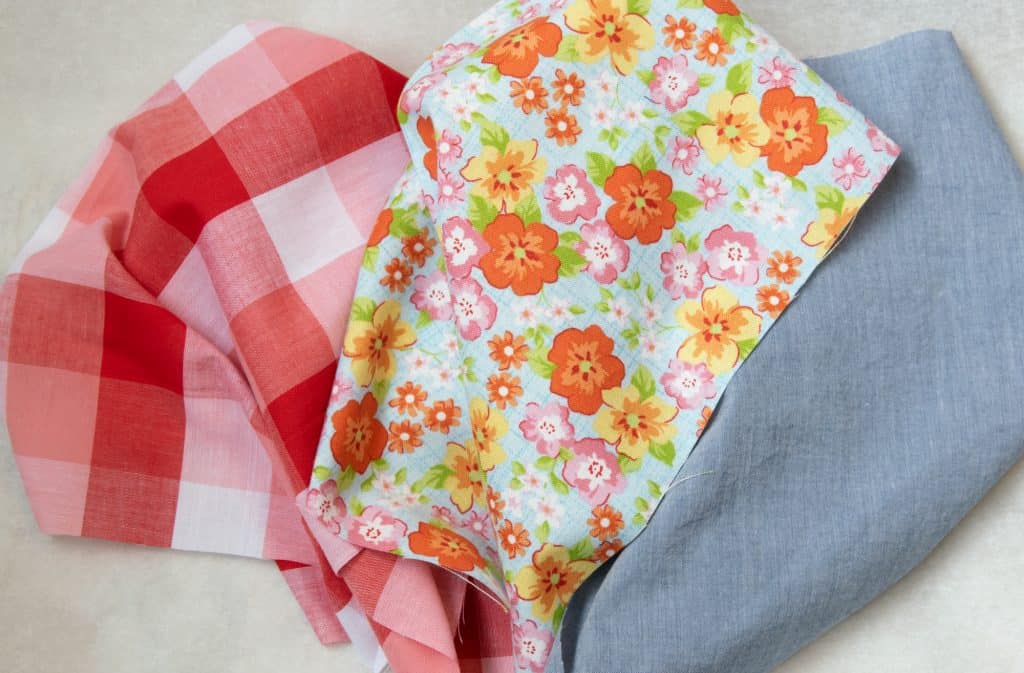
After sewing about a gazillion face masks, I currently have a lot of cute cotton fabric scraps on my hands. Maybe you are in the same boat. And who needs a bunch of fabric squares taking up useful space in the house?
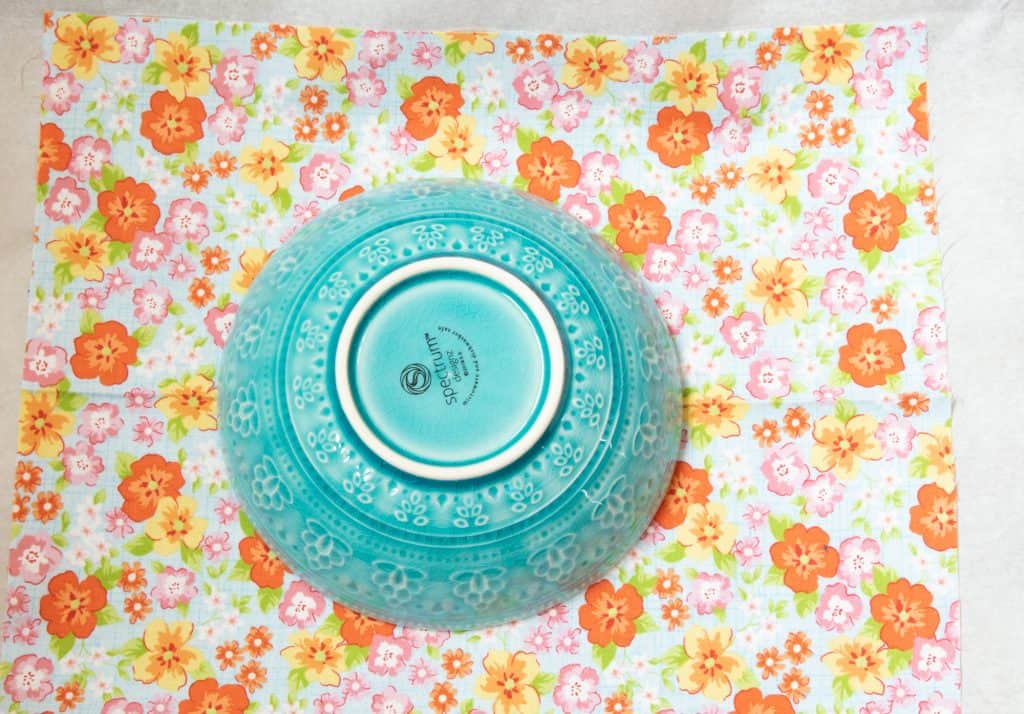
Reusable wax bowl covers are the perfect little DIY! With only 2 ingredients and tools, everyone has on hand anyway, this is as easy as DIY gets. Here is just a tiny sample of the many great fabric scraps I have.
It’s a simple upcycling project you can make quickly and use daily! Save the money you would spend on plastic wrap for something else. You are going to love this!
If you like making your own skincare, you may already have beeswax pellets on hand. They are a staple ingredient in many of my homemade products, like all-natural baking soda free deodorant and organic lip and hand balm. Beeswax is definitely one multi-use ingredient that is a must-have at our house.
Projects like this make me happy because they save me money, make my life easier and this one happens to be fantastic for the environment as well. Keeping plastic wrap and other kinds of foil from going in the trash is a good thing. Of course, it doesn’t hurt that they also happen to be cute.
For more great ideas and the recipes to the skincare products mentioned above, be sure to sign up to get the password to my FREE Resource Library as well as my newsletter!

*This post contains affiliate links. You can read the complete affiliate link policy here.
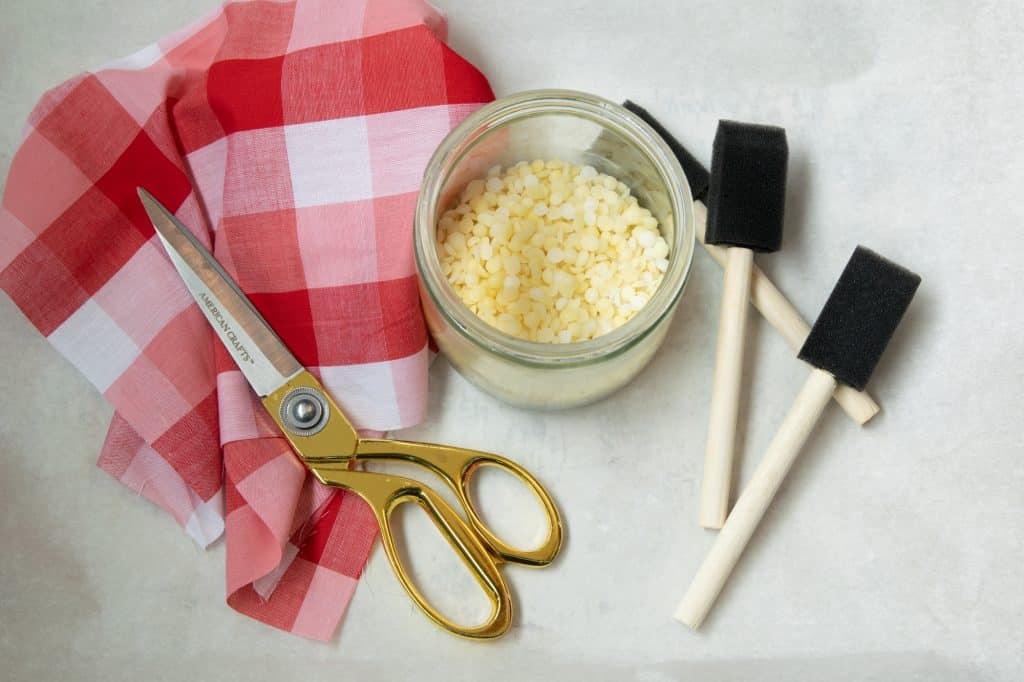
Here is what you will need:
- Beeswax pellets
- 100 % cotton cloth in desired sizes, prewashed – do not use any synthetic materials for this
- cheap paintbrush or foam craft brush
- scissors and/or pinking shears
- parchment paper
- iron/ironing board or pad
Step by Step
Gather your materials and be sure to protect your work surface. You don’t want any wax getting onto anything other than the cloth you are making!
For convenience and safety stay close to where you will be melting the beeswax. Since that will likely happen in the kitchen, the kitchen counter is ideal.
To melt the beeswax, place the pellets into a heat-safe glass jar. When working with wax, it’s best to use a jar you won’t be using for anything else. Beeswax has a lot of great qualities, but easy cleanup is not one of them. If you have any wax left over, you can simply store it and use it another time. Melt wax in a double boiler – that is a pot or bowl placed over another pot with water on the bottom. Start with 1/2 cup of wax pellets. You can add more if needed.
You could also microwave the wax in 30-second increments stirring each time with a wooden popsicle stick. I happen to have a glass cooktop with a warmer and I just warm my jar with the wax by placing it directly on the cooktop on a medium warmer setting. Do not attempt this on a regular burner! They get far too hot too quickly and are not safe to use for that. A candle warmer would be another safe and easy choice. Use caution when handling the jar with wax as it is definitely hot. Don’t do this around small children of pets.
Line a large cookie sheet with parchment paper to create a safe and contained work surface. You can also put down several layers of newspaper and put the parchment down on top of it.
Next, you want to make sure the fabric you are using is properly sized for the bowl or dish you want to cover. Keep in mind that you will need at least 1″ (2.5 cm) extra all around. This is necessary to allow you to secure the cloth properly around the bowl when in use. You can easily create several covers in different sizes.
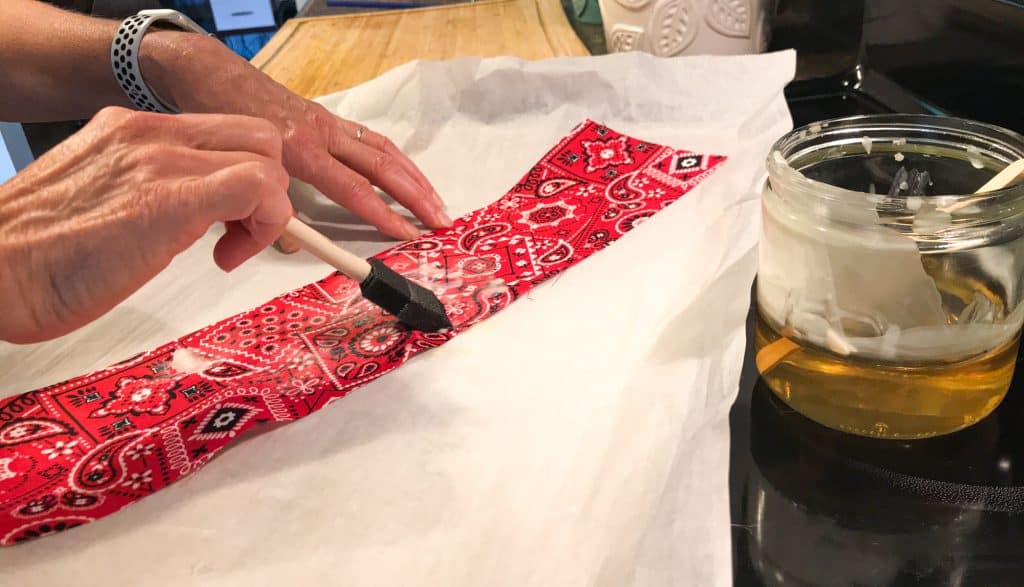
To apply, carefully pour a little of the melted wax on top of the cloth and spread evenly and in a thin layer all over the cloth with a foam or bristle brush. You can see here that I opted for a foam brush, but I will probably try a bristle brush next time around to see if they allow for more brushing time. When it comes to the amount of wax, it’s better to start out with less and add more if needed. If you apply the wax too thick, the cover will be stiff and brittle. Excess wax can be challenging to remove.
When I try something that I want to share with you, I usually give several different methods and/or recipes a try to find the best one to share with my readers. Some recipes called for additional oils and some included pine resin. There is absolutely nothing wrong with them. But in the spirit of simplicity, I decided that creating the covers using beeswax as a stand-alone ingredient worked so well, it didn’t call for any addition. Some instructions I tried have you place grated beeswax or small pellets directly on the cloth which is sandwiched between two layers of parchment paper.
You can certainly do that and skip the melting-in-a-jar step, but I have found that getting the amount of wax just right may take several passes. This method works well if you are working with a small piece of material, but as a whole, I have found it easier to just brush the wax on, especially if you plan on making several covers.
To achieve a thin and even layer of wax in the finished cover, place your cloth between two sheets of parchment paper as shown and iron on low heat. If your iron has a steam setting, be sure to turn that off. Make sure that none of the wax comes into contact with the iron! Gently heat the layer of wax between the sheets of parchment. As the wax re-melts you can carefully push it onto any area that is not saturated.
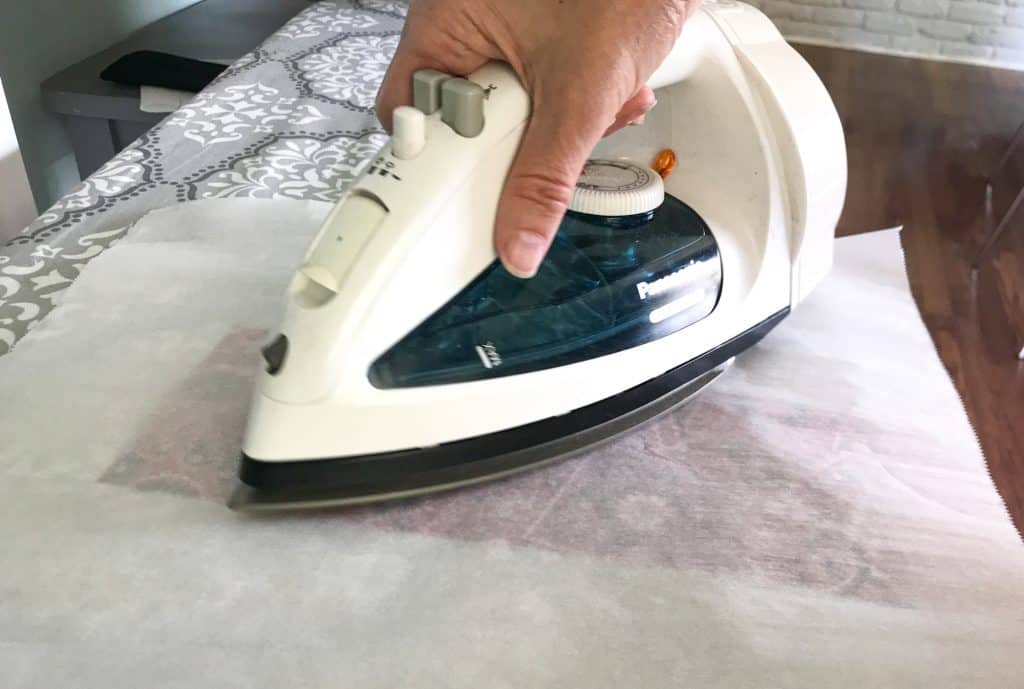
You are aiming for fabric that has a matte wet look when it is properly saturated. It should not be stiff, but pliable. Be sure to use parchment paper that is much larger all the way around to avoid getting wax on your ironing board. If you are worried about wax getting on your board, cover it in a couple of layers of newspaper or brown paper bags.
Let the wax cool completely. Then peel the wax cloth off the parchment.
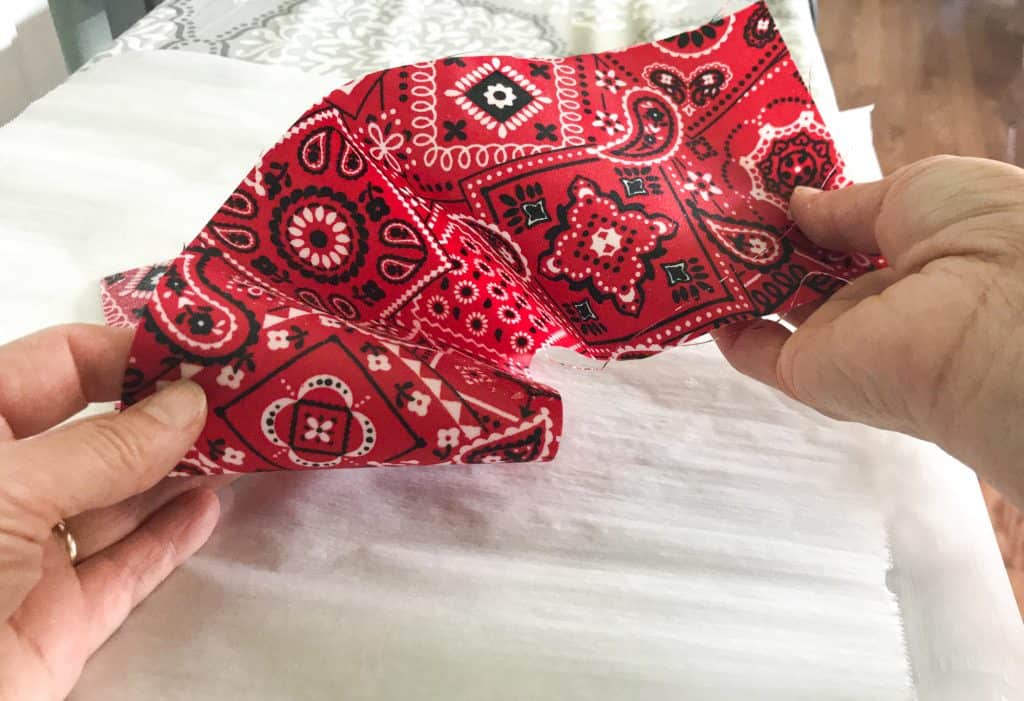
Here you see that the wax has been absorbed into the cloth. It has a wet appearance and easily holds its shape. Cut the cloth into your desired size and shape, if you haven’t done so already. You may want to use pinking shears to prevent fraying. Definitely don’t use your good fabric scissors as cutting through wax will ruin them!
And you are done! This is the perfect little project for a rainy afternoon.
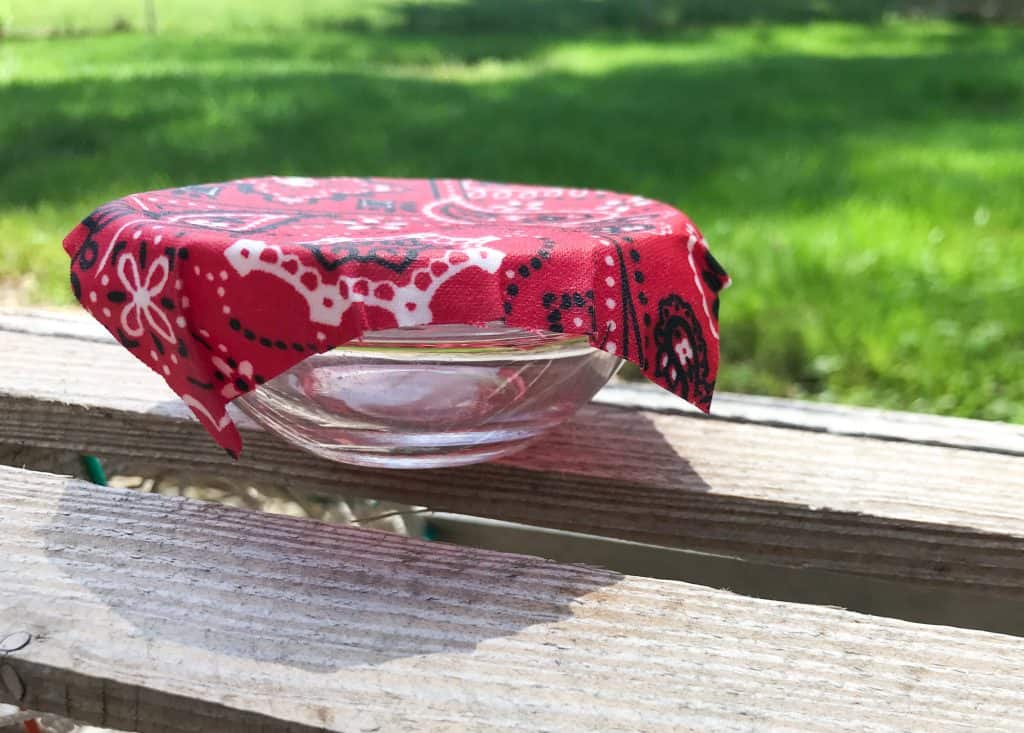
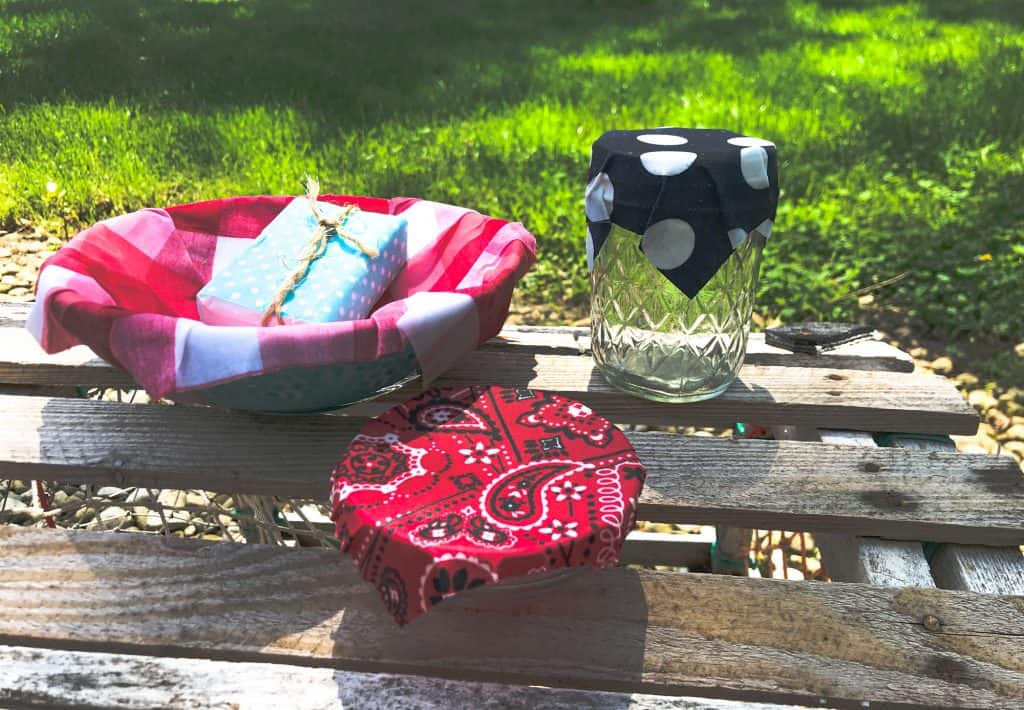
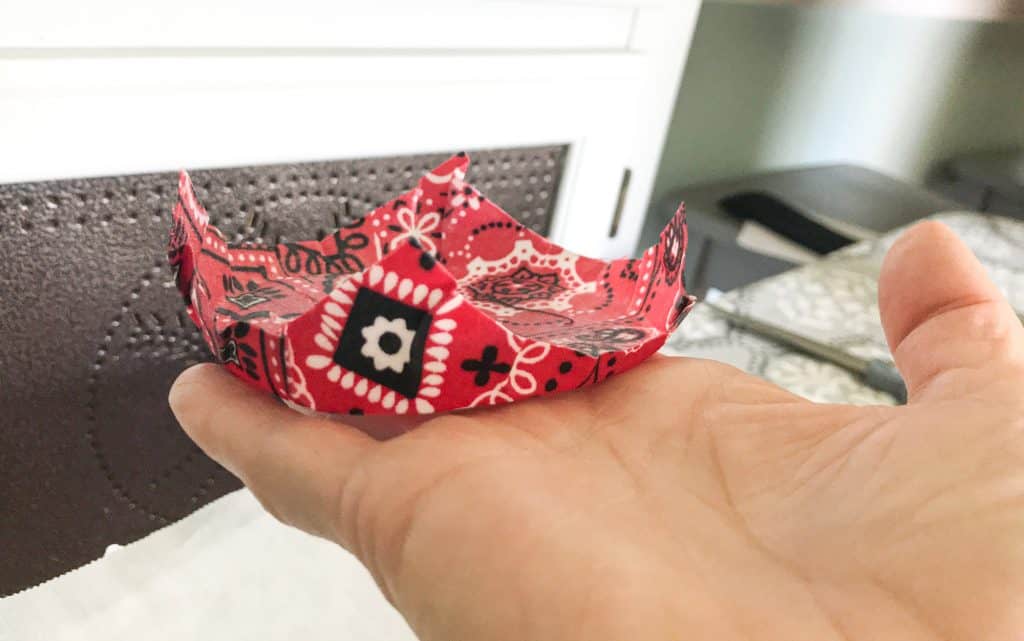
See how it holds its shape even after you remove it from the bowl?
Here is how to make sure your fabric bowl covers last:
- Don’t wrap or cover any meat in beeswax cloths as they should not be washed in hot water.
- Do wash them in warm water with mild dish soap. Never put beeswax bowl covers in the washer or dishwasher!
- If the cloth gets brittle and you notice little pieces of beeswax coming off, you can make it good as new by placing the clean cloth between two layers of parchment paper and gently ironing it on low heat.
Now you know how grandma covered food to store on the counter, in a cool pantry or in her “icebox”. Great things just never go out of style.
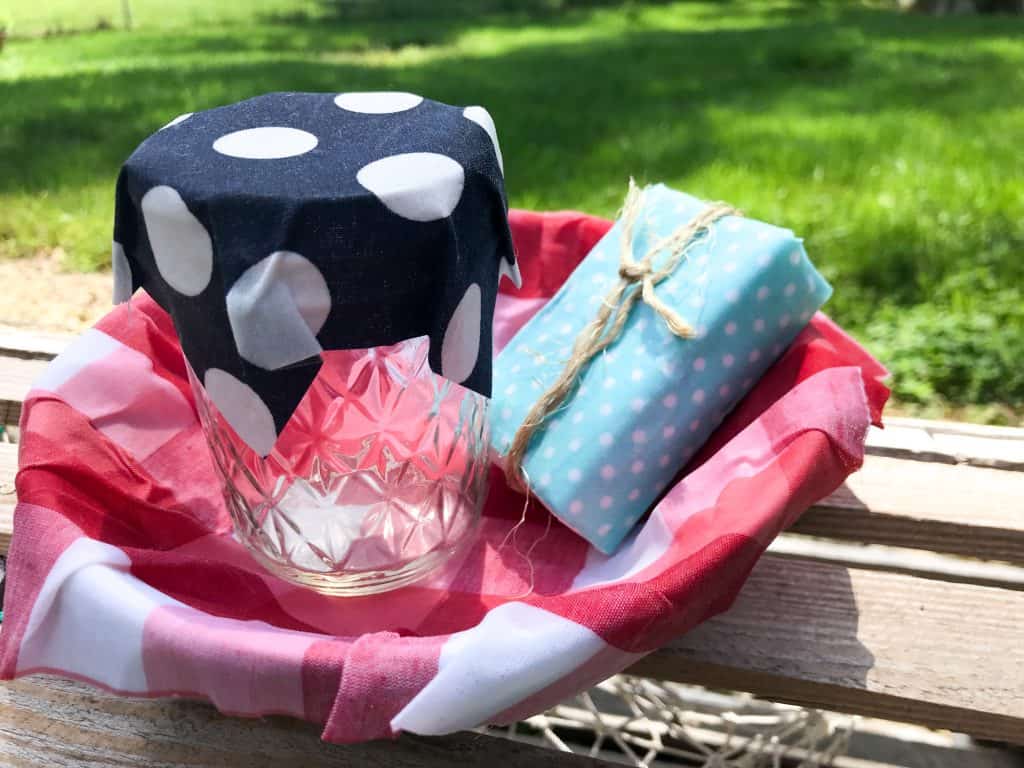
I have found that beeswax bowl covers also make for a fun gift wrap that can make even the most ordinary gift look fancy. I love wrapping my homemade soap in it. Of course, you could make a few covers in different sizes and give them as a gift all on their own. Use them to line any baskets if you will be putting food in it, like fresh fruit. The wax liner is perfect to keep the fruit from staining your basket and looks great!
What do you think? Will you give them a try? Besides being super easy to make, they take up very little space in your kitchen and you will save you money by not having to buy plastic wrap. Fabric bowl covers are also perfect for use in an RV!
If you make them, be sure to stop by the TWGL Facebook group and show us how they turned out! Not a member? No problem! We would love to have you!
Be sure to check out some of my other helpful projects around the house:
The best way to clean a thermal coffee pot.
Easy and budget friendly drawer organization
Have a great day!

Great idea !!!! Nice tutorial .Thanku for sharing..
Rec’d as a Christmas gift in different sizes. LOVE THEM!!! That’s why I want to make more!!!
You can never have enough!
Thank you so much for the tutorial! I was having a hard time with iron (more like lack of patience) and could see that some of the was wasn’t melting completely through the fabric so I tried something else and it appears to work like a charm.
1. Place a sheet of parchment paper down and place one cover with the waxed part down.
2. Place another sheet with the wax part up; so the two backs of the fabric are together.
3. Add another piece of parchment and repeat until done. The last one doesn’t need to be covered with parchment.
4. Place in over for 15 mins; I found that 250 was a good temp.
The wax absorbed all the way through without much work or intervention.
Thank you for sharing your tips!