
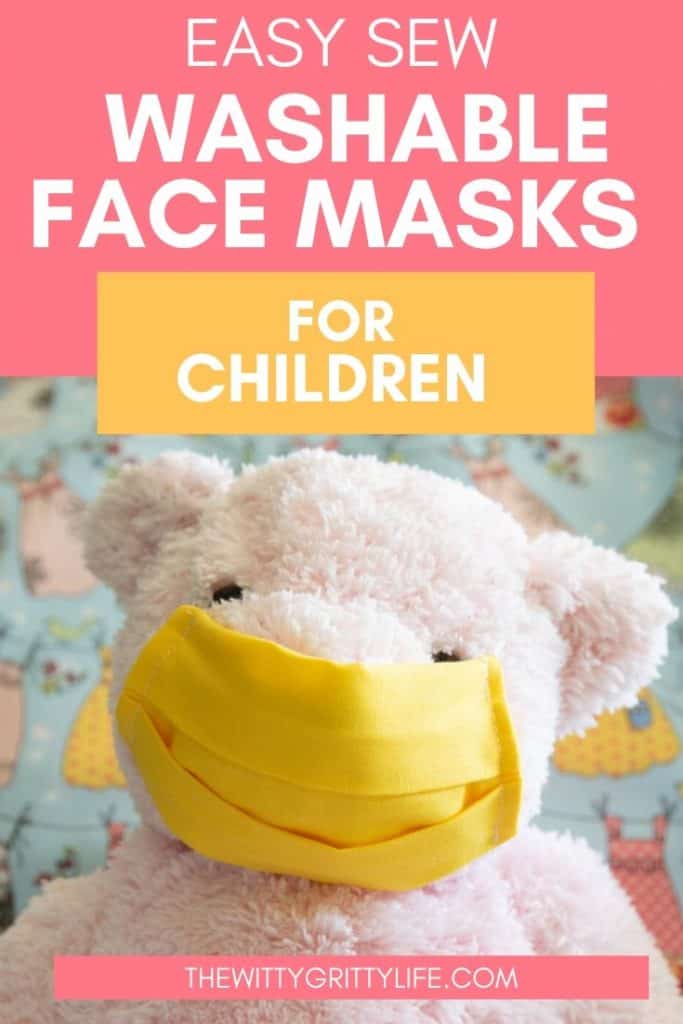
When I recently posted instructions for making washable face masks, I could not imagine how well they would resonate with my readers. It is a pretty simple, yet effective pattern even a relative beginner can sew. But one question that has come up several times since then was whether or not I had measurements to make washable facemasks for children. Today I am going to answer with a resounding YES!
While the original face mask pattern is super easy and works very well with most adults, many of my readers mentioned that they were having trouble adjusting the measurements to fit a child properly. And yes, it can be tricky to get that just right, but thankfully, this is a pattern that is surprisingly easy to scale down in size as well as up! I am happy to help you with it!
As with the adult version fit is not the only consideration when it comes to children’s masks, but material as well. While it is important to use breathable material like 100% cotton fabric for anyone, little faces often get irritated quickly. Not all cotton fabrics are created equal. The cloth you use should be densely woven but also soft to the touch so your little one will be much more comfortable wearing their mask out and about.
While it may seem difficult to find suitable fabrics right now, there is a pretty obvious solution that may literally be under your nose: cotton pillowcases or sheets. After all, they are the material your little ones rest their cute little heads on all night, so they are absolutely ideal for this project! And chances are you have at least one or two you could repurpose for this reason without ever having to leave the comfort of your home.
Look for sheets that have a thread count of around 300. It is tightly woven yet breathable. If the fabric has been washed, better yet! I also recommend that you choose organic cotton whenever possible and stay away from using fabric softener, which usually contains irritating chemicals no one should be inhaling.
When I designed my original pattern, I wanted to make sure that the masks are: easy to sew with only straight lines, cover the face well, and have three layers, one of which is a removable liner made of non-woven fabric.
To learn what materials the CDC recommends for fabric masks and how to wear them properly you can check out their link here. As a former healthcare worker who used to wear masks frequently, I know how important fit, comfort, and breathability are. Nothing less than a design that met all the criteria would do.
At first, I considered simply copying the pleated designs of most masks for my own use but found them to be somewhat tedious to sew. Multiple stacked layers like those in masks with several pleats, tend to get stuck in the sewing machine easily. And that can get frustrating quickly. Other patterns lacked the pleats but had several rounded pieces with somewhat confusion instructions to boot. Those patterns also use considerably more elastic and may not be a good fit for everyone.
The inverted pleat was the solution to my design dilemma. It allows for the mask to cover the face well without many fussy layers and makes it easy to create a pocket for a separate, removable liner. And because I know that not everyone tolerates the latex in elastic ribbon, I made sure to include options for replacements for those as well.
For a printable version of both the children’s and adult mask instructions along with all of the measurements (also in metric) sign up here to receive the password to my FREE Resource Library:
This post contains affiliate links. You can read my complete affiliate link policy here.
Tools and Materials
- good fabric scissors or rotary cutter and a self-healing cutting mat
- quilting ruler
- pins – I love those with a flat head for easy handling
- iron & ironing board
- sewing machine
- 300 thread count cotton sheet
- matching all-purpose cotton thread
- 1/8″ elastic ribbon or 1/4″ satin ribbon or grosgrain ribbon
- or: old t-shirt cut lengthwise in 1″ strips to create a flexible ribbon
HERE ARE THE STEPS TO MAKE FACE MASKS FOR CHILDREN
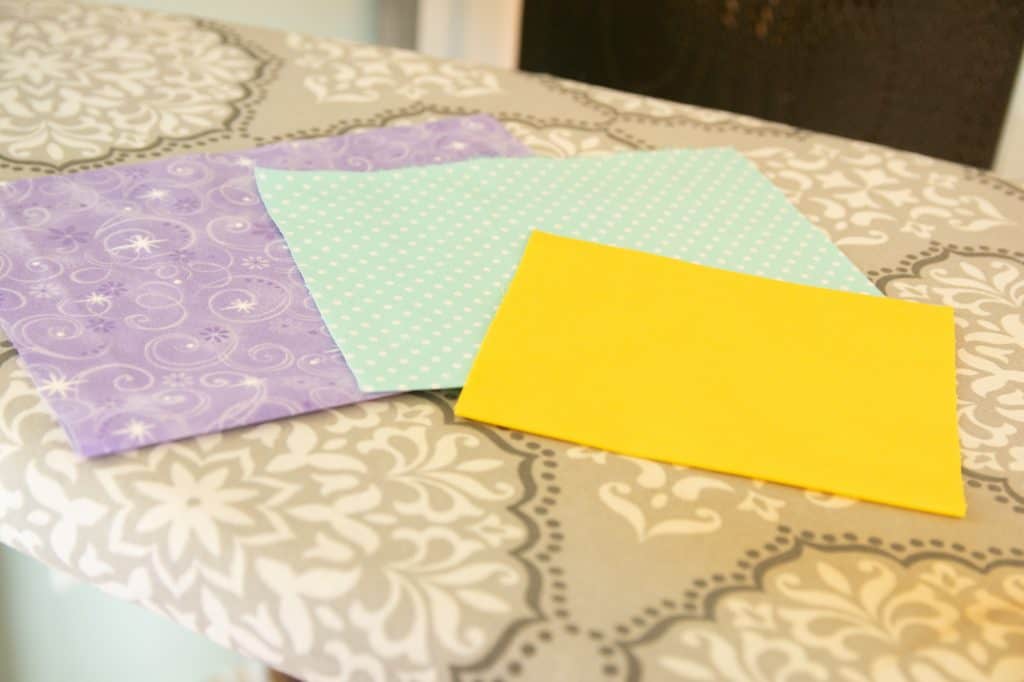
Measure and cut fabric. You can find the measurements for all large, medium, and small (=very small child, doll, or teddy bear) sizes in the FREE Resource Library.
All measurements are stated in inches as well as metric.
CHOOSING THE PROPER Face Mask Size:
In this post, I am creating the smallest size (7″ x 10″), but the same basic instructions apply to all sizes :
- Large child/Small adult: 9″ x 14″ (about 23 x 35 cm)
- Medium: 8″ x 12″ (about 20 cm by 30 cm)
- Small: 7″ x 10″ (about 18 cm x 26 cm)
Not sure which size will work best? Measure from ear to ear and from the bridge of the nose to the bottom of the chin.
Older children will generally do well with the large child size mask, while children from about 3-7 will be fine with the medium size. The smallest size was included more to allow you to create a mask for your child’s favorite bear. Most children 3 or younger likely will not tolerate wearing a mask for more than a couple of minutes and are generally not required to wear one.
You can find detailed video instructions for the face mask pattern in my post:
HOW TO SEW YOUR OWN WASHABLE FACE MASKS
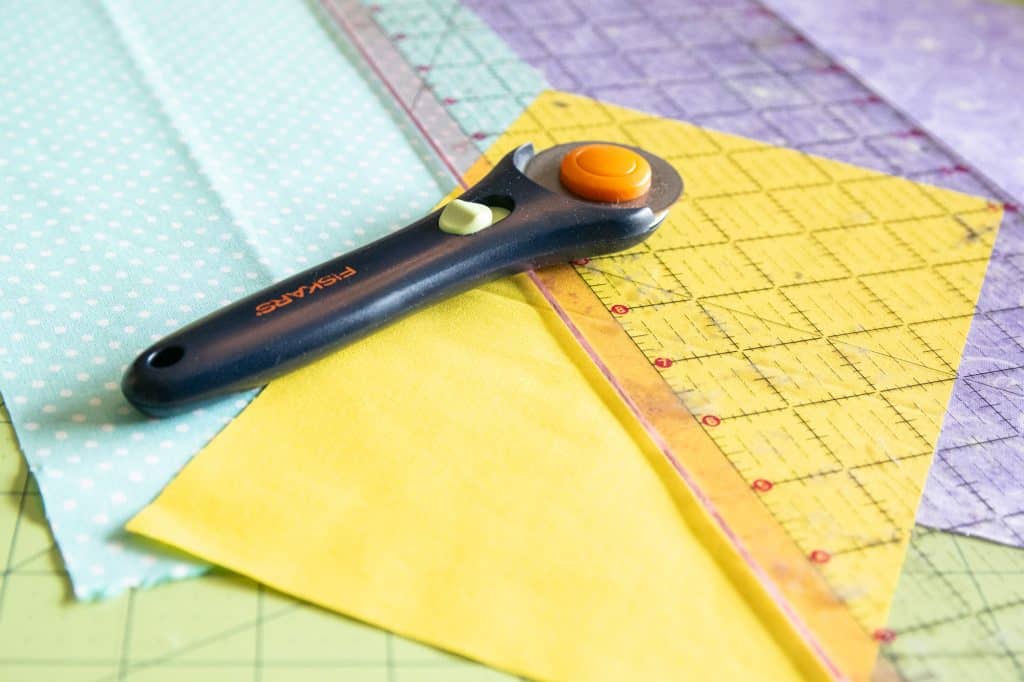
While scissors are perfectly fine for a mask or two, if you plan on making them in a greater quantity, using a rotary cutter, quilting ruler and self-healing mat is a must. Not only will you be saving a ton of time, but you might just emerge from the project with your sanity intact!
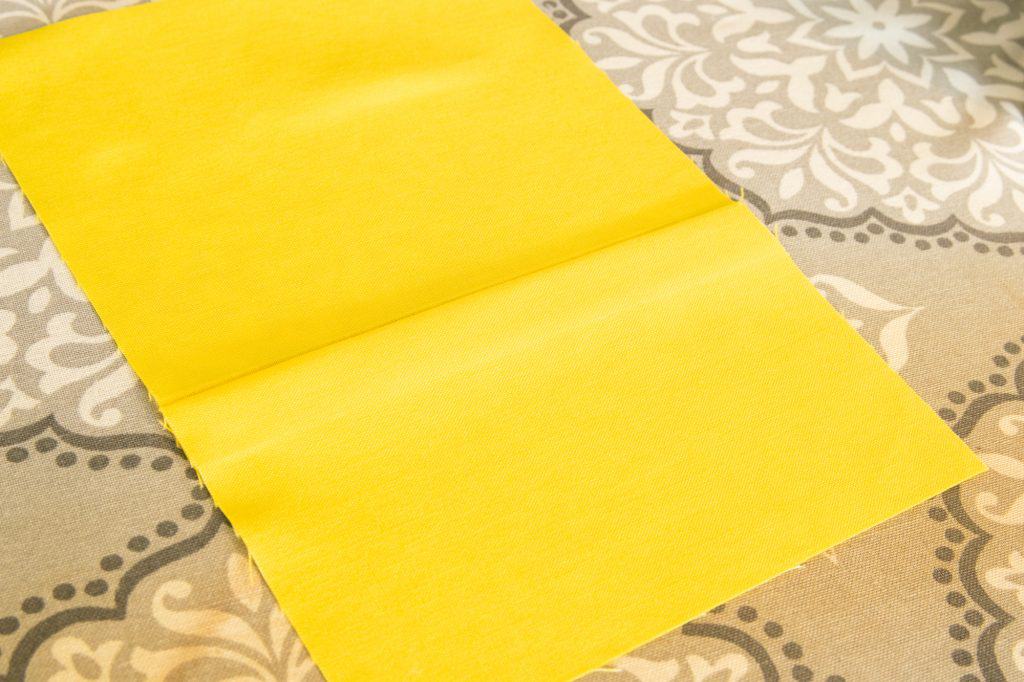
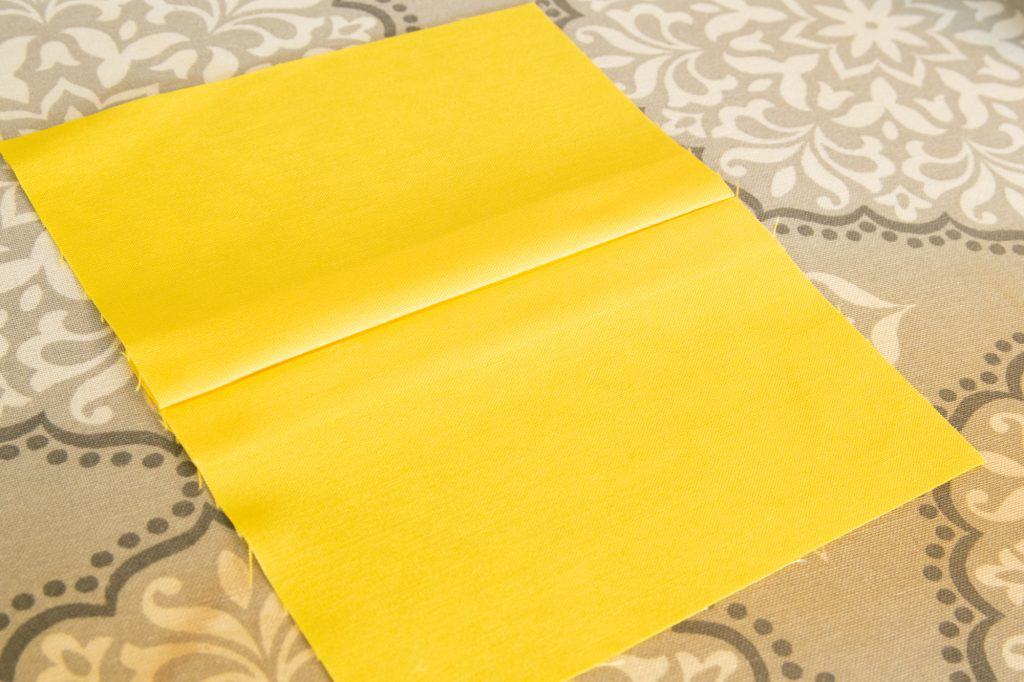
Once the rectangular piece of fabric is cut to size, fold it in half sideways and press like this:
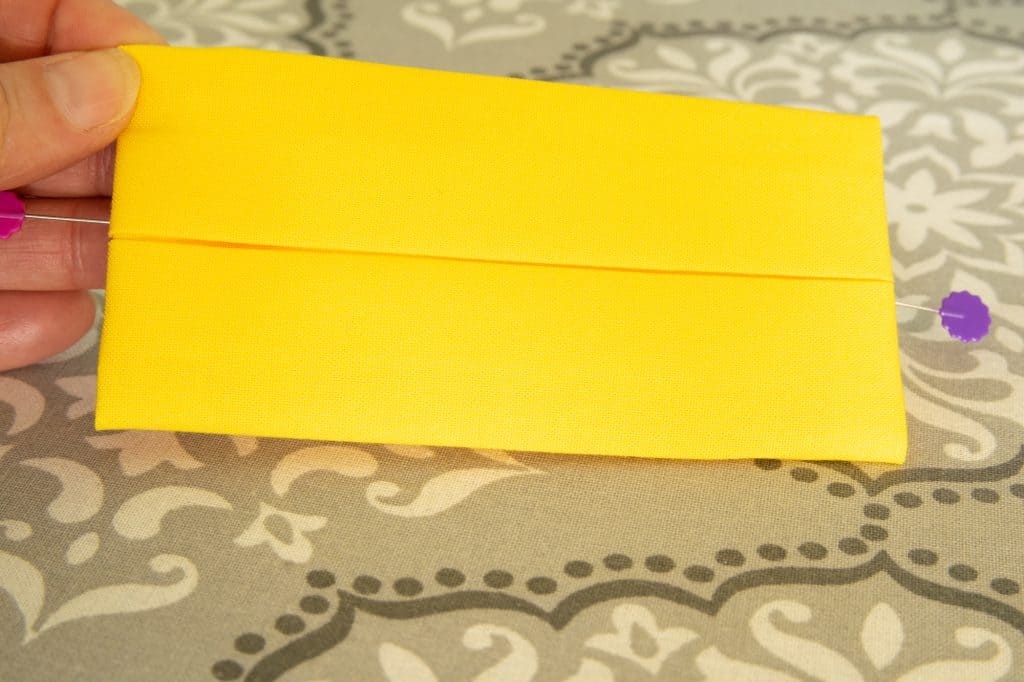
Then open the piece back up to begin folding the center pleat. This is accomplished by measuring down about 1 1/2″ from the centerline. Grab the fabric on both sides at the 1 1/2″ inch mark and fold it up to meet with the centerline.
Press in place and repeat on the other side so that both folds meet on the centerline. Each fold should be about 3/4″ (1.9cm) wide.
This is what the pleat should look like when opened up:
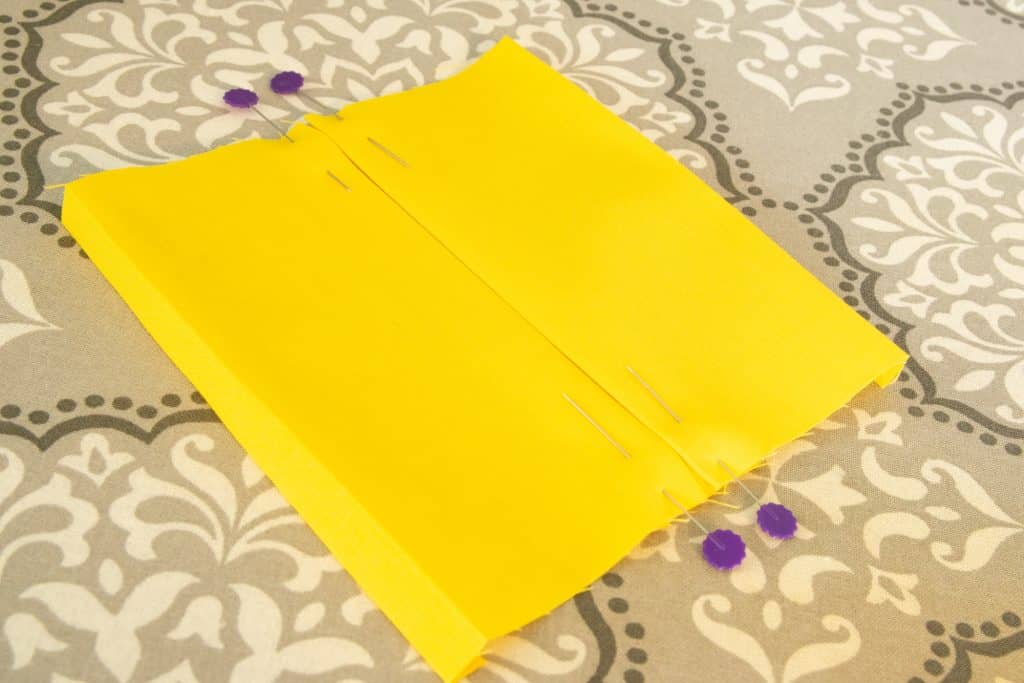
See the original centerline? You want to fold the fabric on top of itself toward it. Pin the pleats in place on both sides like this:
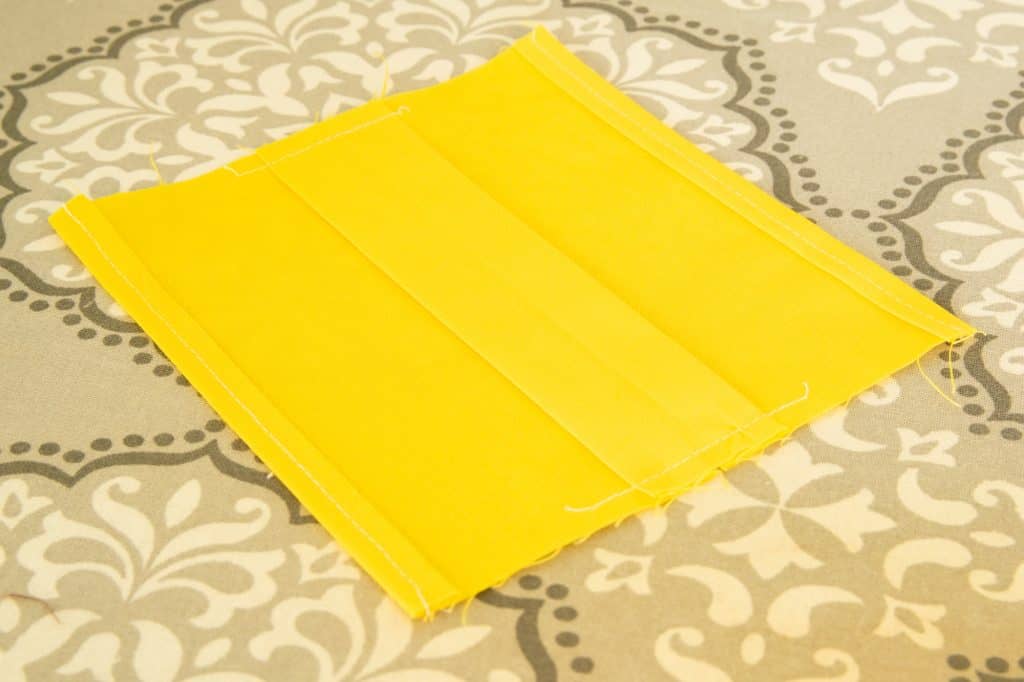
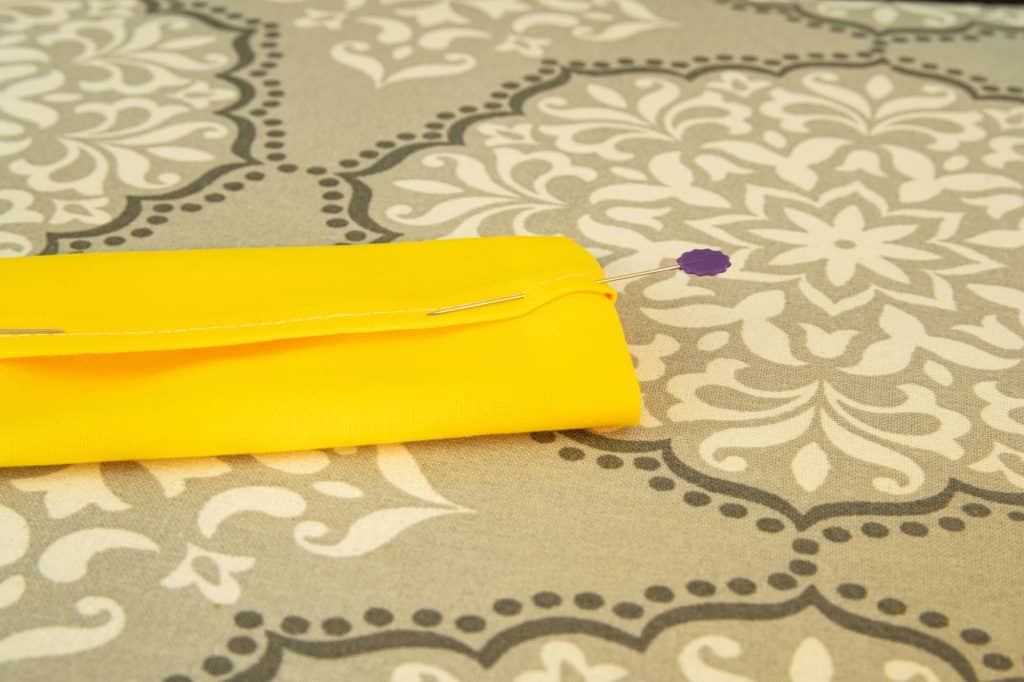
Now turn the piece over and roll up and press the seams on the top and bottom. Roll them over twice to prevent fraying. Pressing them well with a steam iron is enough to hold them in place for stitching.
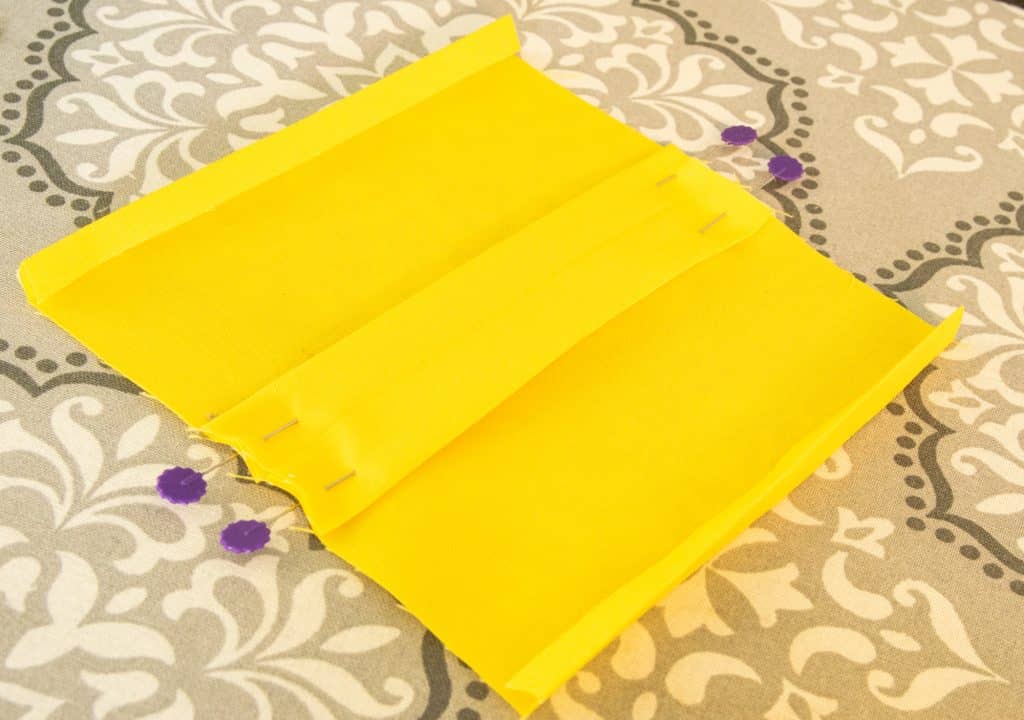
This is what will be the inside of the finished mask. Next, stitch the rolled hems and the pleats in place on each side.
And here is how the front will look:
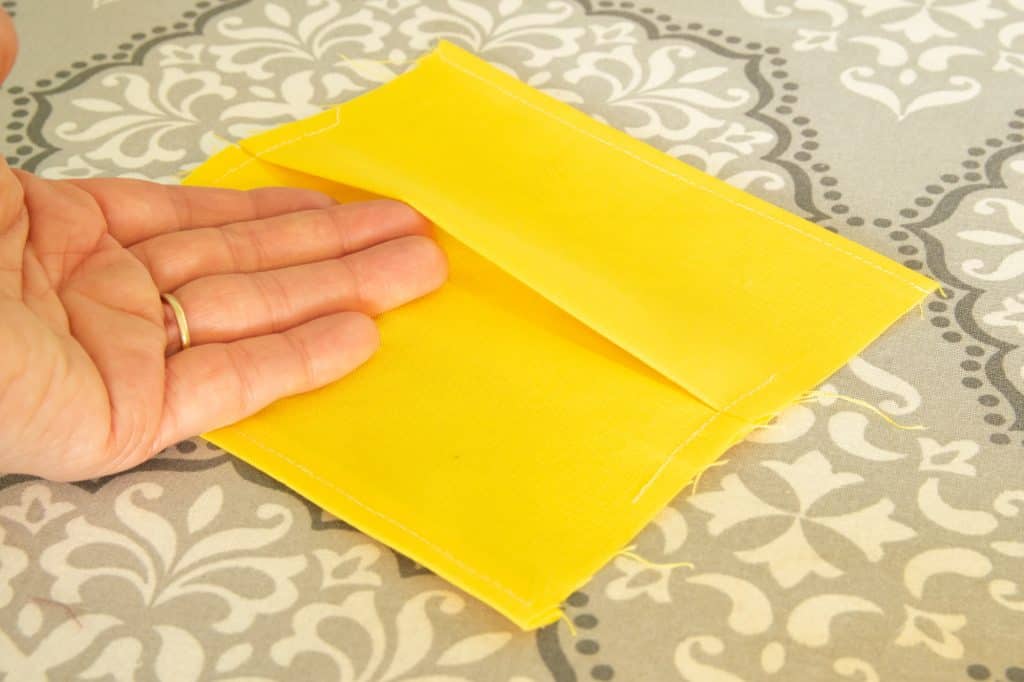
Iron the piece from the top to set the seams and flip over to press up the sides about 1/2″ (1.3 cm) like this.
Now it’s time to first fold up the bottom towards the center, then the top.

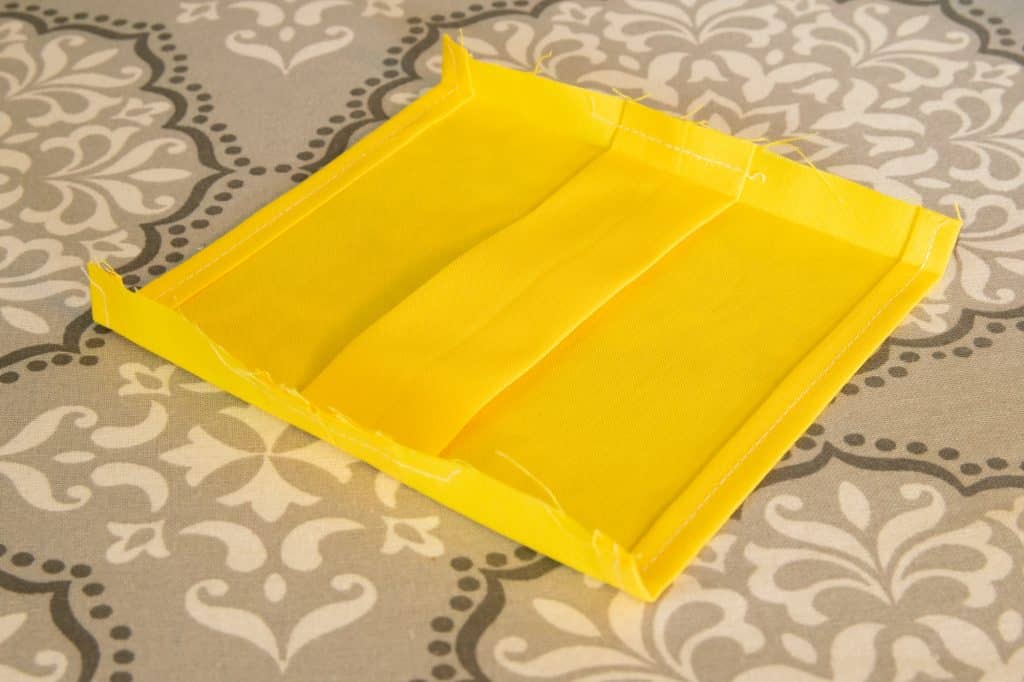
And here is what the front of the mask looks like:
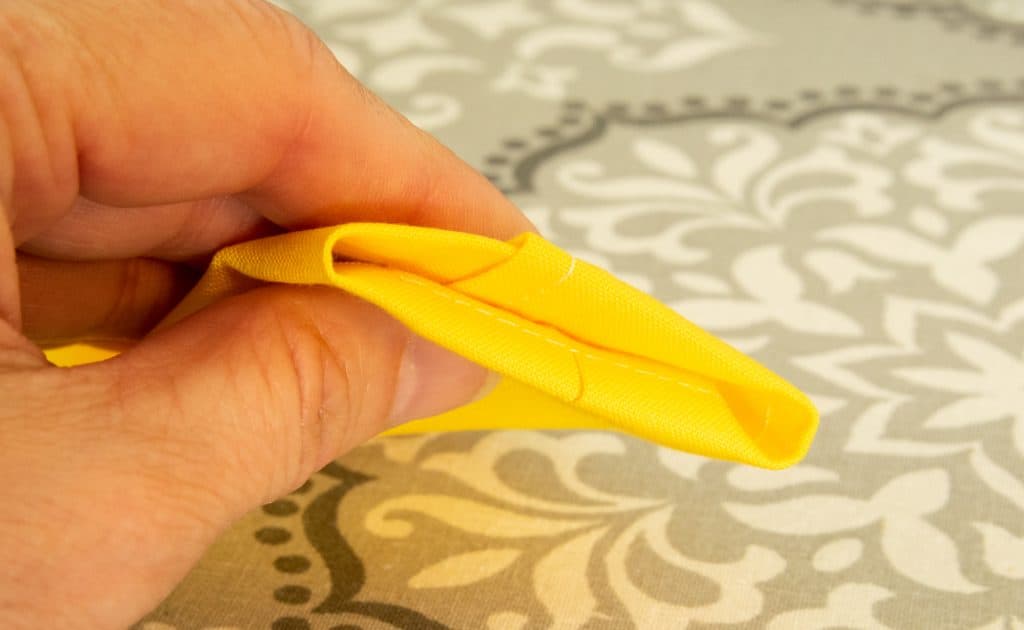
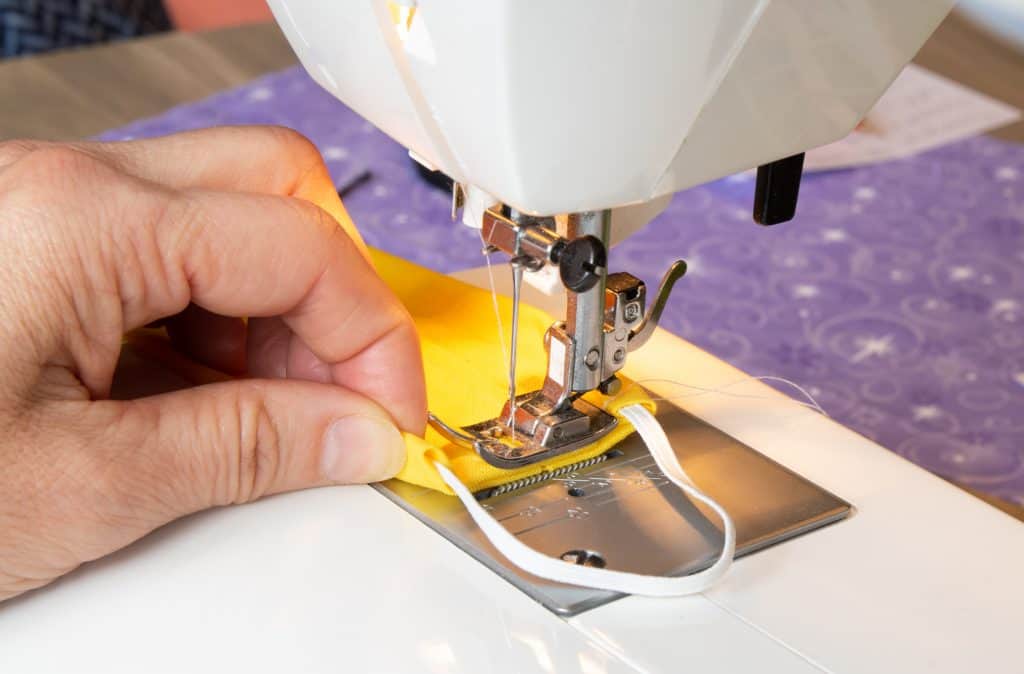
For a mask as small as this one (this is the smallest size), it’s best to pin the center before stitching in the elastic or ribbon.
I found that it is easiest to stitch down when you tuck the sides neatly like this.
Now you are ready to insert the elastic or ribbon and stitch them into place. While 1/4″ (.6mm) elastic is probably the better and more durable choice for adults, it’s just too wide for children. 1/8″ wide elastic is the better choice for kids masks. For a medium child-size mask, cut the elastic to 6 1/2″ (16.5 cm) or measure around the ear with a piece of string to determine the best fit.
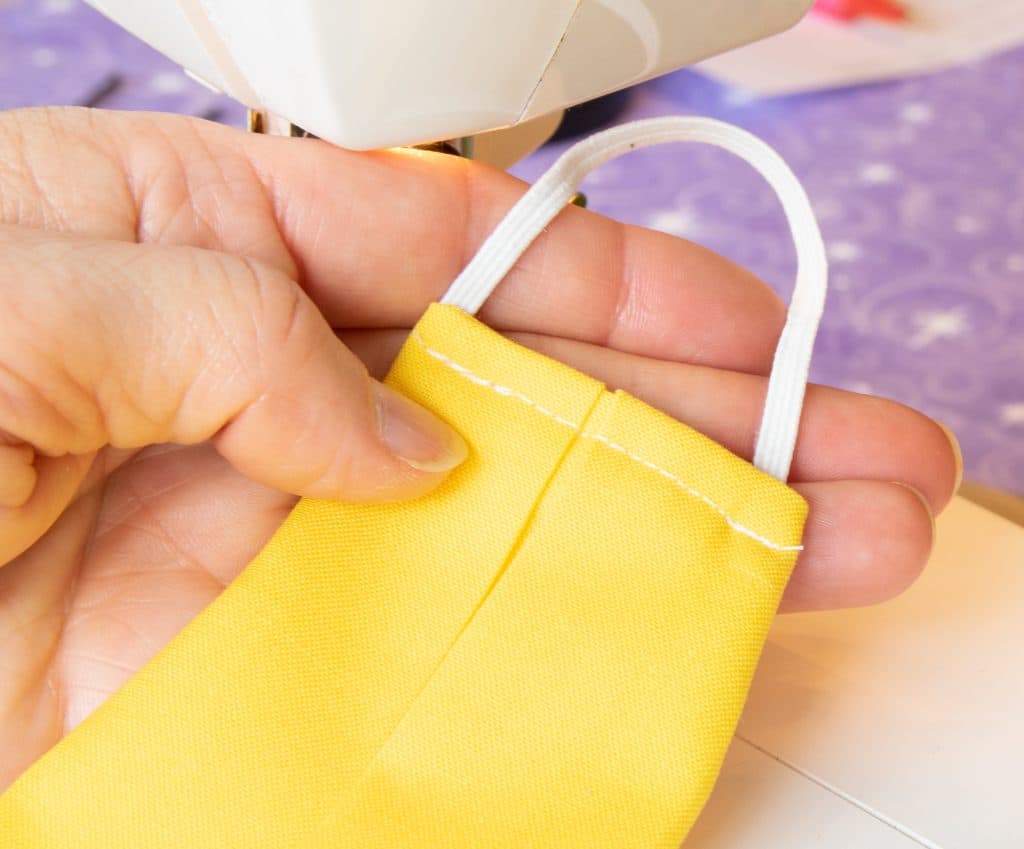
The elastic should fit without pulling the child’s ear in any way.
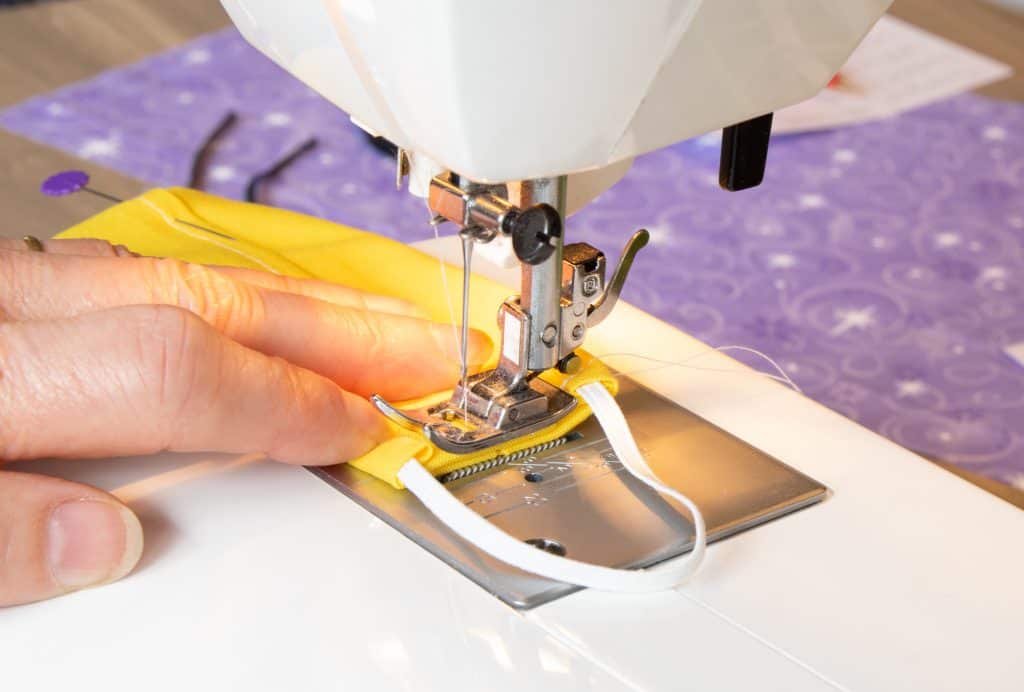
Here is how it is inserted into the side of the mask. It’s easiest to insert it about 1/2″ (1.2cm) then roll the side over it. Begin stitching over the fabric and elastic and backstitch once to hold the elastic firmly in place.
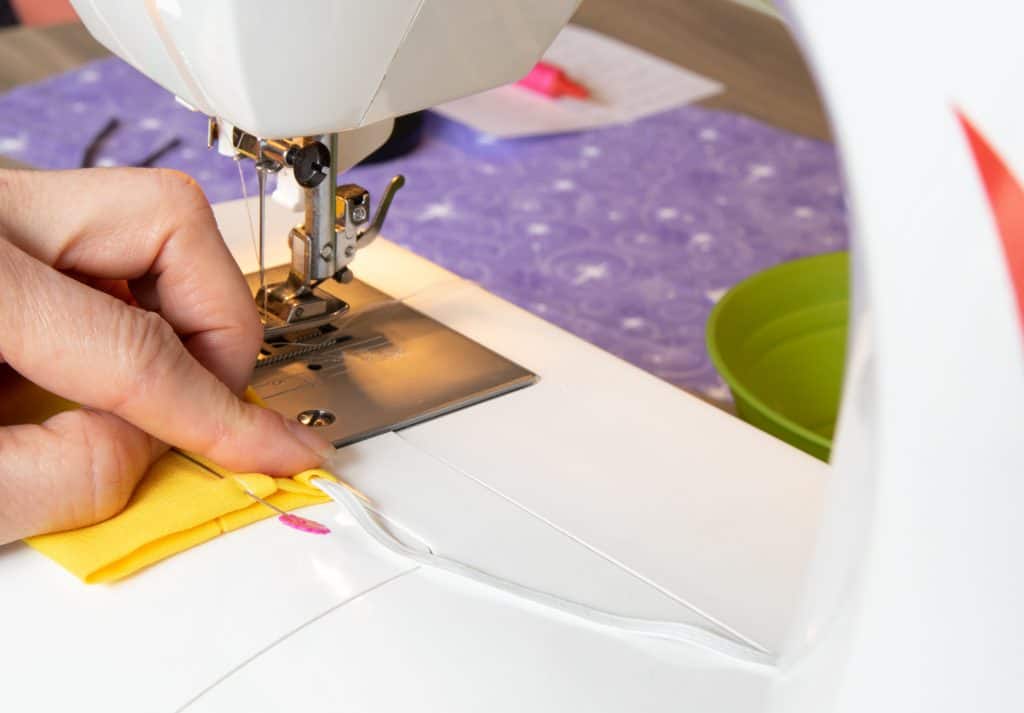
Tuck the other end in on the opposite side and stitch. Make sure the elastic is not twisted. Repeat on the other end of the mask.
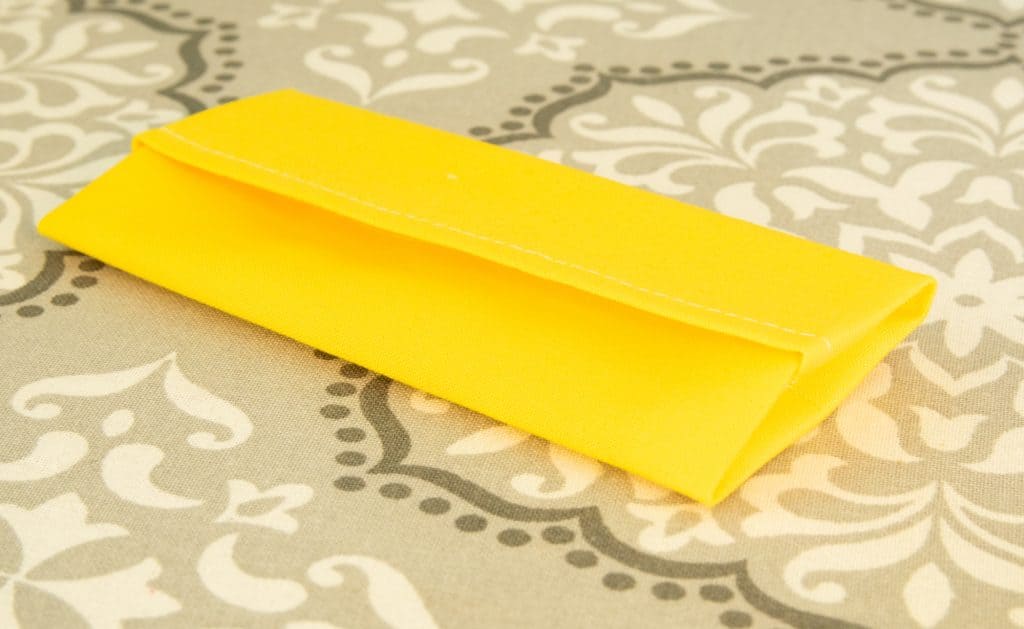
And once you finish the other side you are done! Great job!!!
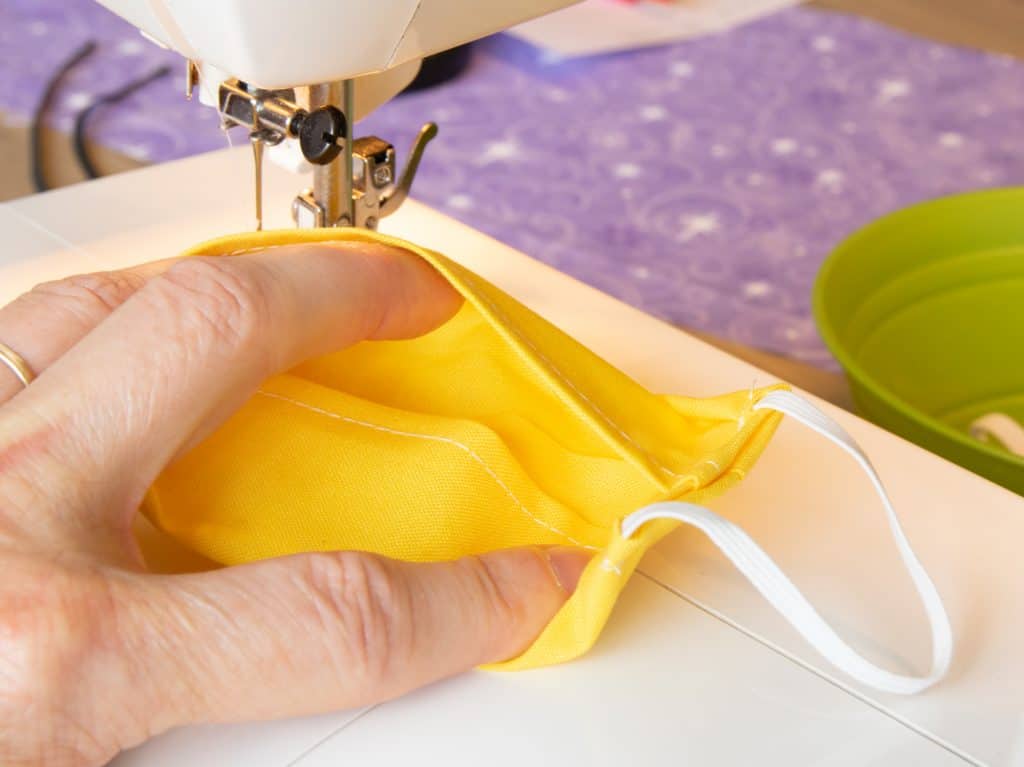
Here is what it looks like front and back.
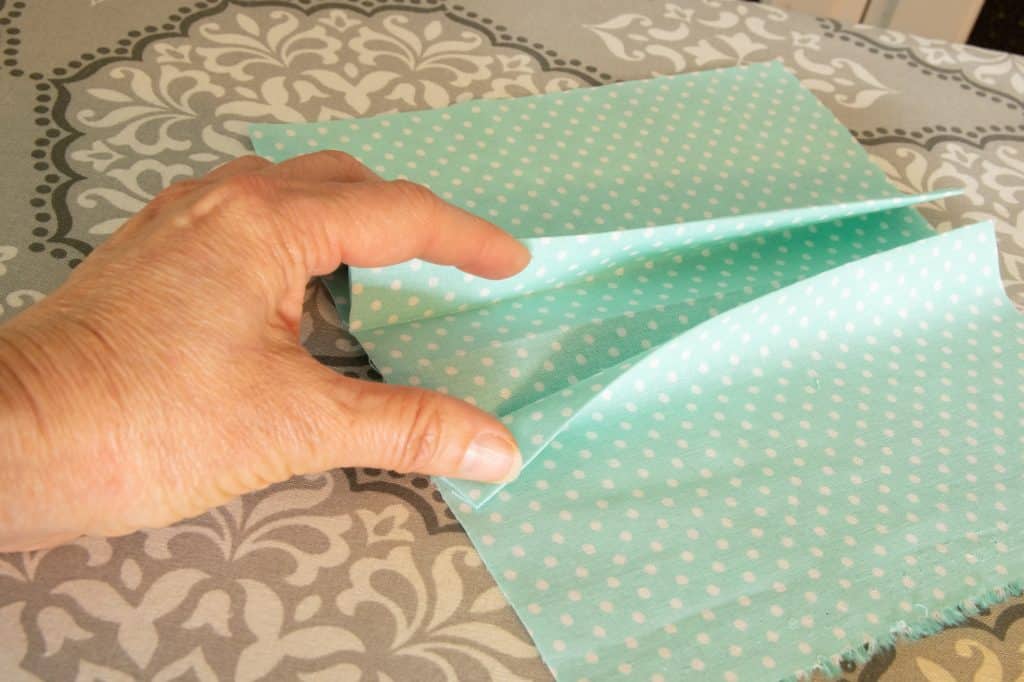
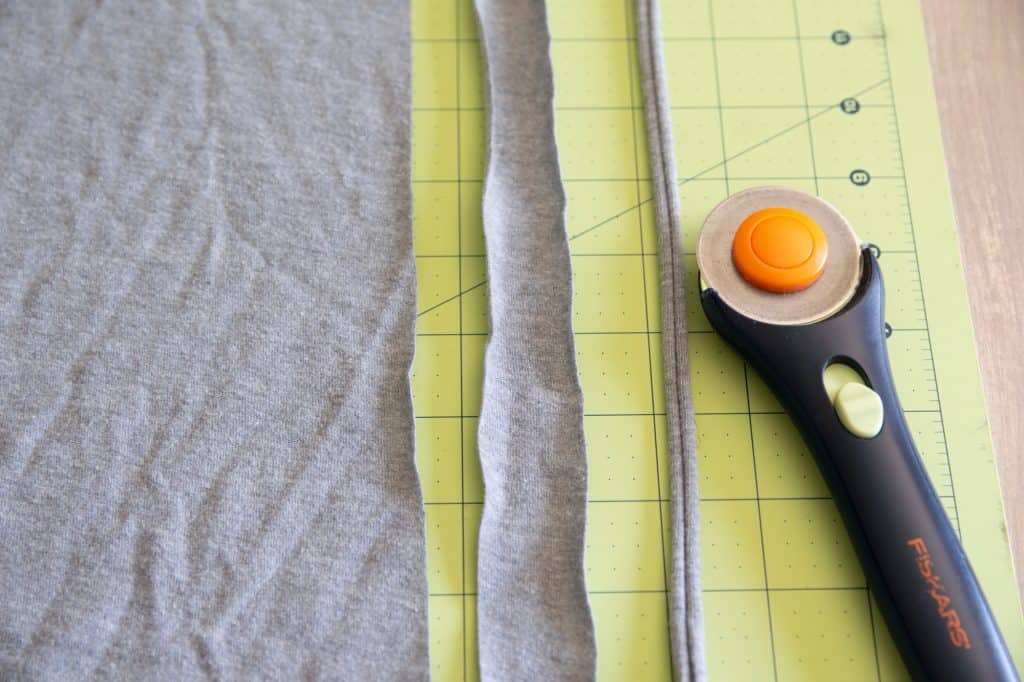
I mentioned alternatives for elastic ribbon above. My favorite option is strips cut from a soft, thin T-shirt material. Cut strips about an inch (2.5 cm) wide then pull on each end to create a rolled ribbon. Cut and use the T-shirt ribbon the same way you would use the elastic. You can see here how it rolls up into a thin ribbon. Cut the material lengthwise rather than on the bias. That will allow you to pull the strips into long ribbons easier.
For additional tips and tricks on making sure that face masks fit well, be sure to read this post:
HOW TO GET THE MOST COMFORTABLE FIT FOR YOUR FACE MASKS
And here is Cori the pink teddy bear modeling the finished mask!
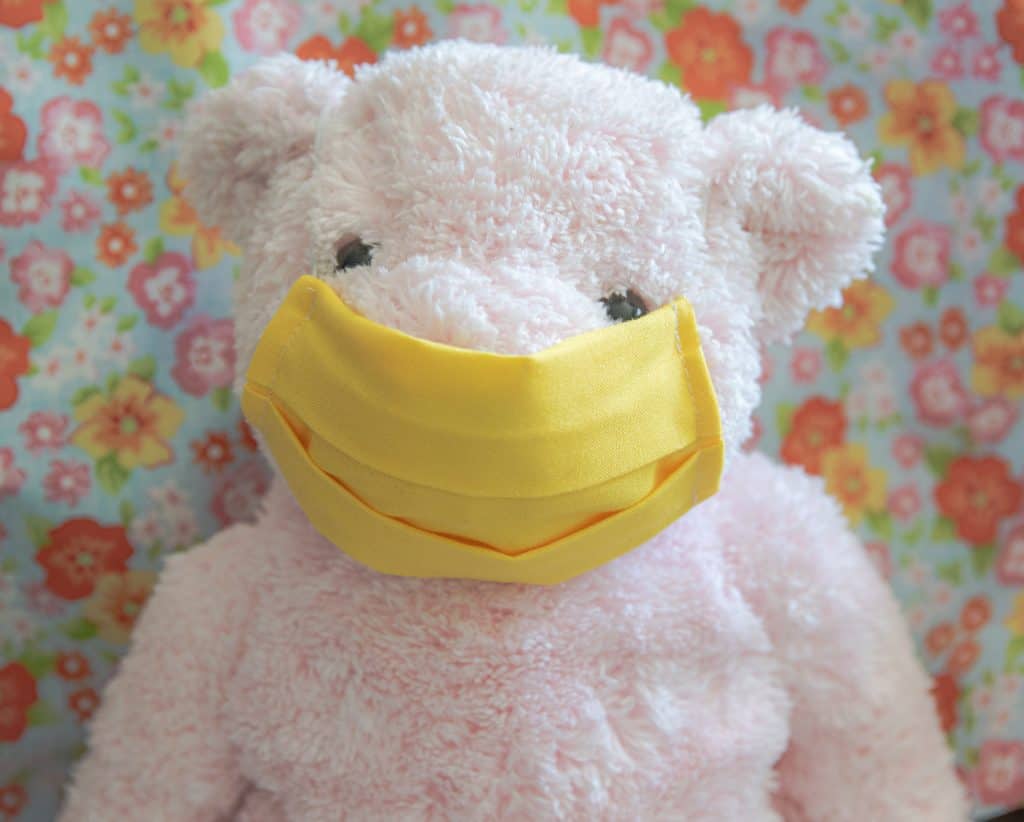
Isn’t she the cutest? You can see how the center pleat opens so you can adjust the mask for the perfect fit.
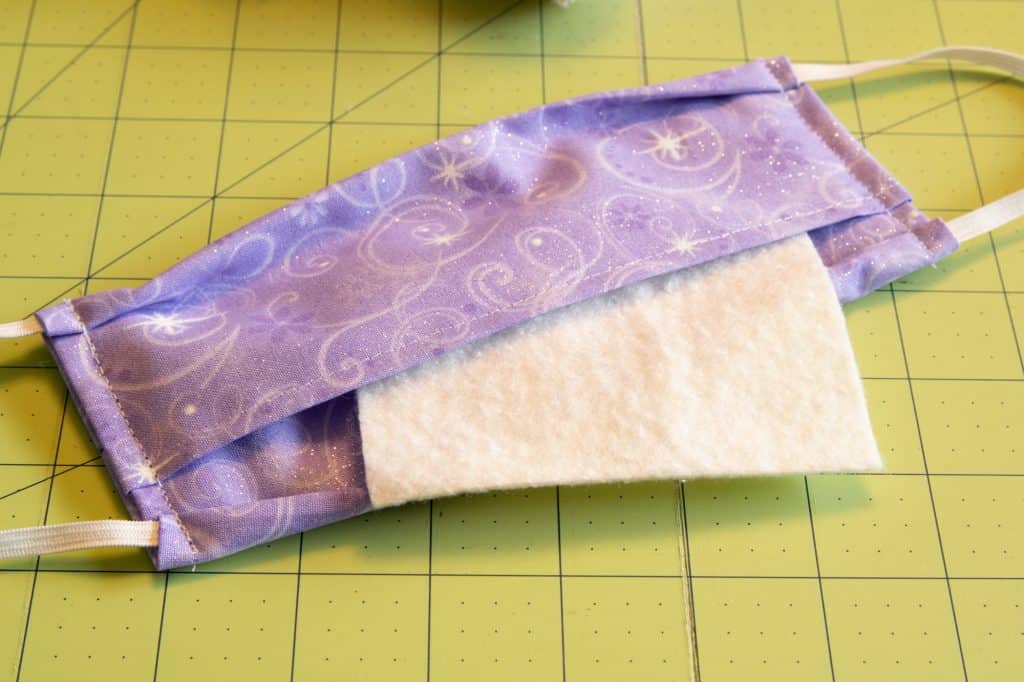
As I mentioned at the beginning, this pattern is designed to hold a liner. There are several options for liners, but my favorite is thin cotton batting. It is a dense but lightweight and breathable material that can be washed or sanitized in between washings with a steam iron. Easily cut it to size and make several for each mask.
Hey there, you made it through the entire post! I hope you will give this easy pattern a try. Don’t forget to sign up to my newsletter and to receive your password to the FREE Resource Library!
And if you do, why not share it with other mask makers in our Facebook group? We would love to see how it turned out. It is also a great place to ask questions and connect.
Great job and great instructions. Thanks for sharing and providing a much needed product.
Different and interesting -there are so many patterns KF
the rolled hems on the ends…..i’m not seeing the size
OOPS I meant on the top and bottom!
The hem on both the top and bottom should be 1/4 inch. Is that what you mean?