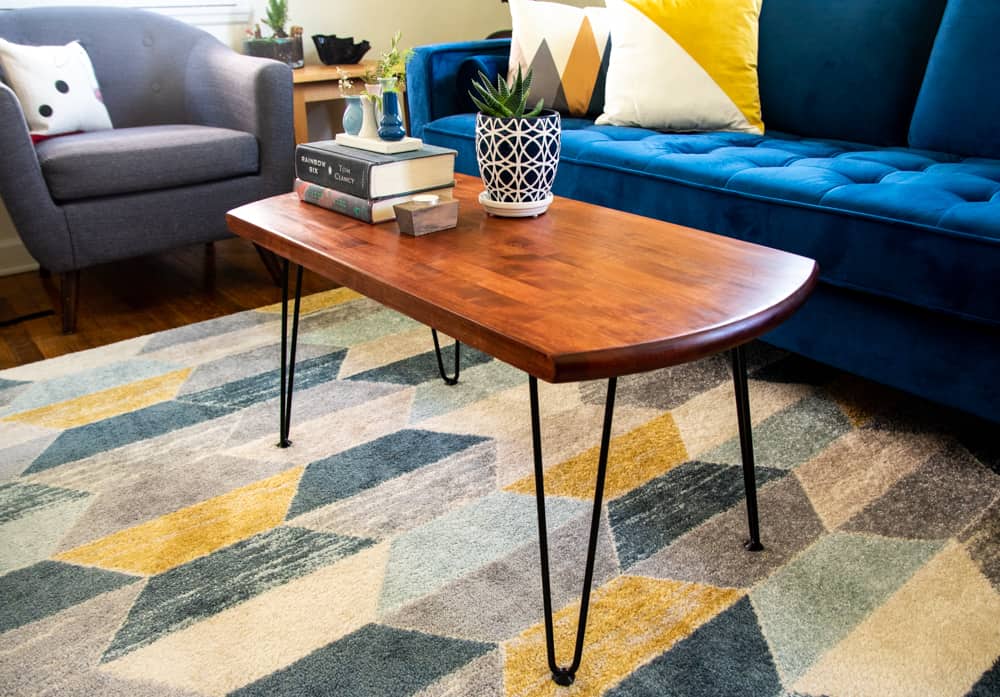
EASY DIY MID CENTURY MODERN COFFEE TABLE
Do you know what is better than a mid-century modern coffee table? One that you can build yourself without any skills! Even better from upcycled wood! There is no need for complicated furniture plans to get a great designer look.
Today’s project is super easy and certain to impress, not to mention budget friendly. In other words, right up your alley, am I right?
Personally, I love mid-century modern for its classy clean, and unfussy lines. It gives interiors a fun and youthful, yet sophisticated vibe, which is kind of amazing, considering how long this style has been around.
It’s not often that a style that was loved by your grandma is as trendy now as it was then. Real style stands the test of time!
This project has been a long time in the making. And when I say long, I mean FOREVER.
You see, the piece of wood I used, has been cluttering our house for a while. It was a lucky find my hubs dragged home from a morning walk.
Actually, he brought home an entire table. This table had a turned leg base that I promptly repurposed into another table. The other two sides of the round fold-down tabletop were too badly damaged to be used as anything other than firewood.
But the center piece, a solid slab of butcher block, was in pretty good condition. Here is the back of it.
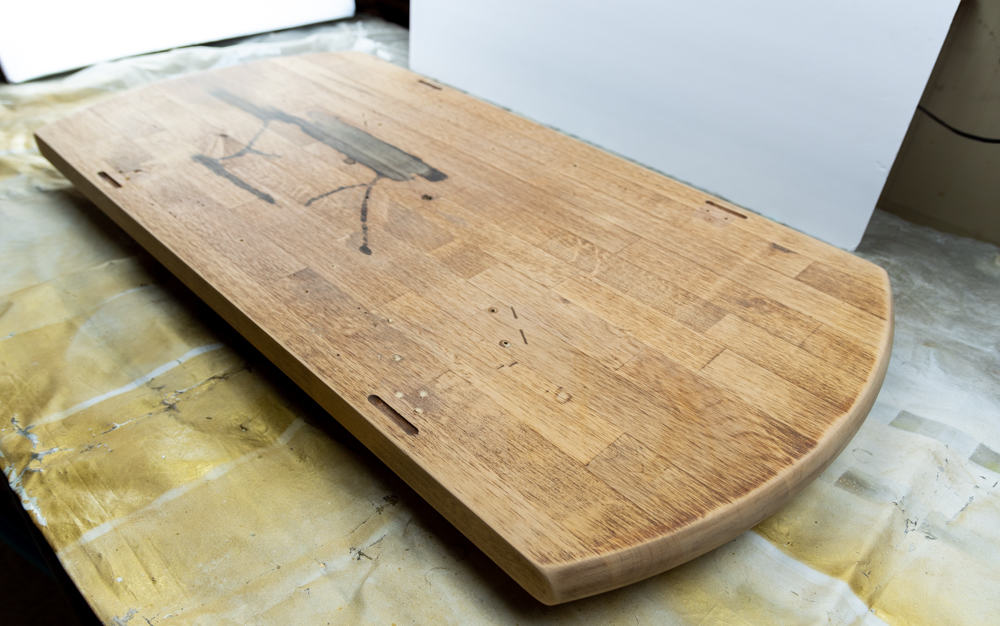
Originally, I had planned to cut off the rounded ends. As luck would have it, though, our circular saw broke and other life things happened. And so the pretty slab of butcher block languished in a corner to be upcycled into something amazing another day.
Well, my friends, that day finally came. Read on to find out how easy and cheap it was to turn this forgotten table center into a great little mid-century modern coffee table.
What, you don’t have a lucky find like this on hand? No problem! I will show you how you, too, can create this look with ease!
Before I go on, I have to tell you about something I created just for my readers. It’s the FREE Resource Library. In it you will find all of my favorite tutorials, tips, and recipes as handy printables. Just sign up here and the password is on its way to your inbox!
*This post contains affiliate links. You can read the complete affiliate link policy here.
HOW TO CREATE YOUR OWN EASY MID CENTURY MODERN COFFEE TABLE
TOOLS AND SUPPLIES NEEDED TO BUILD A MCM COFFEE TABLE
You may already have many of these!
- Wood for tabletop (see suggestions and measurements below)
- Set of four 16” steel hairpin legs
- Screws*
- Ruler, pencil
- Drill & manual screwdriver
- Sandpaper in assorted grits
- Random orbital sander (optional)
- Wood stain – see below
- Stainable wood filler (optional – if repairs are needed)
- Water-based polyurethane (optional)
- Disposable rags like an old cut up t-shirt or cotton socks
- Disposable gloves (you can use old rubber gloves)
- Brush or foam brush (optional)
- Safety glasses
* The set of hairpin legs I purchased for this project included all of the necessary hardware as well as plastic protectors for the bottom of the legs.
COFFEE TABLE MEASUREMENTS
As mentioned above, the piece of wood I used was the center of a round table with a diameter of 35”. This resulted in a table length of 35” and a width of 18”.
The butcher block slab itself was 1 ¼” thick. I recommend at least a 1″ thick piece of wood for this project.
Since you likely don’t have the exact same piece of wood on hand, I suggest the following:
Always look and see if you happen to have a suitable piece of wood on hand already. That’s a great way to relieve your garage of wood scraps!
If you would like a table with rounded ends like the one I made, purchase a 30” or 36” round tabletop at your local home improvement store. They can cut it to the desired width for you. You could repurpose the sides as shelves!
Alternately, if you prefer a rectangular tabletop, this 1 in. x 24 in. x 36 in. Allwood Pine Project Panel Table Island Top would work very well. Have the friendly people at Home Depot cut it to size for you if needed.
PREPPING WOOD FOR THE COFFEE TABLE
Regardless of the type of wood you use, it will require sanding.
To get a smooth finish with the least effort, I generally love using my random orbital sander.
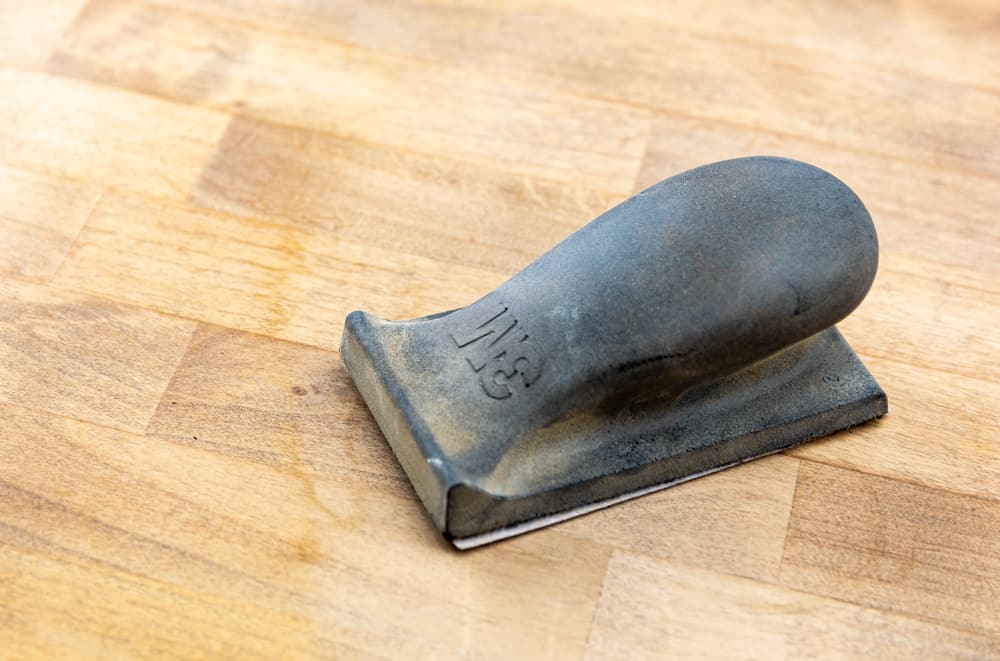
No electric sander? No problem! For tasks like this, a handheld sander like this 3M Pro Grade Reusable Sanding Kit works just as well. And it comes with three different grits of sandpaper that attach with hook and loop!
As a matter of fact, that is what I wound up using for this entire project. It is easy to use, even with sore hands. The handle part is firm yet soft and you can switch up how you hold it.
Beginning with a coarser grit like 120, work your way up to about a 320 grit for a nice smooth surface.
If you are working with a repurposed piece of wood, you may want to fill any holes or unsightly gouges with stainable wood filler before sanding.
My upcycled butcher block piece had some holes in the bottom from its previous life which I chose to leave as is. I knew they would not be visible in the finished product.
STAINING AND SEALING THE top of the COFFEE TABLE
Once the table top wood is sanded and free of dust, it’s time to stain it. The choice of stain color is entirely up to you.
While I normally adore my all-time favorite wood gel stain Jacobean by Minwax, this table called for something a little lighter.
I happened to have Golden Pecan on hand. That, in turn, was a little too light for my taste, so I gave the table three coats of Bombay Mahogany on top of the Golden Pecan.
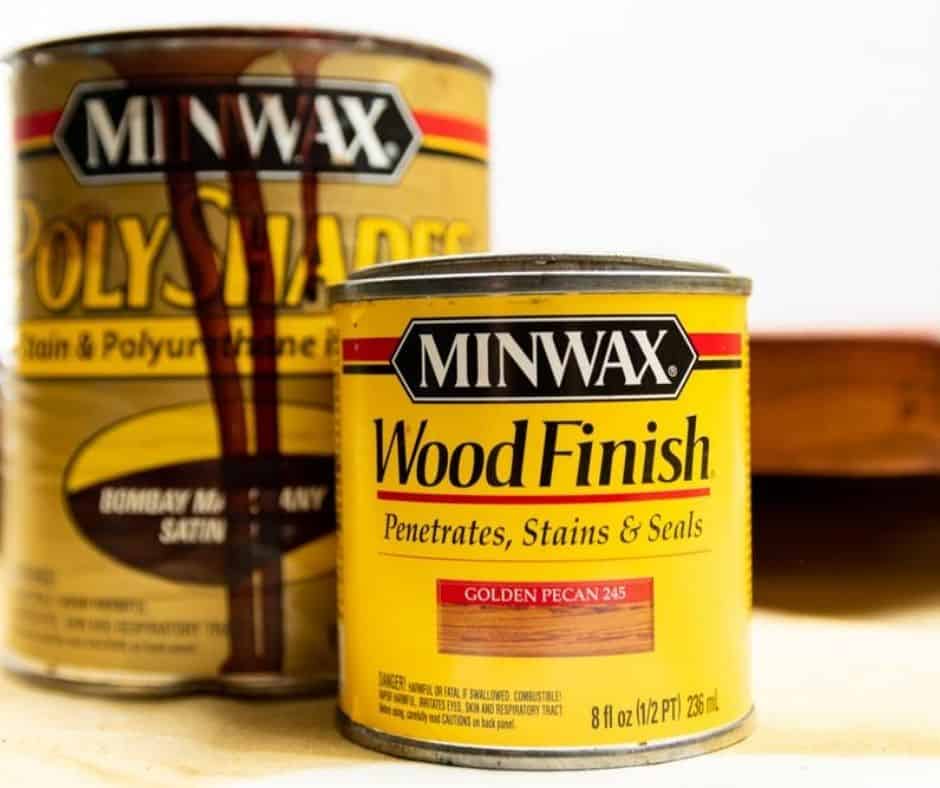
No matter what stain you use, you will not need anything more than the pint size container. Stain goes a long way and you will be able to use it for several more projects!
While I normally don’t use stain with such a reddish hue, it was a perfect shade to match some of the pieces that were already in the room. Truth be told, the color example on the can doesn’t really do most stain colors justice. It’s always best to try it out first on a similar piece of wood or the underside of a table.
PROJECT PLANNING TIPS: Give yourself ample time between coats. Stain needs to dry properly for the best results. For a smooth finish on top, wait to apply the final coat at the very end after the legs have been attached.
The process of staining is pretty easy. Just don disposable gloves and dip an old clean rag in the stain. Those lonely single cotton socks or cut up old t-shirts come in super handy for that!
Apply the stain to the wood, then wipe off. It’s always best to try it first on a spot that won’t be visible later, like the underside of the table. You only need a couple of coats on the table bottom.
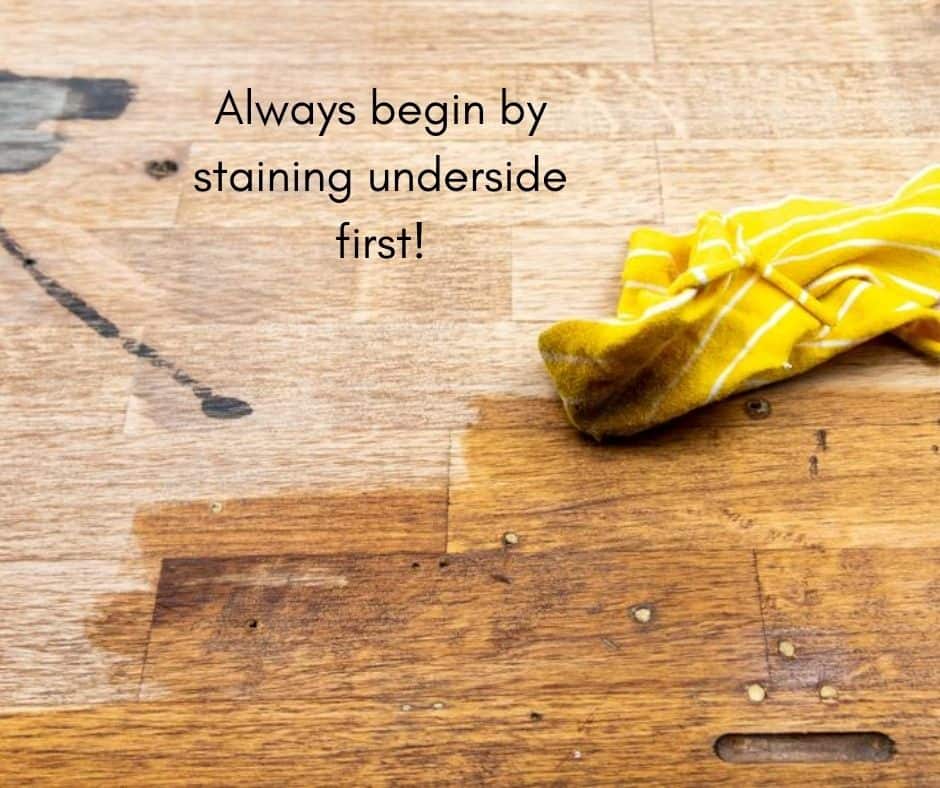
Once the underside is dry, repeat steps on the top. Save final coat and/or polyurethane until after the legs are attached.
Depending on the kind of stain you use, you may want to seal the tabletop. In this case, my product was two in one. After initially planning on giving it a couple of coats of polyurethane, I decided the finish was perfect.
If you opt for polyurethane, make sure it is the water-based non-yellowing kind. Simply follow the instructions on the can.
I usually prefer a rag for small pieces like this, because brushes often leave tiny but unsightly bubbles that have to be sanded back out.
Sand lightly between coats with fine grit (320 or above) sandpaper for a smooth and even finish. I used to be in too much of a hurry and skip this step, but it really makes the finish!
ATTACHING THE HAIRPIN LEGS TO THE TABLETOP
Once the polyurethane is completely dry and has had time to cure, it is time to attach the hairpin legs to the table top. The particular set of table legs I used here are very easy to attach.
Their squares make figuring out how to place them a breeze.
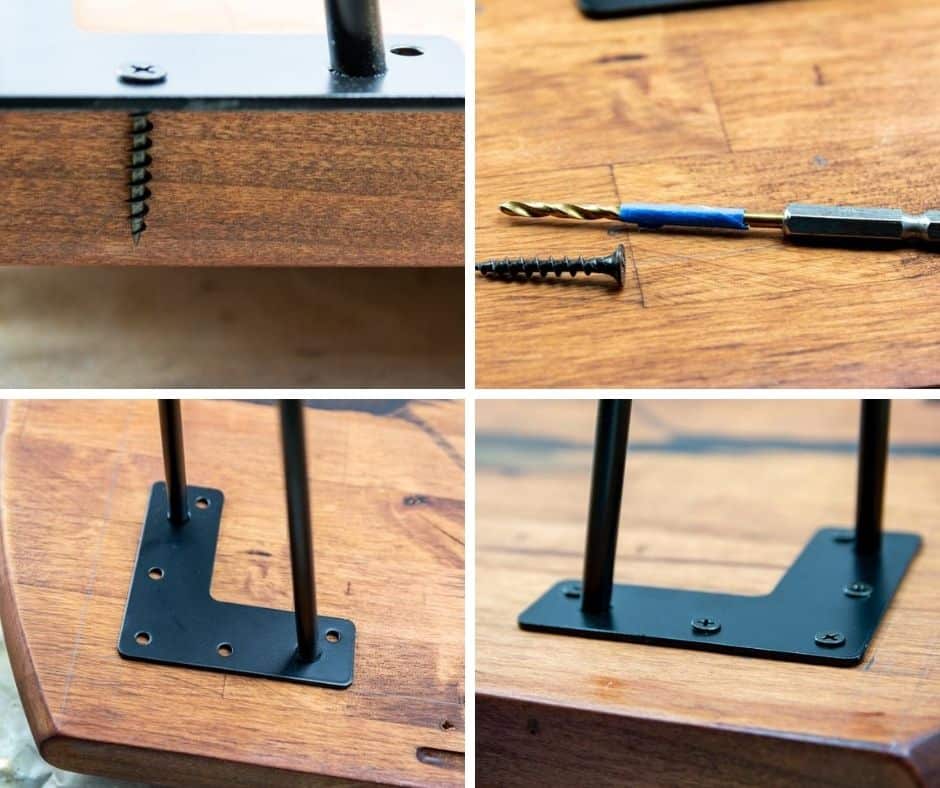
This particular set of hairpin legs called for a distance of 1 1/2″ to each side in the corner.
Place each leg in the proper position and mark the screw holes with a pencil to be drilled. Repeat this step for all corners.
Once all of the screw holes are marked, predrill each one.
USEFUL TIPS:
- To figure out how deep you should drill, hold your drill bit up to the side of the tabletop. Check that the screws you will be using are not too long!
- Mark the drill bit with a piece of masking or painters tape
- Anchor the table leg with a screw on each side to hold in place for drilling the remaining screw holes. This helps to keep each leg bracket in its proper place.
Once all of the holes are drilled, finish attaching the hairpin legs.
Flip the table over and apply final coat(s) to the top.
ADDITIONAL TIPS AND TRICKS:
- Applying the final finishing coats to the top and the edges of the table after the legs are attached results in the best finish.
- You can create your very own stain color by mixing two different colors you may already have on hand. Just make sure they are the same type of stain and preferably by the same manufacturer
- Always read all instructions for hardware and other materials ahead of time so you can plan your project
- Work in a well-ventilated area
- Wear a dust mask while sanding – here is my popular face mask pattern for making your own
- Always follow all manufacturers safety instructions for each tool you use
This little Mid Century Modern coffee table is the perfect project for a beginner. If you feel comfortable operating a drill, that is all the woodworking skill you need.
TOTAL COST FOR THIS table PROJECT:
- Butcher block piece – Found for FREE $0
- Stain, sanding kit, sandpaper, rags – already had on hand $0
- Hairpin legs, 16″, set of four, hardware included $ 24
- All other tools and supplies – already had $0
Total: $24
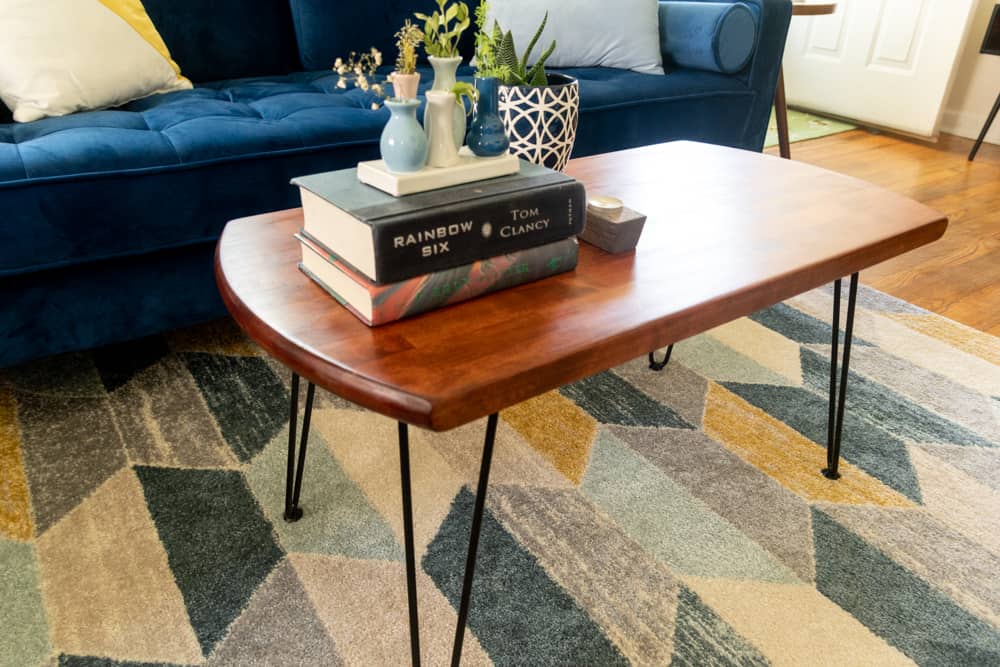
The size of this cute mid-century modern coffee table is just right for a smaller home or apartment – which makes it perfect for downsizing!
And I don’t know about you, but this piece of wood looks like it was waiting for a set of sleek and sexy legs all along!
Use these instructions to create affordable end tables or plant stands as well.
HERE ARE SOME OF MY OTHER EASY DIY PROJECTS!
SAVING DIXIE THE DRESSER – PART FOUR: THE REVEAL