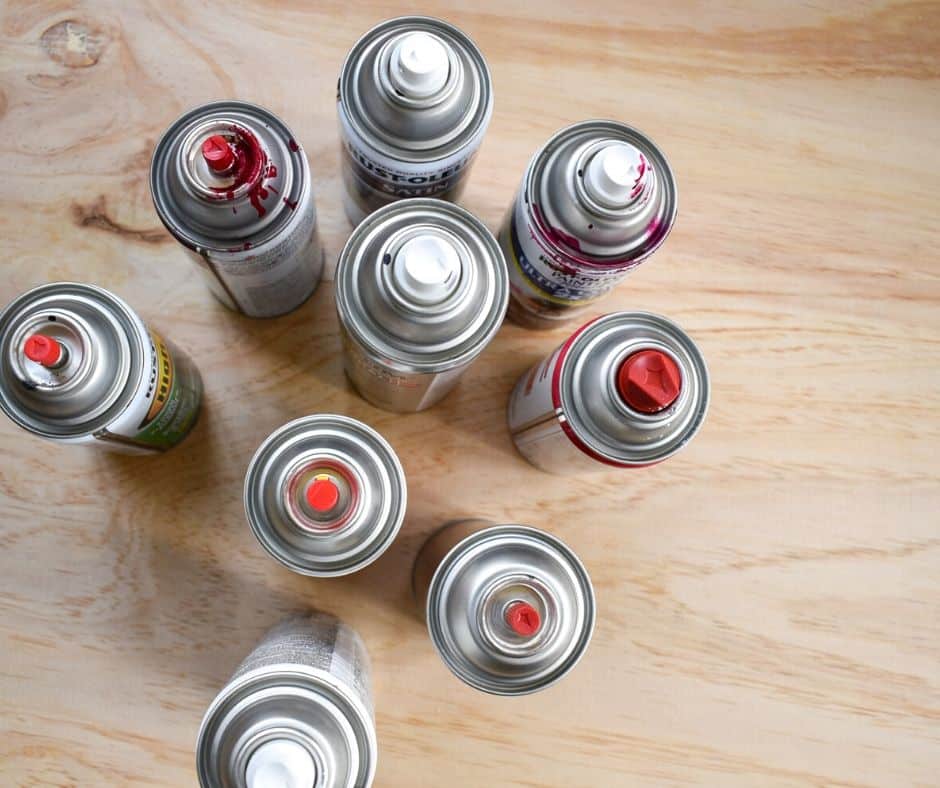
LEARN SPRAY PAINTING BASICS FOR RESULTS YOU CAN BE PROUD OF
Are you are a beginner who is using spray paint for the very first time and don’t know if it will work for you? Maybe you tried spray painting in the past with less than optimal results. Spray paint in a can is a popular medium that is amazingly versatile, relatively easy to use, and budget-friendly. That makes it a darling of any avid DIYer or enthusiastic crafter. It certainly ranks in my top 5 supplies to have on hand at all times. But just as any tool in your arsenal, it will work best if it is chosen wisely and used appropriately.
Through the years I have transformed numerous items into pieces I can be proud of. Still, not everything I set out to revive with my trusty can of spray paint turned out the way I had hoped. Through trial and error, I discovered what works well and what you should definitely avoid. And today I am sharing my little bag of tricks with you so you can avoid unnecessary mistakes and tackle your paint project with confidence even if you have never done it before.
In this article, I will take you from learning what spray paint actually is to whether or not it is the right choice for your project. We will move on and discuss how to choose the right paint for the job, tools, safety gear, and gadgets that make spray painting easier for you. Then we’ll get into the meat and potatoes part of spray painting technique, tips, and tricks, clean up, and disposal before closing with troubleshooting common problems and how to solve or avoid them in future projects.
This post contains affiliate links. That means that if you click on one of those links I earn a small commission at absolutely no extra cost to you. You can read my affiliate link policy here.
What exactly is spray paint?
Paint can be applied in several different ways. There is, of course, brushing and rolling, which is mainly used for walls as well as furniture. Many professional painters also use paint sprayers that can be loaded with paint and used to paint much faster than traditional rollers and brushes. Today we will focus on spray paint that comes ready in a can.
Unlike low or zero VOC latex paint used to adorn the walls inside of your home, spray paint is generally oil-based. It is also pressurized, highly flammable, and vents fairly toxic gases. That is why learning how to handle it properly before getting started is important. To learn more about the specifics of what canned spray paint consists of check out this article to learn more.
Spray paint should only be used in a well-ventilated area and with proper safety equipment (more on that later). In addition to the standard finishes, it is available in a wide variety of specialty finishes. These include, but are not limited to metallic sheen, textures like stone or hammered metal, crackle, mirror, chalk, and even glow in the dark. The added choice in finishes makes it a great tool for creating unique and professional-looking home accents.
One downside of canned spray paint is somewhat restricted color choices. To avoid getting overwhelmed in the aisle at your paint store be sure to research your choices ahead of time online. Not only will you have a pretty good idea of what is available color-wise, but you can narrow down your decision by researching dry and recoat times as well as other specifications. That is a huge help when it comes to planning your actual project. Just know that not every spray paint brand is sold at every retailer. I am including names and links to the most popular brands for you at the bottom of this post.
Are off-brand bargain paints okay to use? Maybe, but to be honest, you generally get what you pay for. It can be tempting to try and save a buck, but from my experience, having to use twice the amount of paint to achieve the same result is a waste of time and money. That is not to say that all of the more expensive, commonly known brands work equally well. There can be significant differences from one brand to the next. By doing your homework ahead of time, reading reviews, and choosing the right paint for your project, those differences should be kept to a minimum.
Oh wait, before we go any further I wanted to let you know about the FREE TWGL Resource Library. It is an ever growing collection of Printable tips, recipes, art etc. that is available exclusively to my subscribers. Just sign up here to receive your password in your inbox.
when is spray paint the best option?
As versatile and amazing as spray paint is, there are times when it may not be your best option.
Another factor that comes into play is whether or not you have adequate weather, space, and ventilation available. If you live in an area that does not allow for spray painting outdoors for most of the year and you don’t have access to proper ventilation, spray painting may not be the best option. Or save spray painting tasks for specific seasons like Spring or Fall when you know temperatures and humidity levels will more likely be in the proper range.
HOW TO CHOOSE THE RIGHT SPRAY PAINT FOR THE JOB
When deciding on which paint to use consider the following:
- material to be painted
- conditions in which the finished project will be used like indoor vs outdoor, high humidity, high temperature
- finished look of the project
Matching the proper paint to your material is crucial in achieving a good looking and long-lasting result. Some paints may work better for plastic than others. If you plan on spray painting wood, metal, stone, etc. make sure the paint you choose will work with your surface. You can find that information right on the paint can. This is when you can save time by researching the properties of various paints online really pays off.
The conditions in which the finished project will live are a huge deciding factor. Paint that is rated for indoor use will not survive a harsh outdoor environment for very long. Outdoor paints will offer the added protection needed to withstand rain, UV exposure, heat, and freezing temperatures. Will your finished piece be subjected to high humidity or a generally damp environment? Be sure to pick a paint that will inhibit rust if you are covering metal. Planning to repaint an old barbeque grill? There is just the right paint high heat for that as well!
What is the finished look you are trying to achieve? Just like latex paints, spray paint comes in a variety of finishes from matte to satin, semi-gloss to glossy. The finish you choose determines factors like the look of your finished piece as well as how easy it will be to clean. This part is largely up to personal preference.
TOOLS, GEAR, AND WORK AREA SETUP FOR SPRAY PAINTING
Before you get started with your project make sure you have every thing on hand you will need. Let’s begin with what you have to have and we’ll work our way up to optional accessories that are not necessary per se, but can make the job much easier.
list of must-have spray painting tools:
- disposable gloves
- safety glasses
- mask
- surface protector like a tarp
Each of these is pretty self explanatory. Spray paint nozzles are notorious for leaks and depositing paint on unprotected fingers. And while I like a unique manicure, this is not the kind of chemicals you want to seep into your skin. As mentioned before, spray paint is oil-based and cannot simply be removed with soap and water. Save your hands and time and use gloves.
Safety glasses are a must in my eyes (ha!) When working outdoors, wind can kick up unexpectedly and blow paint spray into your eyes. They are easy to find and should be a staple in every DIYers toolbox – might as well put them to the use they were intended for.
The same goes for wearing a mask. I know, that subject is getting old, but just like you don’t want fine paint particles in your eyes, you don’t want to inhale them either. If you are painting outdoors, a simple triple layer cloth mask will be enough. For painting indoors in an area that has less ventilation, a respirator mask is considered mandatory equipment. You only have one set of lungs my friend.
Last but not least, you need to protect the surface on which you will be painting. Proper coverings will prevent overspray from landing where it shouldn’t. And because spray paint droplets can travel pretty far even with a slight breeze, be sure to cover a much larger area than you think you need. Spray paint is notoriously difficult to clean from surfaces and proper surface protection will save you time and headaches later. A cover like an old vinyl shower curtain, tarp or a large piece of cardboard also provides a clean surface for your project piece to rest on while getting sprayed.
OPTIONAL Helpful Tools FOR EASIER Spray Painting
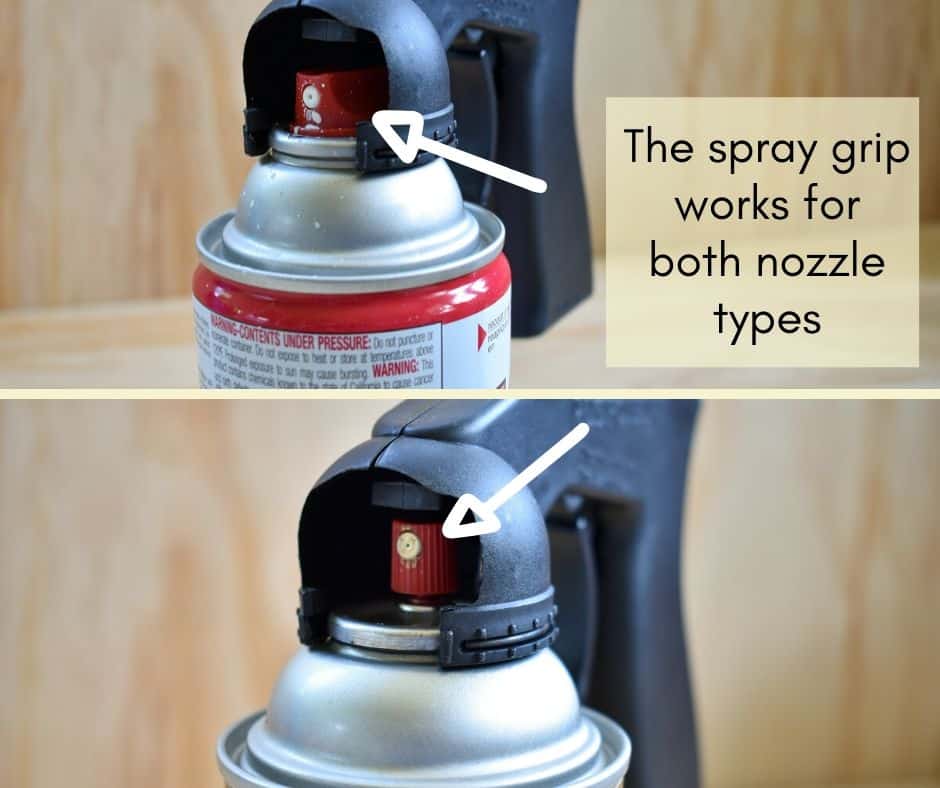
- spray grip attachment – highly recommend
- spray shelter tent – or large cardboard box
- small risers – or small wood blocks
While you don’t absolutely have to have any of these, they make life much easier. Up until now, I have spray painted the old fashioned way, that is without any fancy little helpers. But now that I have severe arthritis in the middle joint of my right index finger, holding down the tiny nozzle on the paint can has become almost impossible for me. The spray grip attachment is a lifesaver for me and once you experience how much more comfortable it is and how more control you have while using it, you won’t want to paint without it ever again! Comfort is not the only benefit. Since your finger won’t touch the nozzle, your hands stay clean. Spend a couple of bucks on this hand helper, I guarantee you won’t regret it.
A pop-up spray shelter tent takes up minimal storage space and you won’t have to hunt for a suitable cardboard box ever again. Tents usually come in a couple of different sizes. If you plan on painting slightly larger pieces frequently, invest in the bigger size. If you don’t plan on painting very often, a large cardboard box with the front cut out is a free option.
Risers keep your paint project from sticking to the surface beneath and give you better all-around access. If you are painting something like a picture frame, risers can save you an extra step because you won’t have to flip it over to cover the bottom edges with paint. You can either purchase risers specifically made for the job or use small wood blocks.
WORK AREA SETUP
Setting up a proper work area is an important component when it comes to achieving a successful spray painting project. As I mentioned above, ventilation is a key factor. Always, whether you are working outside or in an indoor setting like an open garage, make sure it is well ventilated. When working outside, calm wind-free conditions are best.
If you have to work in a mild breeze, set up your work zone in an area that is as sheltered from any wind as possible. Always work with the wind at your back to prevent any aerosolized paint from being blown at you.
The success of any spray painting project also depends heavily on proper humidity and temperature levels. Drying times may be greatly affected by humidity levels and less than ideal temperatures may lead to problems in paint finish like unsightly cracks or bubbles.
Protect an area much larger as described above to protect from overspray. And don’t forget to keep papertowels or rags handy for any cleanup that might be needed.
SPRAY PAINTING TECHNIQUE AND CLEANUP
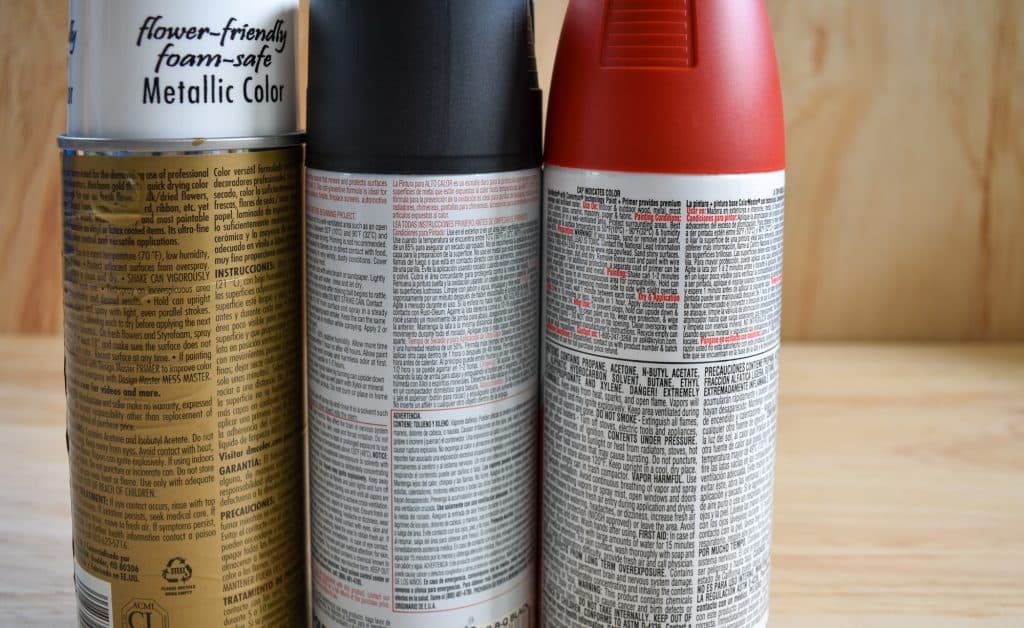
ALWAYS Read all instructions and follow them!
Before starting read the directions on the can and make sure you are able to follow them exactly. This applies especially to drying times. Spray painting is a technique that allows for very little wriggle room as far as drying times are concerned. And as strange as “repaint after 1 hour or wait 48 hours” may sound, those instructions are crucial to the outcome.
You can find all instructions on the back of each can.
Personally, I like to set a timer on my phone as soon as I have finished my first coat to stay on track. If you are not sure whether or not you can repaint when the manufacturer suggests, plan your paint project for a day when you can.
Proper Preparation
Thoroughly sand (if applicable) and clean all surfaces that you plan to paint. Krud Cutter is my favorite heavy-duty cleaner and it really lives up to its name. Alternately, warm soapy water works well to get rid of any grease and oils. For rust spots, you may need to treat the area with Naval jelly to loosen rust particles and scrub them off with a brass brush. Even though some paints claim that you can use them over rust, you really shouldn’t. Once your object is thoroughly clean and dry, tape off any parts of your object that you do not want to be painted.
If you need to prime your project, this is the time to use the primer that works best for your application. You may opt to use primer if you are changing from a very dark to a very light color. I prefer to prime any object that is subject to more wear and tear like a metal or wood end table or hardware that will be handled on a daily basis. Apply a thin coat of primer all over and allow to dry well.
It may seem like forever to get to this point, but now you are truly ready to paint!
Spray Painting Technique
For double-sided pieces like dresser doors or small panels it is always best to paint the backside first. Since this will be the side that won’t be visible as much, a slightly uneven finish will not be as noticeable in the finished project. Starting on the back of the project also allows you to practice your technique so you will be ready when it’s time to cover the front.
In order to achieve a smooth and even finish, begin by testing your paint on another surface to assess coverage. A small piece of cardboard works well. To get the paint flowing properly, most manufacturers require you to shake the can thoroughly for at least a minute once you hear the ball inside the can rattle.
In very rare cases the ball may not rattle. If this happens do not use the paint and return it to the store where you bought it. If the ball inside won’t rattle, the paint inside will not be mixed properly and you won’t get a good result.
Never tamper with any paint can due to the risk of grave injury.
Keep the paint can as upright as possible. Make sure you move continuously to avoid unsightly drips.
Once you tested the flow of paint begin painting your object with thin even coats. The spray grip mentioned above gives your finger a break and allows for much better control in dispensing paint. The first coat may seem very light and coverage may vary greatly from one brand to the next. Make sure each coat overlaps slightly. Shake your paint can frequently to keep the paint well mixed.
When your object is covered with the first coat wait the appropriate time as indicated before recoating a second time. Sometimes a third coat may be necessary. After finishing all coats, let your project rest so that the paint can cure properly. Cure times will be indicated on the can. Occasionally you may desire an extra layer of protection over the color coat.
Make sure the sealer you choose is compatible with the paint you used. It is generally best to stick with the same brand for both paint and sealer.
As you can see, when it comes to achieving a smooth and even result, preparing the object to be painted properly is at least as important as the painting process. Choosing the appropriate materials and setting up your work area as discussed above will make the painting simple and easy for you. I can tell you from personal experience that once you have transformed something boring and lackluster into a little master piece you will definitely want to paint more!
Clean up
Proper prep and painting techniques will hopefully all but eliminate the need to do much clean up. Still, if any of your spray enamel lands where it shouldn’t, using the correct tools for removal is key. As discussed earlier, nearly all spray paint sold in aerosol cans is oil-based.
One of the simplest and most readily available methods for removing oil-based paints is to use oil. Try removing any errant paint with some vegetable or olive oil if you get paint on your skin. Timing matters as well. The sooner any stray paint is removed, the better.
Remember, when using any type of paint remover that you need to protect any areas you don’t want the paint stripped from.
There are several commercially available options that should do the trick. Just be sure to always use the proper remover for the type of surface you are working with and to follow the manufacturer’s instructions.
- Zep Aerosol Paint Remover – available at most automotive stores
- WD 40 – a must-have in any household
- Acetone Nail Polish Remover
- 91% Isopropyl Alcohol – available at drug stores, but currently difficult to find
Proper Disposal of spray paint cans
Since spray paint comes in pressurized cans, proper disposal is important. Never dispose of any can that still contains paint. Contact your local recycling center to learn how to safely get rid of cans. If the can is completely empty, meaning there is absolutely no hiss of air when the button is depressed, you can throw the can out in your regular trash.
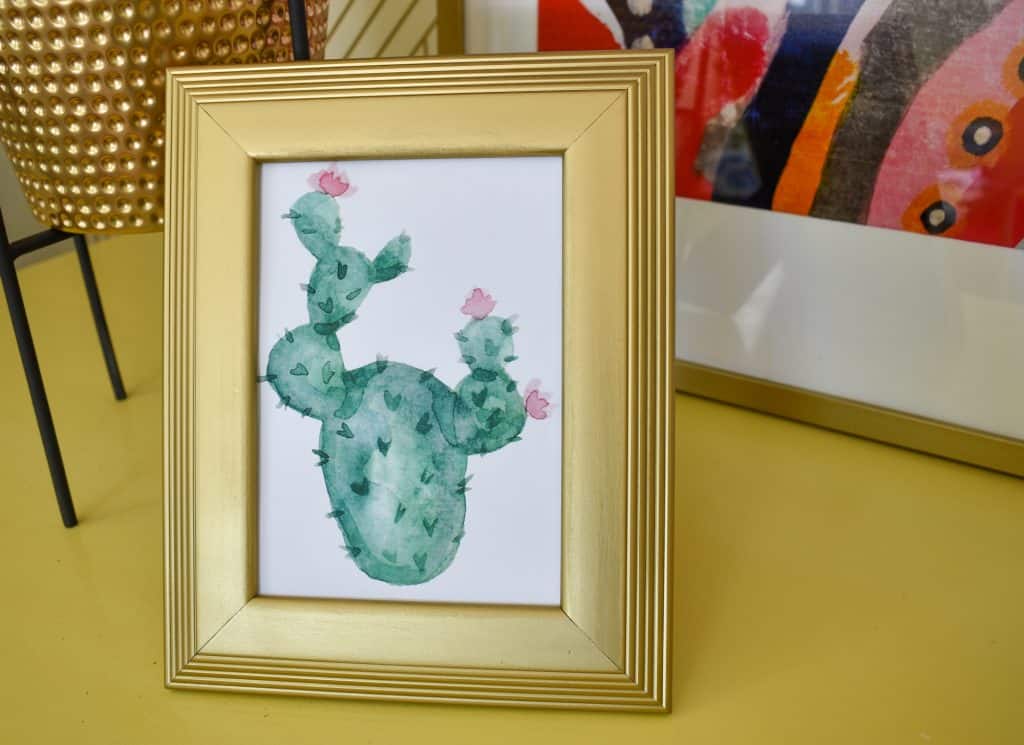
Here is a small little project to show you how easy it is to update outdated decor. This picture frame no longer fit my style at all, but I knew a quick coat of paint would quickly breathe new life into it.
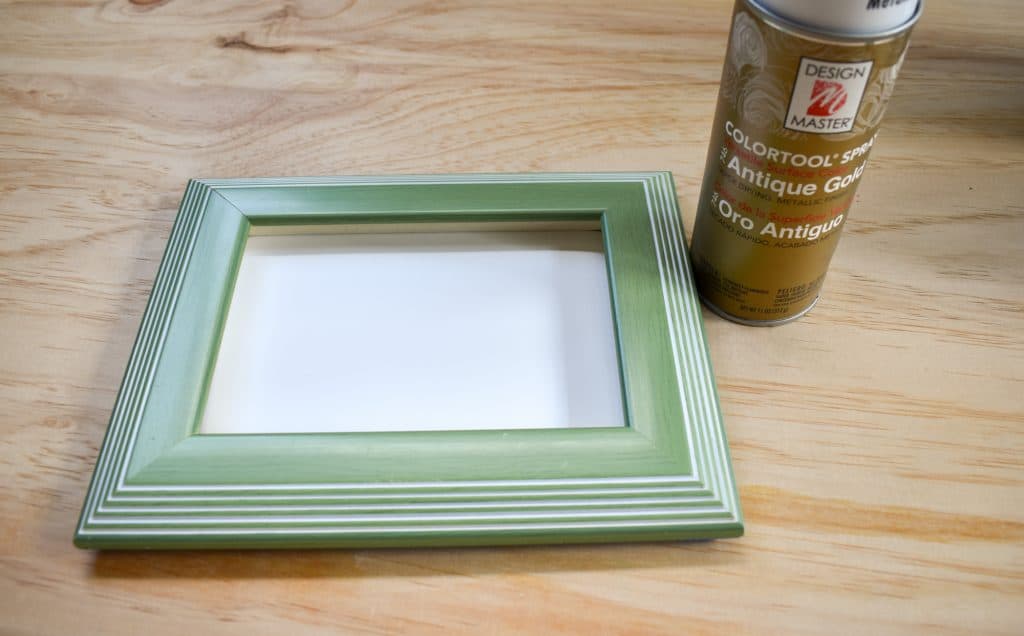
After a couple of coats of my favorite gold spray paint…
Troubleshooting common problems with spray paint
Uneven or blotchy finish:
Uneven or blotchy areas in the finish are generally caused by paint that was applied to a surface that was not cleaned well enough. Painting over grease or small oily spots will keep the paint from adhering properly resulting in uneven areas. To fix spots you will have wet sand the affected area, make sure it is properly cleaned and prepped and repeat the painting process.
Blotchiness may occur if the area has not been covered well enough in paint and may simply need another layer. If you notice your spray paint coming out of the can in bigger drops (spitting), be sure to shake the can very thoroughly before continuing.
Drips and runny paint
Just like conventional paint, using too much at once will result in drips that are unsightly and can be difficult to remove. Use light coats while keeping the recommended distance – generally 8 – 12″ (check your can for proper distance). Keep moving while spraying. Stopping in one area even for a brief moment can cause unsightly drips. If at all possible avoid spraying vertical surfaces, but lay them flat instead.
Bubbling and Cracking
Bubbling or cracking can occur on wood that has not been properly primed. Always use oil-based primer on wood surfaces before painting! Wood painted in low-temperature conditions is more likely to have a bubbled or cracked finish. Make sure wood surfaces are thoroughly sanded and cleaned prior to priming and painting.
Small debris and dust can settle on your paint project if your work area is set up under a tree or if you are working in windy conditions. Once dirt and dust particles are embedded in the paint, you will have to sand your project with fine grit sand paper to even out the finish before the next coat is applied.
Dings and Scratches
To avoid unsightly dings and scratches to your fresh paint job, be sure to let the paint cure for several days before handling. It can take up to a full month for spray enamel to cure fully. Make sure any item you paint will be in a protected area until the paint is fully hardened.
Popular Manufacturers of Spray Paint
As promised, here is a list of the most popular manufacturers of spray paint in the United States. Just click on the name to go to their website.
- Krylon
- Rustoleum
- Seymour (automotive and industrial – sold at Lowe’s)
- Design Master (sold at Michael’s craft store – my favorite for metallics)
Spray enamel, aerosol paint or simply spray paint, no matter which name you prefer, is a great way to stretch your decorating dollars. Few tools in my personal bag of tricks are as versatile in helping me make old and worn look like new. Even if you are not looking to revamp an interesting thrift store find, it will help extend the life of metal items that would otherwise fall victim to rust.
And if you are brand new to using the power of spray paint, I hope this post gives you the know-how and confidence to try it for the first time! For a little inspiration here are a couple of projects I created.
Ikea Gold and Marble Table Makeover
I absolutely love adding gold accents to my decor! Have you tried your hand at spray painting, please share your experiences in the comments below! As of right now, I am already planning on several projects that I cannot share with you. If you are interested in following what I am working on, be sure to follow me on Instagram. To connect with other crafters and DIYers join us over to the TWGL Facebook group!

You got my attention when you said that ventilation is a key factor when choosing a proper work area. This must be a safety tip for businesses that deal with applying spray paint, usually for motor vehicles. I would imagine industrial companies shopping for an open face paint booth for the safety of their workers.