Updated in June 2020
Today I have an easy DIY project that is not only fun to make but can be personalized to fit your decor style and colors. Signs with cute sayings have popped up all over the place over the last few years. And they are a trend that shows no signs of letting up. Signs with fun or meaningful sayings are an easy way to inject personality throughout your home.
I am always on the lookout for fun frugal and functional projects and this one checks all those boxes. And even if decluttering is a priority, wall decor is still a sensible option as it adds that little extra without taking up precious space.
Decorative art that is surprisingly easy to create, nice to the wallet, and won’t create clutter are a winner in my book!
With the help of one of my favorite craft supplies, I figured out a foolproof, and budget-friendly way to whip them up myself. Easily personalized, you can create them to match your individual style and taste.
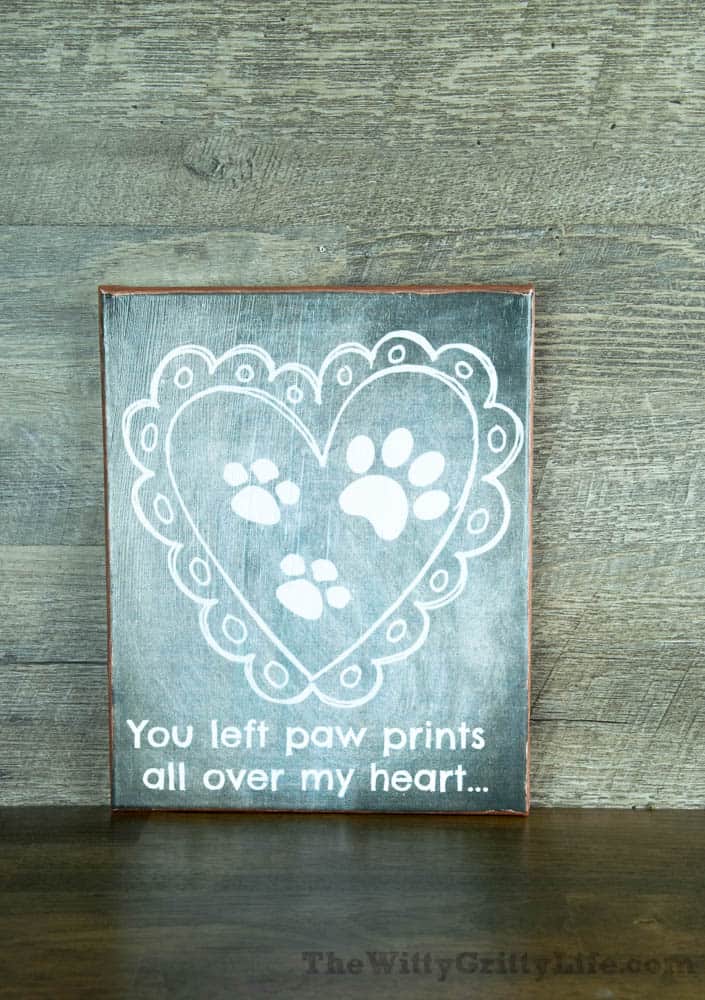
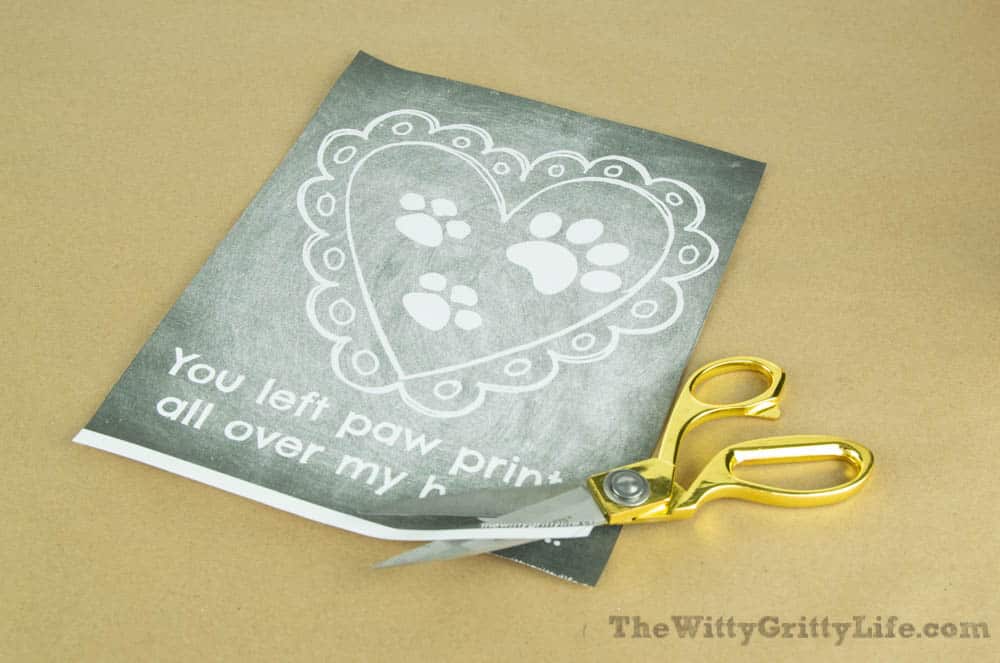
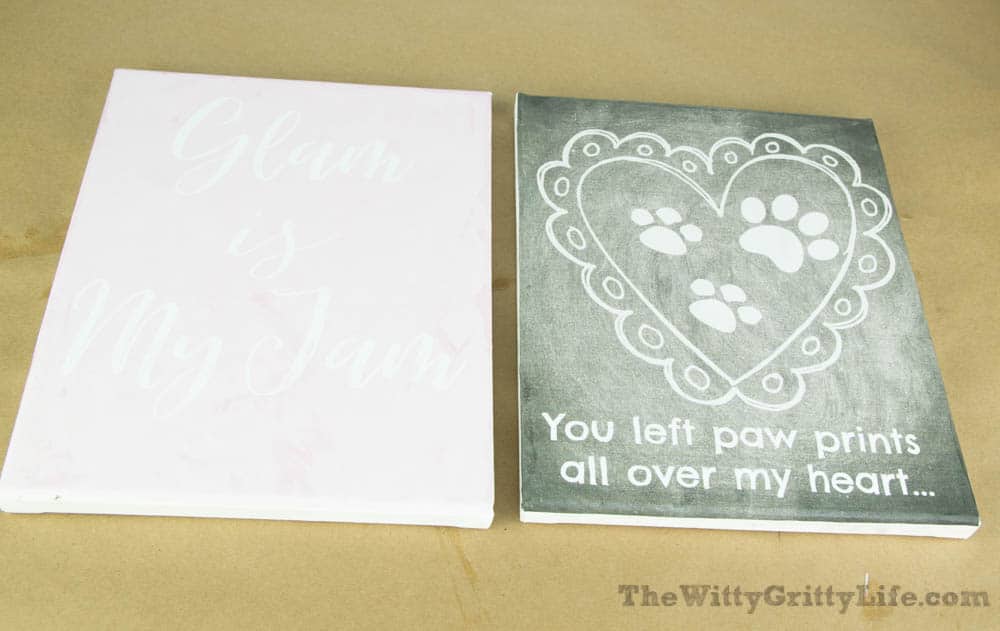
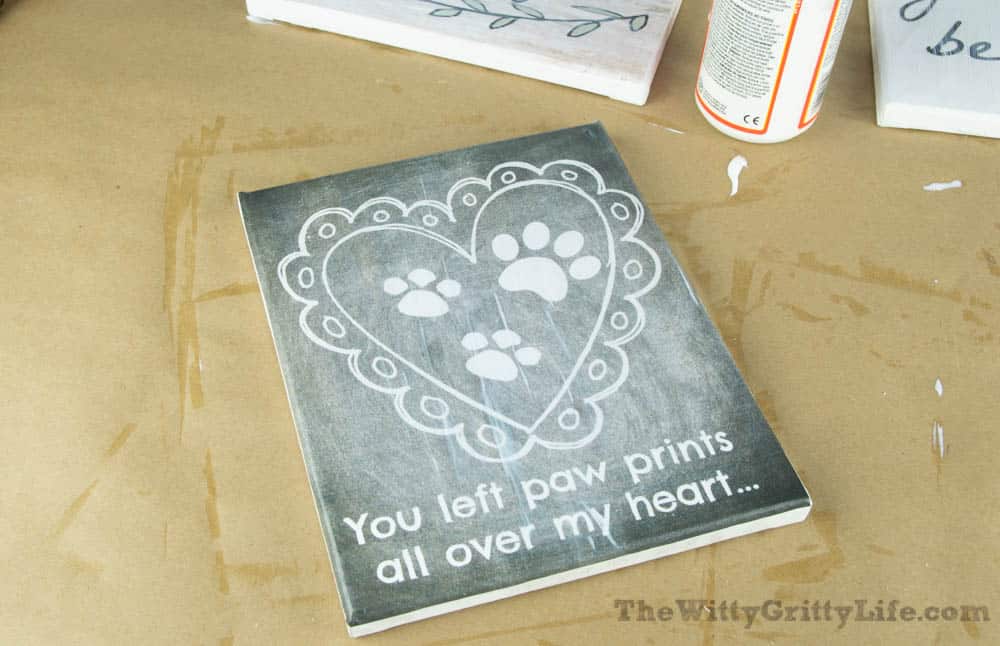
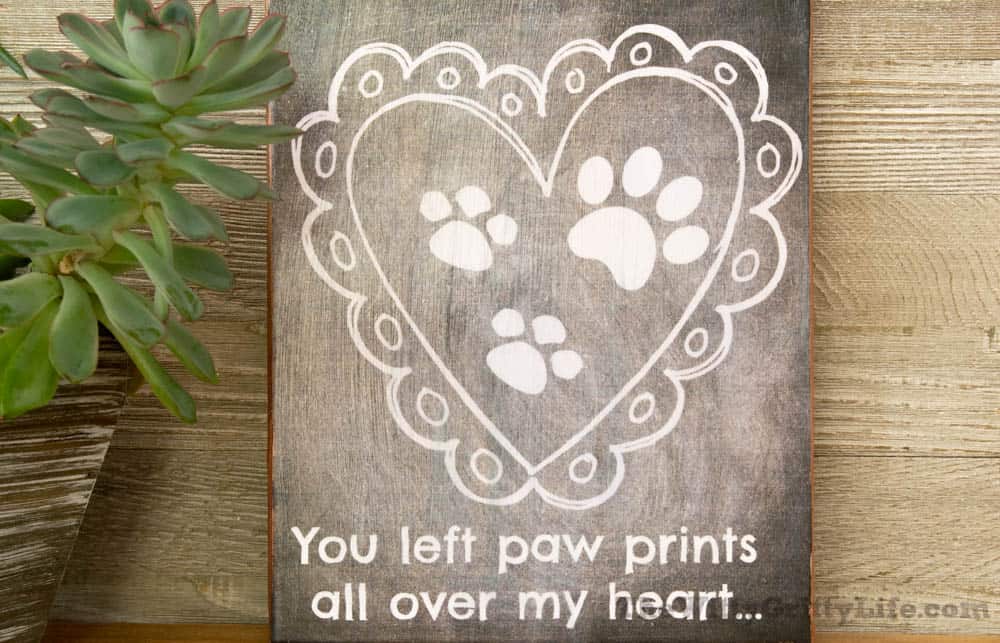
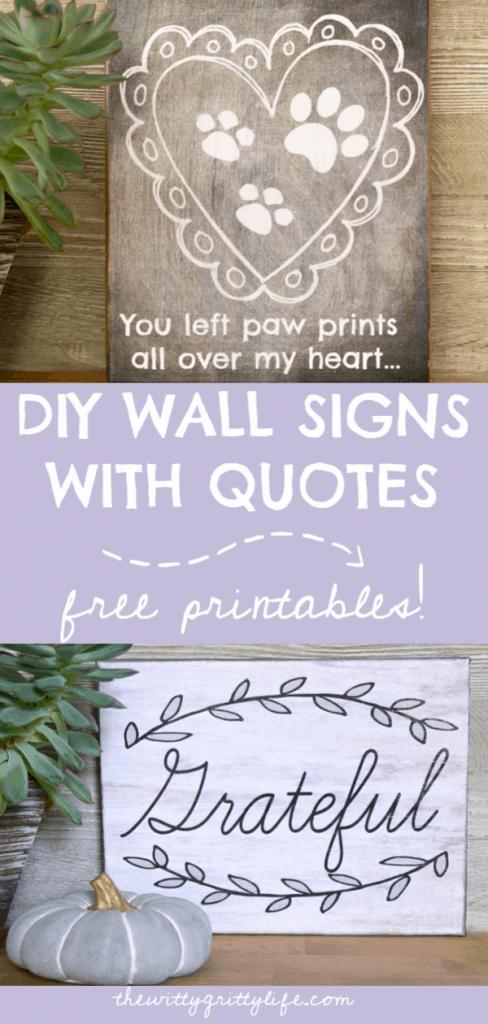
I had been wanting to give these a try for some time. So when Rascal, our beloved black lab mix passed away, this just seemed like something that expressed how I will feel about him always.
He was such a super special dog to our family, his passing has left a big void at our house. When he left to cross over the rainbow bridge, his paw prints left deep imprints on our hearts. 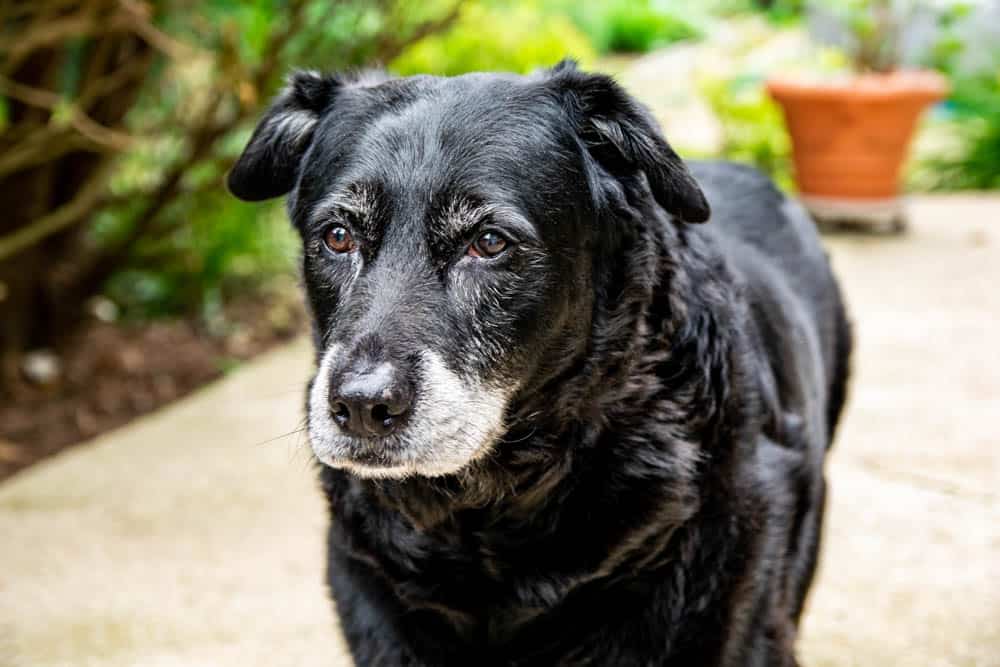
Wasn’t he just adorable? Whenever you lose a beloved pet, it feels like they leave a big paw print on our hearts.
If you have experienced that sadness, you know what I mean. And that is how the idea to create this sign was born. It also makes for a meaningful and thoughtful gift for anyone who has suffered through the loss of a beloved furry friend.
Of course, you could just print it out and frame it, but I thought putting it on canvas was a nice additional touch.
Well, I loved it so much I just kept on designing more. And the result is today’s post.
All of the printables you see in this post and many more are waiting for you in the FREE Resource Library. Sign up here and the password is on its way to your inbox!
.
This post contains affiliate links for your convenience. This means that if you make a purchase through one of these links I may earn a small commission at no additional cost to you. You may read my affiliate link policy here.
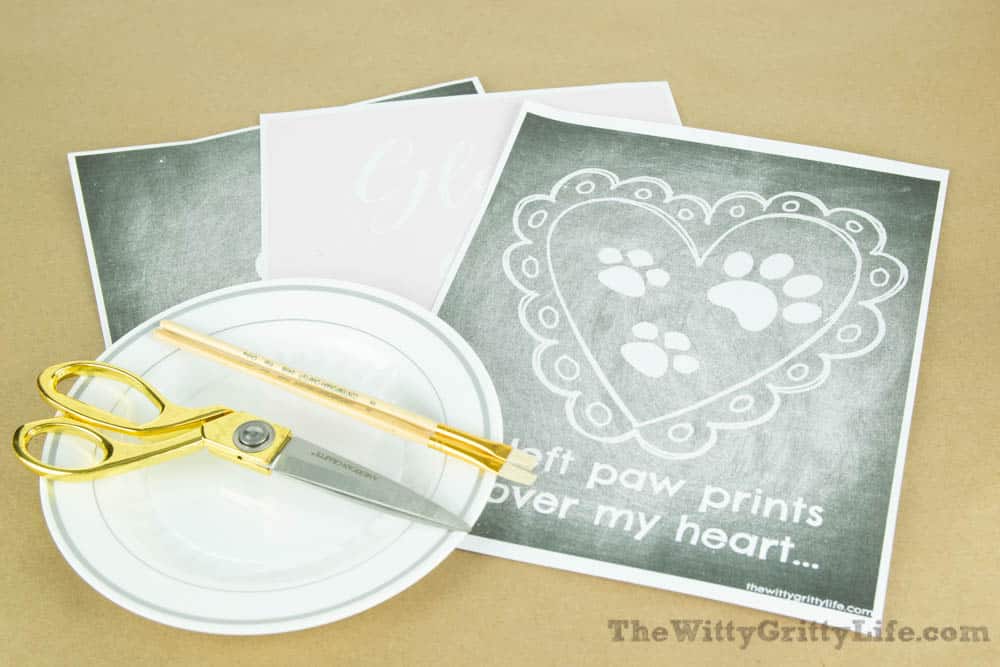
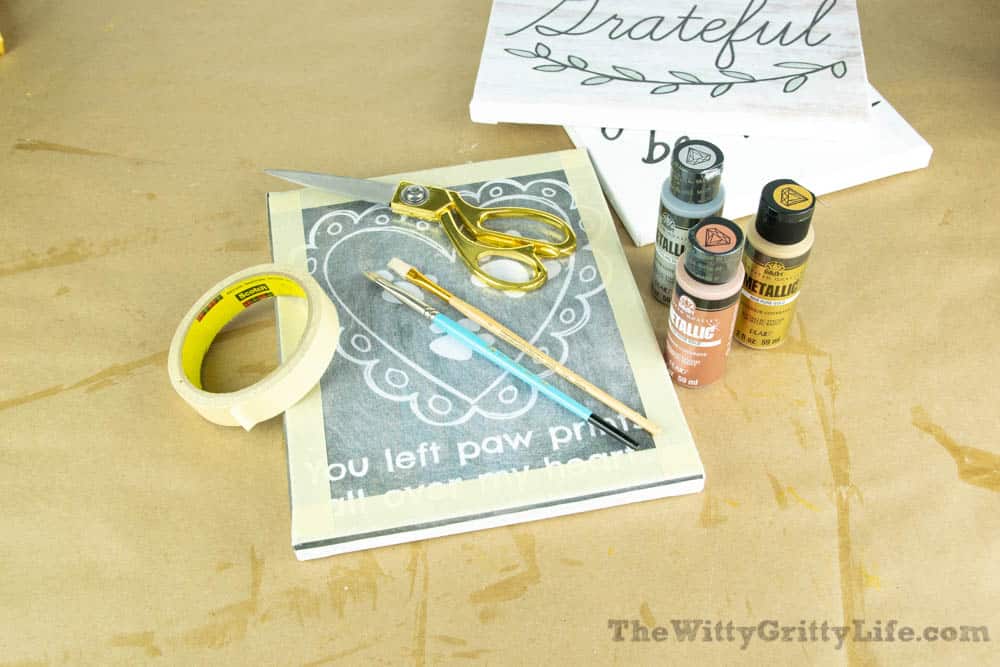
HERE IS A LIST OF THE SUPPLIES NEEDED:
- 8 x 10 stretched canvas panel(s)
- printable image – from my FREE resource library
- foam craft brushes
- mod podge
- acrylic craft paint
- scissors
- painters tape
- optional: small paintbrush, oil-based gold sharpie pen
Mod podge is a super versatile medium to have on hand. It sold in several different finishes. There is even a dishwasher safe version!
I used the glossy finish here because I happened to have it on hand. Matte would look great as well, though. If you haven’t used mod podge before, beware, it is addicting because it is so fun and easy to use.
All of the supplies are also available at any craft store. You may already have some of them on hand!

…and some of the printables I created just for you!
HOW TO CREATE SIGNS WITH SAYINGS
Get your printable(s) from the FREE Resource Library or print your own designs.
Place the stretched canvas panel on the printable upside down and trace the outline with a pencil to get the proper size.
Cut the printable or any other art you choose to size to fit the panel.
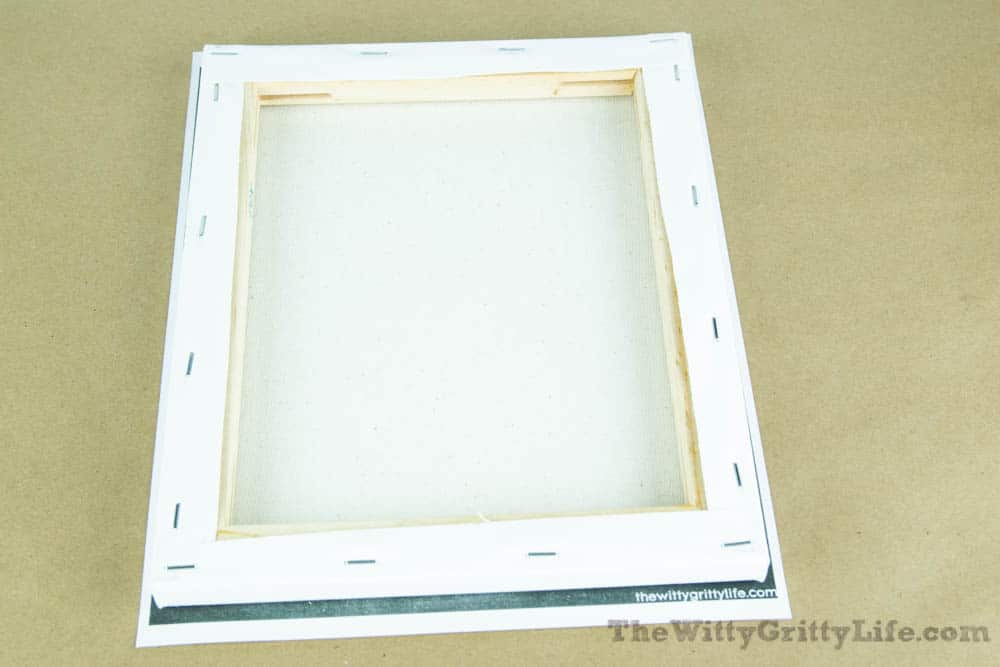
Next, apply a light but even coat of mod podge to the front of the canvas panel and the back of the print.
Make sure you pay extra attention to edges and corners. Remember that any area that is not covered by the decoupage medium will not adhere properly and cause unsightly air bubbles.
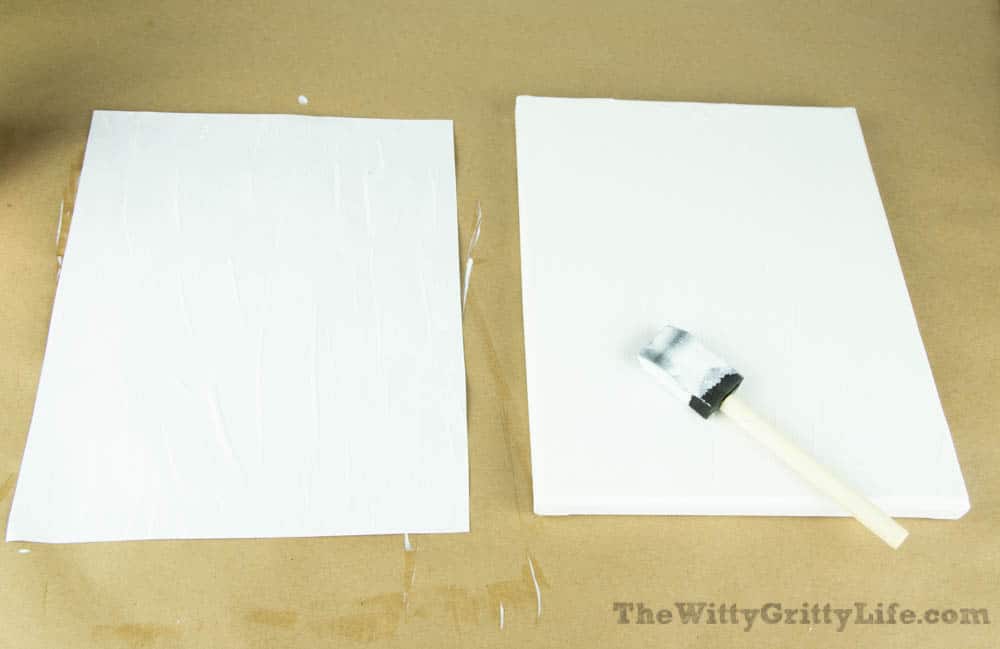
Carefully place the print on the canvas panel, right side facing up. Gently smooth out any creases and air bubbles as you go. Make sure they have well adhered to the canvas.
Canvas panels can be a little bit tricky to work with as they are flexible. This can make it a little bit more challenging to remove any trapped bubbles.
One trick that I have found is to find a book or a block of wood that fits into the frame of the canvas to create a rigid surface.
When positioning the print, remember that paper that is saturated has a tendency to tear even easier, so be gentle!
Once you have smoothed out all of the bubbles, wipe any excess mod podge from along the edges if needed. Let dry at least 30 minutes. The panels may look a little wrinkly and uneven at this point.
For stubborn air bubbles poke a tiny hole with a sewing pin into the bubble at an angle and gently squeeze out any trapped air.
After at least 30 minutes of drying time, apply a thin and even coat of mod podge all over the front and down the edges of the print.
Let dry again and repeat.
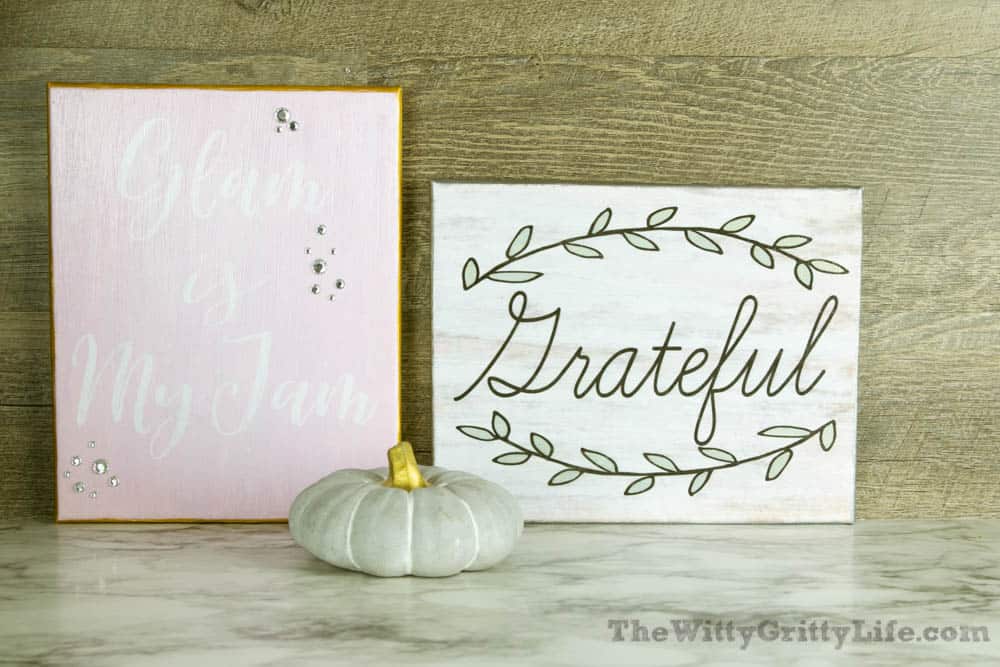
Once the panel is completely dry, you can paint the edges with metallic acrylic color. Of course, you could also frame your masterpiece and skip the paint step entirely.
For this post, I wanted to show you what gold, rose gold, and silver look like. Depending on how steady your hands are, you can tape around the top of the panel to ensure a straight edge.
Personally, I think a little unevenness contributes to the charm of the signs and gives them a slightly rustic vibe.
Now, repeat the metallic paint step until the paint has reached the desired opacity level. It may take as many as three coats to get smooth even coverage.
Next, remove the masking tape and your piece of art is done! That is unless you want to add embellishments. The choice is up to you! For the glam sign, I happened to have some stick-on gems leftover from my metallic flower vase project. I think they add just the right touch of bling, don’t you?
The panels don’t really need any hangers as they will hang easily from the wood frame. To hang each panel on the wall space 2 nails about 3-4 inches apart. Make sure they are level!
I love how they turned out!

I’ll be adding new free printables to the resource library on a regular basis! The whitewashed wood-look on the “Grateful” sign is surprisingly convincing!
ADDITIONAL TIPS AND TRICKS:
- create these signs with wood panels cut to the correct size instead, the process remains the same
- For outdoor use, create signs on wood, then seal all sides well with a weather-resistant sealer
- Personalize your wall signs by using a copy of your children’s artwork
- Go fancy and big by using a favorite poster, canvas panels come in many larger and smaller sizes
- Find other unique downloadable prints on Etsy and have them printed to the desired size at your local photo center. I have mine printed at Costco or Walgreens
- Make sure you buy panels that have the canvas stapled to the back – some are stapled along the outside edge
- Find a fun frame for your wall sign and paint it in a color of your choice
- For more detailed instructions on all things mod podge, check out https://modpodgerocksblog.com
Thank you for stopping by today! I hope you give this easy wall decor with quotes a try!
Do be sure to come on over and share your creation in our Facebook group and be sure to follow The Witty Gritty Life on Instagram!
If you are looking for other easy projects, be sure to check out some of my other posts:
Personalized Dishes the Easy Way
Easy Uplifting Art with Messages
This post is written in memory of Rascal – the best autism service dog any little boy and his family could have ever asked for.
To learn more about autism service dogs and how they have helped countless individuals and families check out the 4PawsforAbility website.
Don’t forget to pin it for later!
Such an amazing tutorial. These look really incredible. I think it s a great way to change up your decor in your home. I will try it for sure. Thank you so much for sharing such an incredible project with all of us.