Today’s project has intrigued me for quite some time. If you spend any time on Pinterest or Etsy, you have surely come across this fantastic idea. Sharpie painted mugs and dishes!
There are so many amazing inspiration pics, I just knew I had to try myself at this sooner or later. But with various methods and instructions, there were also a few questions. I needed solid answers before proceeding on with this post. Whenever I create pretty much anything, it’s important for me to know as much as possible about the project.

I have found my share of duds in the craft department through the years, that’s for sure. That is why I will not present anything to you unless I know it actually works. The most obvious being whether or not it was really possible to create durable personalized dishes. I mean, it does sound kind of too good to be true, doesn’t it? You wouldn’t want to go through all of the expense and work, only to find out the paint washes right back off. Don’t worry, I’ve got you covered. Read on for all of the answers to your burning questions!
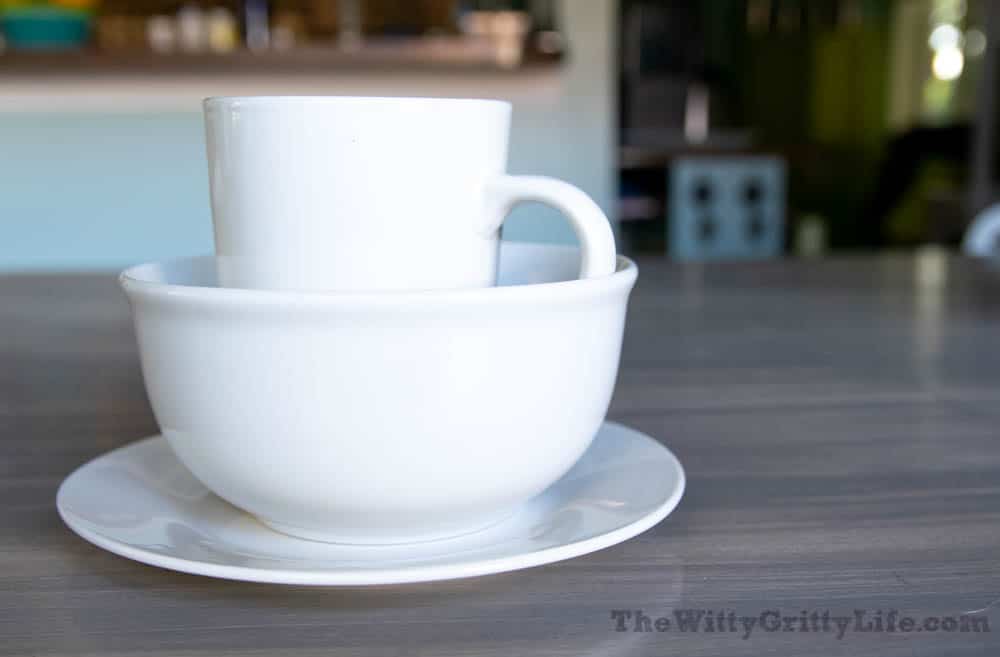
I decided to try several different ways and started with a plain set of dishes from the Dollar Store.
Here they are before their makeover:
For more inspiration, tips, tutorials, and printable art, don’t forget to sign up for the FREE Resource Library.
This post contains affiliate links. Find my full affiliate policy here.
Is it really possible to create durable personalized dishes with sharpies?
The short answer is yes, but it depends on your definition of durability. There are a couple of different methods to make sharpie painted dishes. The first uses regular sharpie markers (the water-based kind) and seals them with a dishwasher safe sealant like this formula of Mod Podge.
The benefit of this method is that you can use whatever sharpie markers you may already have on hand. You don’t need to bake the paint on, but have to seal it well. A major drawback I can see with this way of doing it is that the sealant needs 28 days to fully cure. I won’t be talking about this method, and I have not tried it, but you can check out this post by apieceofrainbow.com, which describes it in detail.
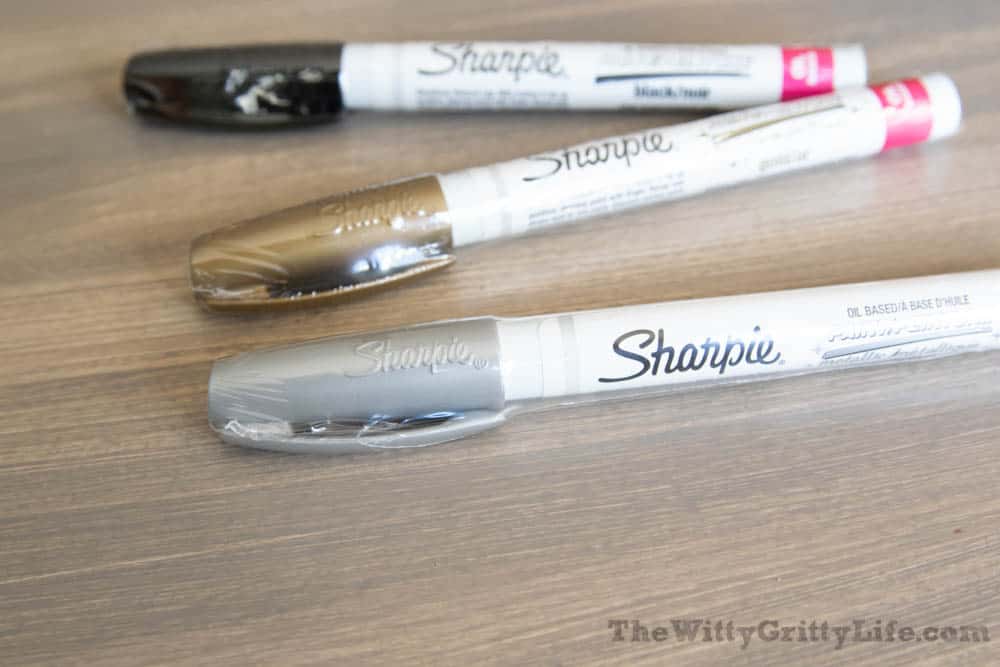
We will focus on working with oil-based Sharpie pens
Baking oil-based sharpie (or marker paint) onto the porcelain or glass surface of your painted dishes. Just to make sure, I tried to bake on regular sharpie paint, but found two things:
- the colors changed, some of them significantly
- the paint washed right off
Disappointing, but at least I know the answer so you won’t have to wonder. I had read that using a regular black sharpie and baking it on would work, but just like the colored ones it also comes right off.
Is oil-based sharpie marker paint food-safe?
Here is what the manufacturer of oil-based sharpie pens recommends:
“While Sharpie markers are AP-certified non-toxic, we do not recommend using them on areas of items that may come in contact with food or the mouth. Sharpie has not been tested as an oven-proof product and should not be used anywhere where a consumer could possibly ingest the ink.”
Is that a deal-breaker? Not really. When decorating mugs and bowls, be sure to keep to the outside part that will not come in contact with any of the liquids or foods. Keep decorations on plates limited to the outer edge and use sparingly in the center part. If you plan to use them strictly for decorative purposes, paint away!
Are Sharpie Painted Dishes Dishwasher Safe?
The short answer is NO. Some of the instructions I found, claimed that they would be. So I intentionally put some of my sharpie painted dishes through the dishwasher on the bottom rack.
Sadly, they did not hold up very well. The sharpie paint will eventually wear off even if baked twice, as some other instructions I found recommended. While the paint is fairly durable, I strongly suggest that you always handwash them.
CAN YOU MICROWAVE SHARPIE DISHES?
Yes. As long as the dishes you are painting are microwave safe, you are good to go. Since the paint will be heat cured you can microwave the finished result. Just to be sure, I tried this with dishes painted with the metallic version of oil-based sharpies and was pleasantly surprised to find that they were just fine.
Update: All of my sharpie painted dishes continue to hold up very well despite frequent microwaving.
CAN YOU USE THIS METHOD TO PAINT PLASTIC OR MELAMINE DISHES?
The answer here is a resounding NO. Since the paint will have to be baked on, plastic or melamine plates just will not hold up. If you have your heart set on marker painted plastic plates, try the method mentioned above.

LET’S GET STARTED PAINTING THE DISHES!
Finally on to the good stuff: Actually decorating real dishes. What makes this method so simple and fun, is that this is a DIY project even the least artistic among us can master. Unlike regular ceramics, this project uses inexpensive dinnerware and mugs that can easily be found at the Dollar Store.
Oil-based paint pens come in different thicknesses and allow you to draw and design pretty much anything you’d like. You can play with fun doodles, inspirational quotes, funky patterns. You are only limited by your own imagination. Not too good at freehanding designs? Why not give a stencil a try? Simple patterns like circles and lines look amazingly stunning with this technique.
Once you get the feel for the paint pens you’ll become a master at decorating plates and mugs in no time.
SUPPLIES AND TOOLS
- OIL based sharpie markers or Ceramic paint pens – regular ones will not work
- white porcelain dishes like plates, bowls or mugs (Dollar Store of Thrift Store dishes work well)
- covered work surface
- 91% isopropyl alcohol (for cleaning any mishaps)
- oven
- cotton swabs, paper towels
- wax paper
BEFORE YOU BEGIN PAINTING:
Cover your work surface. Several layers of newspapers covered with a sheet of wax paper will work well to prevent the paint from bleeding through.
Thoroughly wash all dishes you will paint with hot water and dish soap to remove any fingerprints and/or grease.
Decide on a design. Begin with something simple like lines or polka dots if you’re not sure or need practice.
Keep cotton swabs, paper towels, and 91% isopropyl alcohol or hairspray handy for quick touch-ups. Dab a little rubbing alcohol on a cotton swab or paper towel to help remove unwanted paint.
If you don’t like the final result, you can wipe the entire surface of the dish clean with 91% isopropyl alcohol. Then wash with hot soapy water before repainting the dish. This works well to remove any paint until as long as it isn’t baked on.
Shake each pen you are going to use well to ensure the paint will come out evenly. Try a little bit of each paint color on the sheet of wax paper to get a feel for the pen and to see the true color.
Begin painting just as though you were doodling on paper. The rim of a dessert plate is a fun easy place to practice.
Let me show you the steps of painting the dishes shown in my title picture. It couldn’t be any easier. For this project, I used a fine tip black and a gold oil-based sharpie marker.
You see these are wrapped individually in plastic to keep them from drying out.
Unwrap your marker and shake well. Gently push down on the tip until the paint begins to seep into the tip, like this:

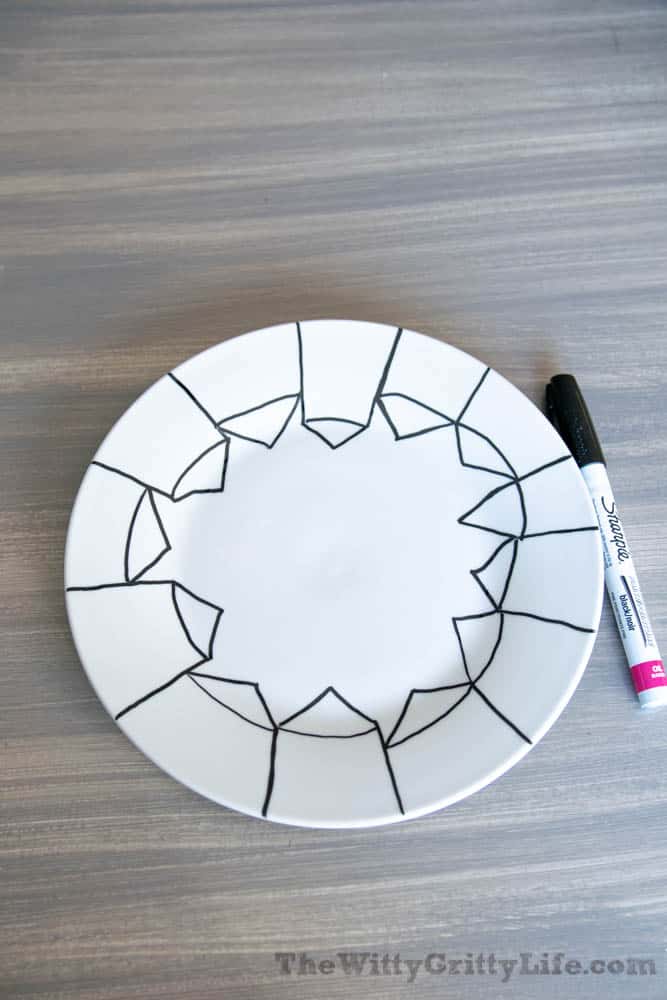
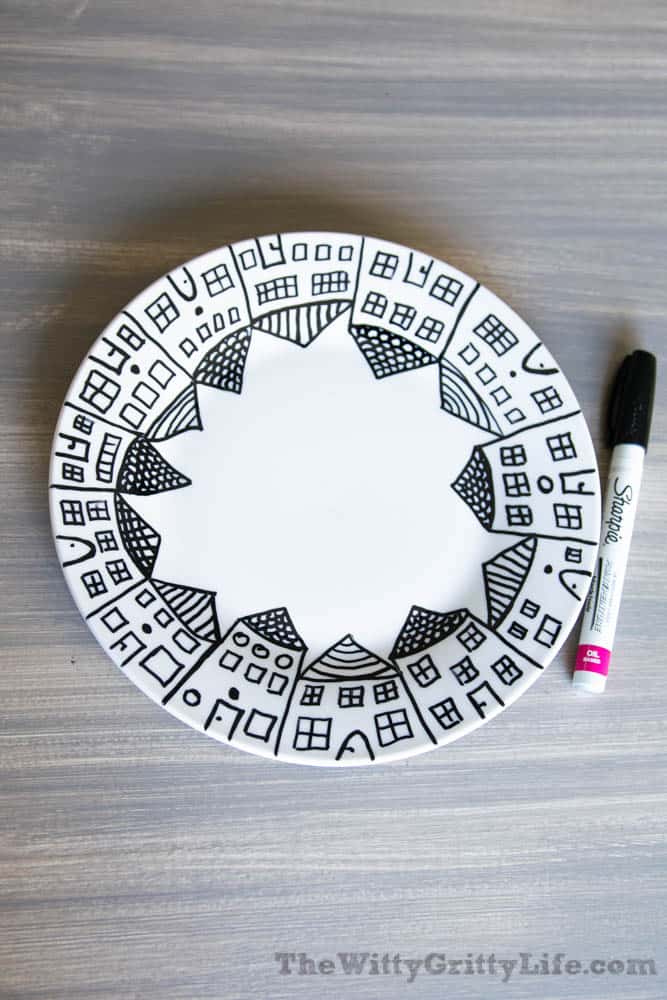
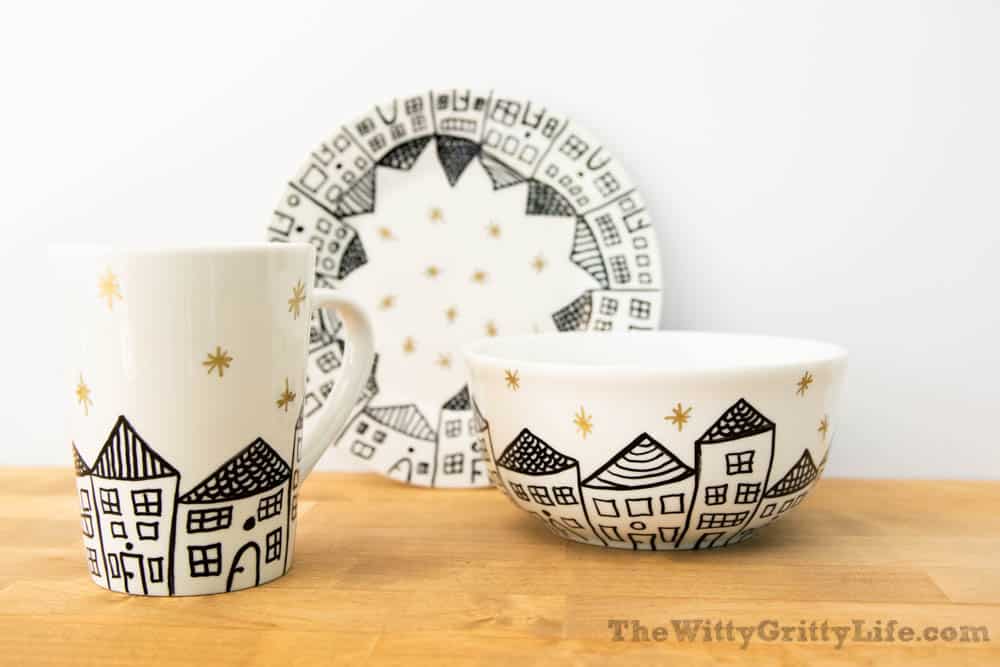
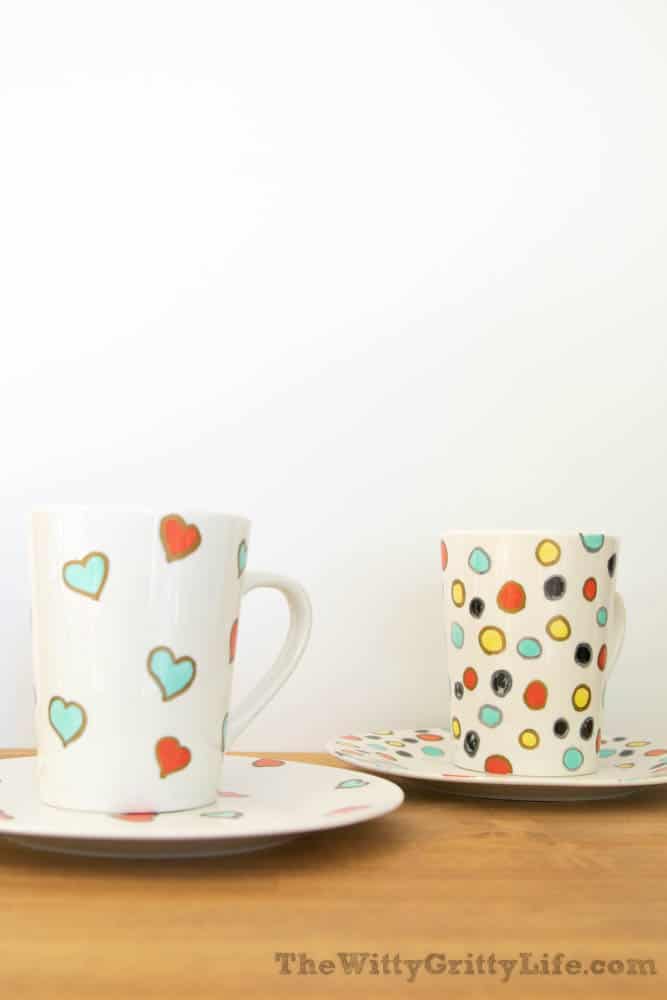
Next, begin drawing your design onto the dish. A flat surface like a plate rim is easiest at the beginning. I wanted to create a plate, bowl, and mug set with houses. Here is the first outline.

Then add details as you go…

The houses are beginning to take shape!
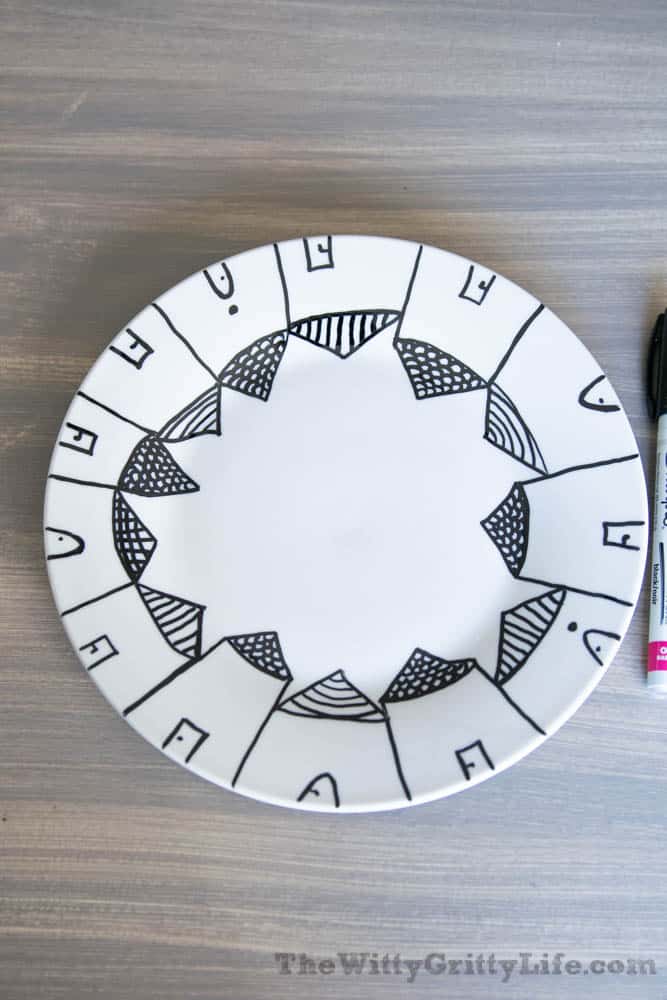
Now on to the windows and doors!
Of course, I had to gild the lily with gold stars!
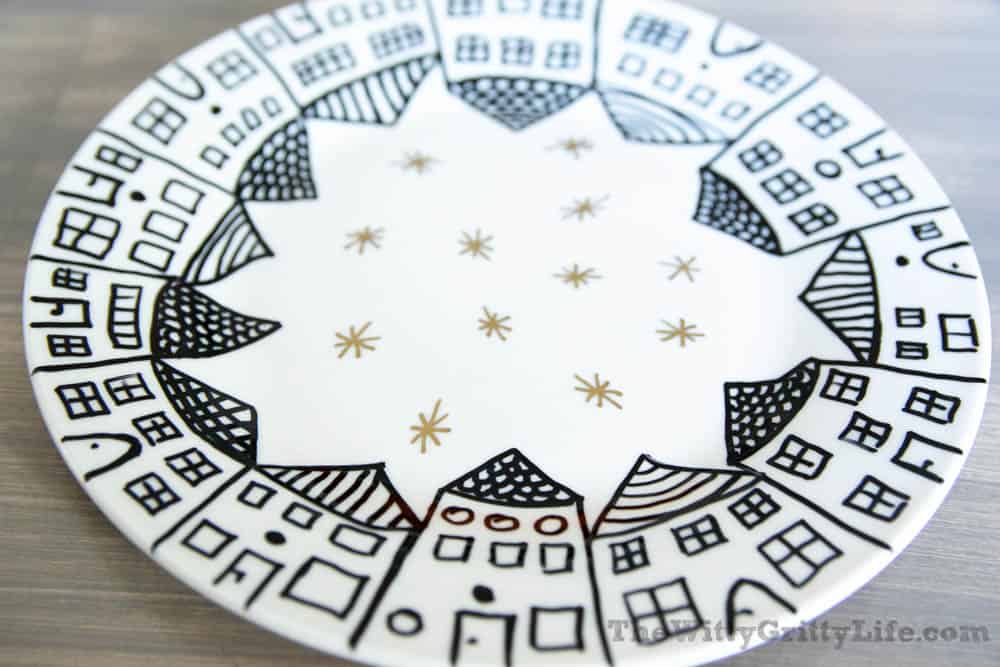
Didn’t they turn out nice? A matching bowl and coffee mug round out the set!
After you are done painting, put your dishes on the center rack of a COLD oven.
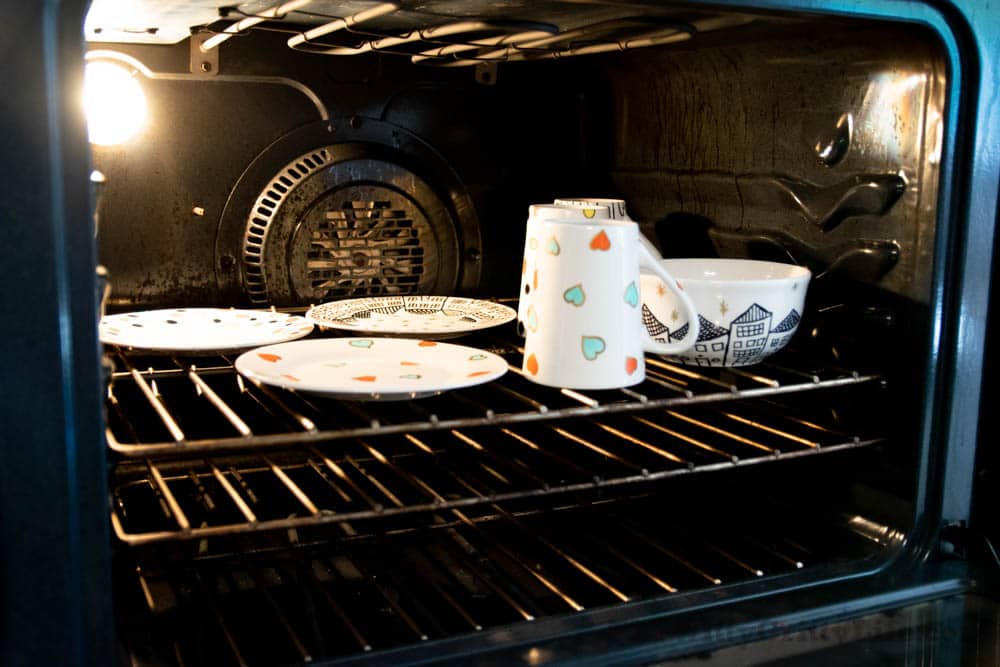
Do not let your helper crawl into the oven with the dishes!
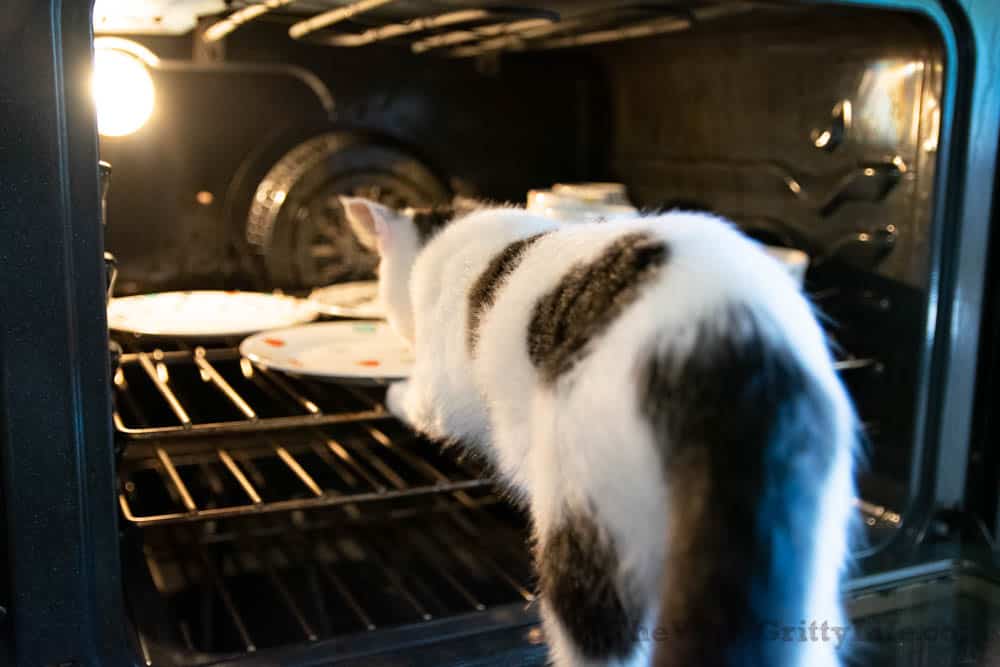
Shut the oven door and heat to 350 degrees Fahrenheit or about 175 degrees Celsius.
Heat the oven fully, then set timer and bake for 30 minutes. Once the dishes are done baking, turn off the oven and leave dishes inside with the door closed until the oven is cooled completely about 2-3 hours.
You can bake the dishes in the evening and just let them sit to cool in the oven overnight. That way you are not tying up your oven in case you need it for cooking.
Some tutorials suggest that the dishes might be made even more or truly dishwasher safe by repeating the baking step. Because I wanted to have all the answers for you I tried this method.
In the end, as I already stated this still didn’t make them completely dishwasher safe. But, if for some reason certain areas of your baked dishes need a little touchup, you can go over the area again with the right pen and re-bake them.
And that’s it. No big mess. No fancy equipment. You won’t even need a tremendous amount of space. Actually, I just recently drew fun designs on a cup, plate, and bowl, while sitting in my favorite living room chair watching TV. Just don’t wear your favorite cashmere sweater while doing that;).
Here are a couple more designs perfect for beginners!
This is a perfect little project to personalize all kinds of items. You may just get hook on creating fun gifts like mugs, dessert plates, and breakfast sets (plate, bowl, mug) for friends, family, and as hostess gifts. Because nothing beats a lovely personalized gift, right? They never go out of style. Anything instantly becomes more meaningful if it includes that extra personal touch.
So grab your kids or make it a fun evening with friends and create fun, inexpensive gifts that will surely please. Invite friends to paint dishes, then have them take their creations home to bake in their own oven!
Since this post was first published, I also tried this exact same technique on a set of wine glasses. You can take a look to see how they turned out in this post:
FUN FESTIVE FABULOUS GLASSES YOU CAN MAKE FAST AND CHEAP
I hope I have inspired you to try your hand at creating your very own personalized dishes. I would absolutely love it if you could share a picture in the Witty Gritty Life Facebook group. Not a member yet? Just pop on over, there is always room for another brilliant mind!
These are super cute! What a fun way to jazz up plain dishes!
Thank you! This is definitely an addicting project!
Thank you so much! This was very helpful!
Wow ! What a decorative piece. I really liked it. It looks beautiful.