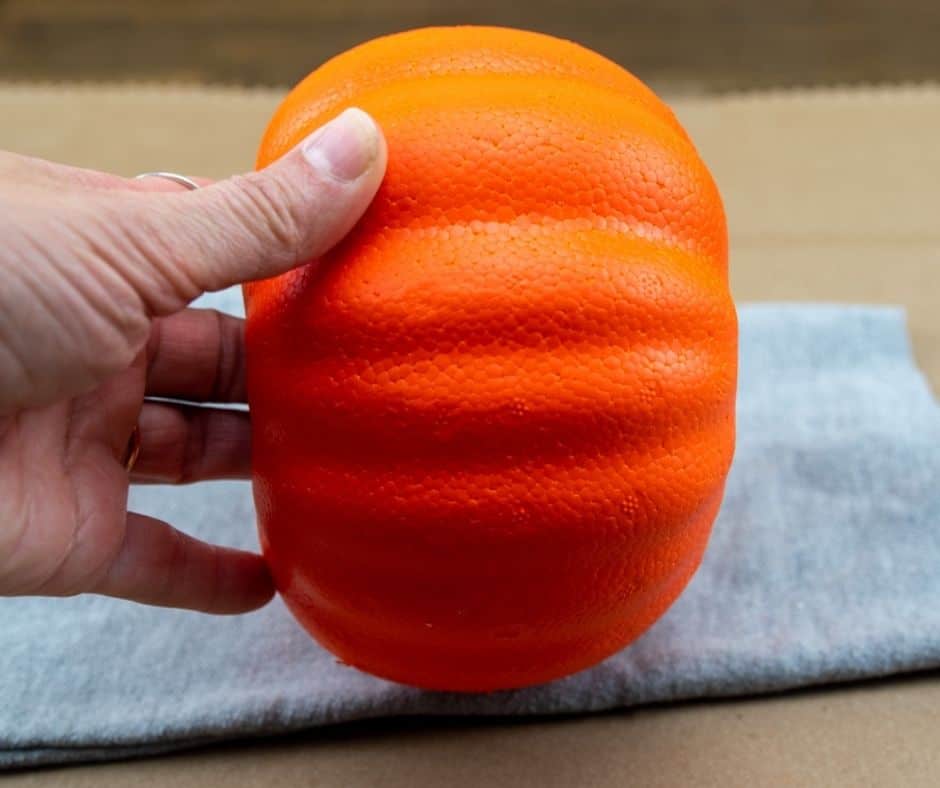
Recently, while browsing my local Dollar Tree, I came upon the famous ugly foam pumpkin that appears to be one of their most hacked and made over products ever. Honestly, until I began seeing all kinds of projects that use them pop up online, I never gave them a second thought.
But this is the year I decided to actually decorate for the Fall season! So I figured this would be the perfect time for me to see what I could come up with to turn an ugly Dollar Tree pumpkin into something to be proud of.
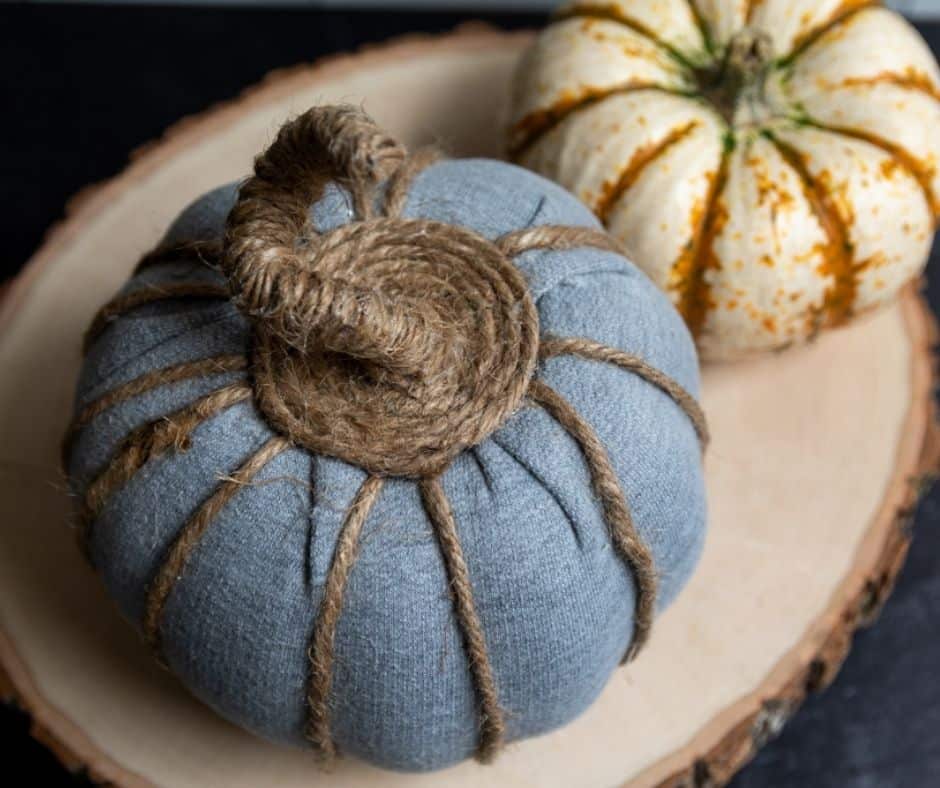
This is the first of three ideas that came to mind and I have to say, I am pretty darn happy with how it turned out.
I have always liked the look of rustic concrete pumpkins. When I came across an old gray sweatshirt that was bound for the rag bin, I knew it would be perfect for this project because the gray sweatshirt material looks very much like concrete.
Of course, you can choose any color or even pattern you like. It’s just what I had on hand and a look that works for me.
And as I mentioned, I have a couple more ideas coming so stay tuned for those.

For more ideas, tutorials and unique printable art, be sure to check out my FREE Resource Library. It is my ever growing gift to you. Just sign up here and your exclusive password is on its way to your inbox.
* This post contains affiliate links. If you make a purchase by clicking on an affiliate link, I may earn a small commission at absolutely no additional cost to you. You can view my complete affiliate link policy HERE.
MATERIALS AND TOOLS FOR SWEATER PUMPKINS
- Carvable Dollar Tree foam pumpkin or similar
- Old sweatshirt, sweater, or fabric of your choice (I used the sleeve of a gray sweatshirt)
- Hot glue gun and sticks – I recommend a glue gun with a cool heat setting
- Medium weight jute twine
- 5-6 pipe cleaners
- Scissors
- Small paring knife
STEPS TO CREATE YOUR SWEATSHIRT COVERED RUSTIC PUMPKIN
While there are quite a few steps to creating this particular pumpkin design, they are all very easy and don’t take much time at all. I just wanted to make sure I covered all the bases for you. Please read all of the instructions completely before getting started with your own project.
PREPARE THE PUMPKIN
If you are using any material other than thick sweatshirt material, you may want to paint the pumpkin first to keep the bright orange color from peeking through. You can use regular craft paint for that.
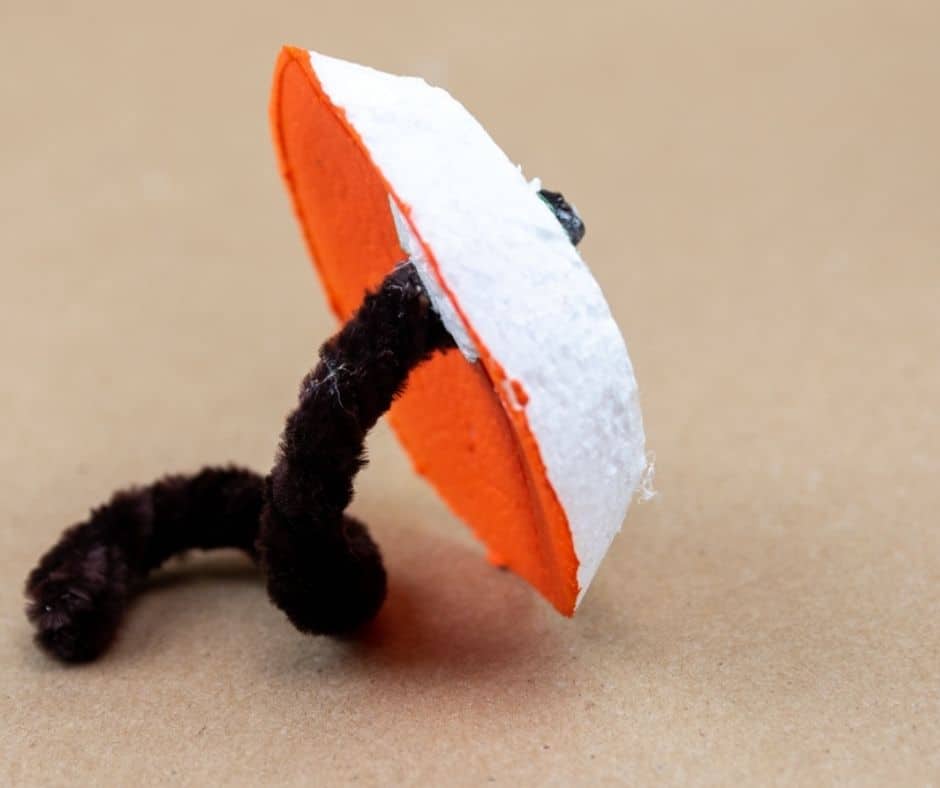
Before you can cover your pumpkin, carve out the top and bottom. This is neccessary, to allow for the string to be threaded.
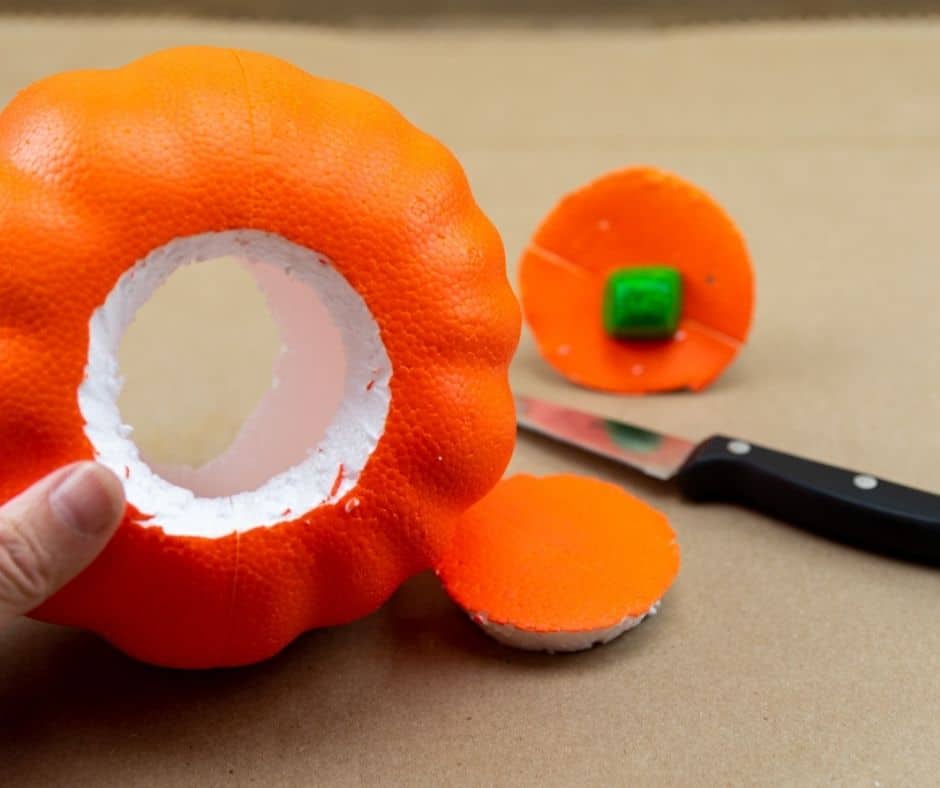
Carving is easy. Just hold your small knife at an angle and cut a circle like this. Carefully remove the green stem piece from the top circle. Set the two circle pieces aside for later.
Your holes should be about the same size, no more than 2″ (5 cm) in diameter.
Covering the foam pumpkin
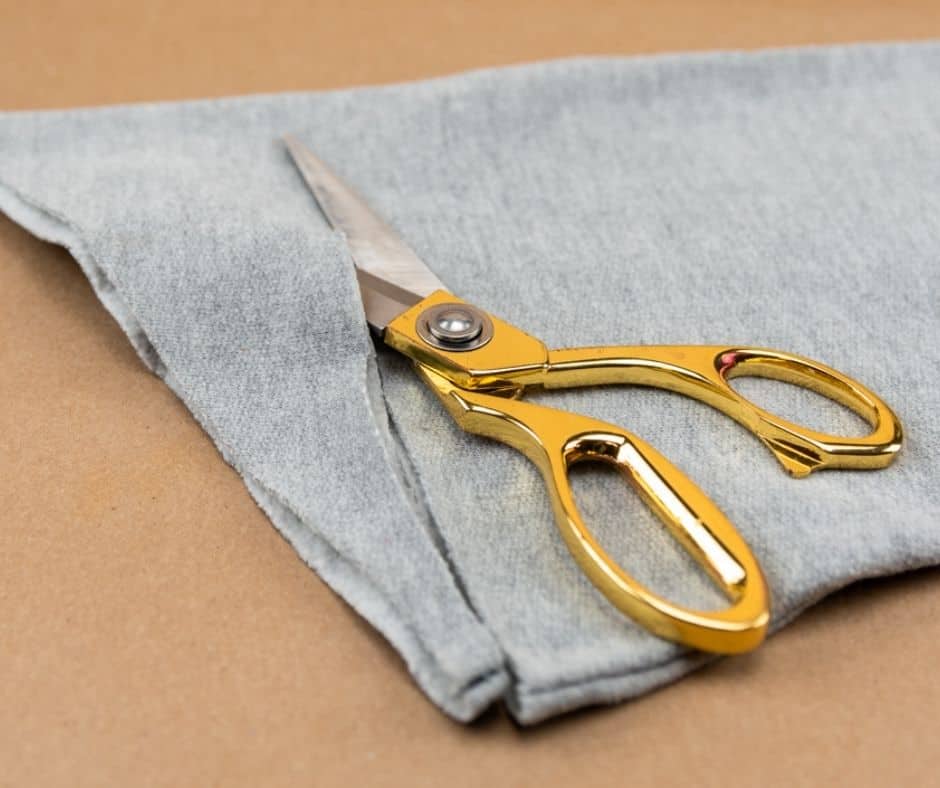
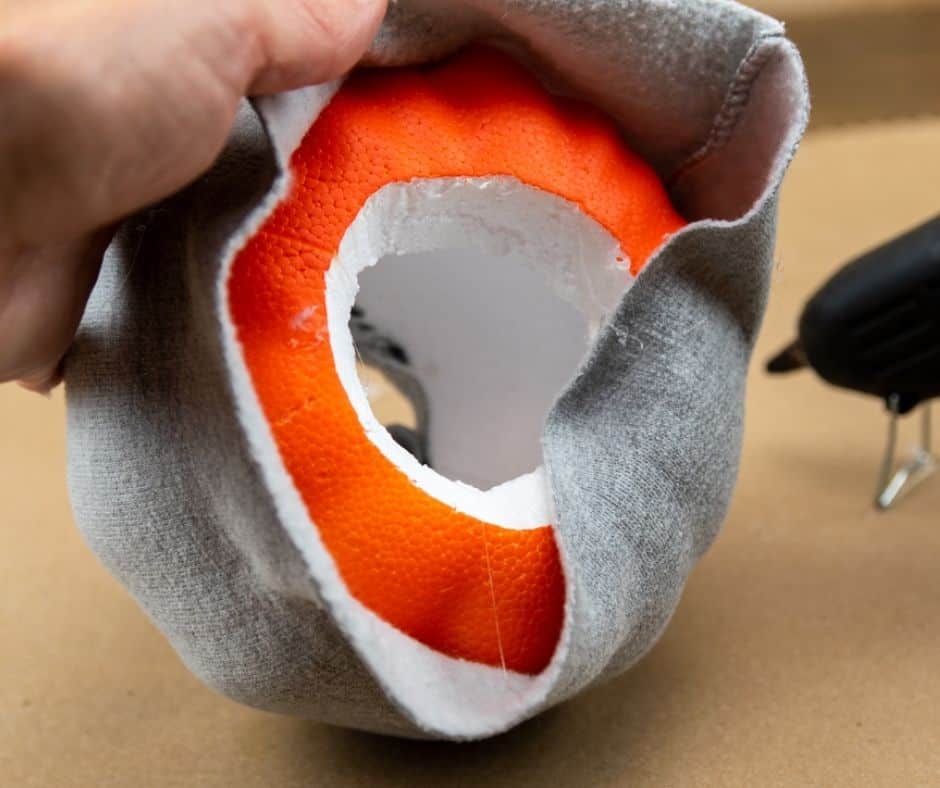
With the top and bottom circles carved out you are ready to cover the pumpkin. For this project a sweatshirt sleeve works very well. It doesn’t require any sewing and is just tight fitting enough. I used a medium size gray Hanes sweatshirt for my project. You’ll want to cut the sleeve off straight. Then it’s time to figure out how long the piece of fabric needs to be to cover the entire body of the foam pumpkin well.
It needs to be long enough to cover the white edges of your Dollar Tree pumpkin like this.
Cut the sleeve piece to size if needed, then glue the top and bottom into place. Fold as needed as you move along. I found it worked best to apply some glue to the white foam rim, stick the fabric down and then add some to the top to glue the fold.
And since styrofoam melts easily, I highly recommend using a low temp glue gun for this project.
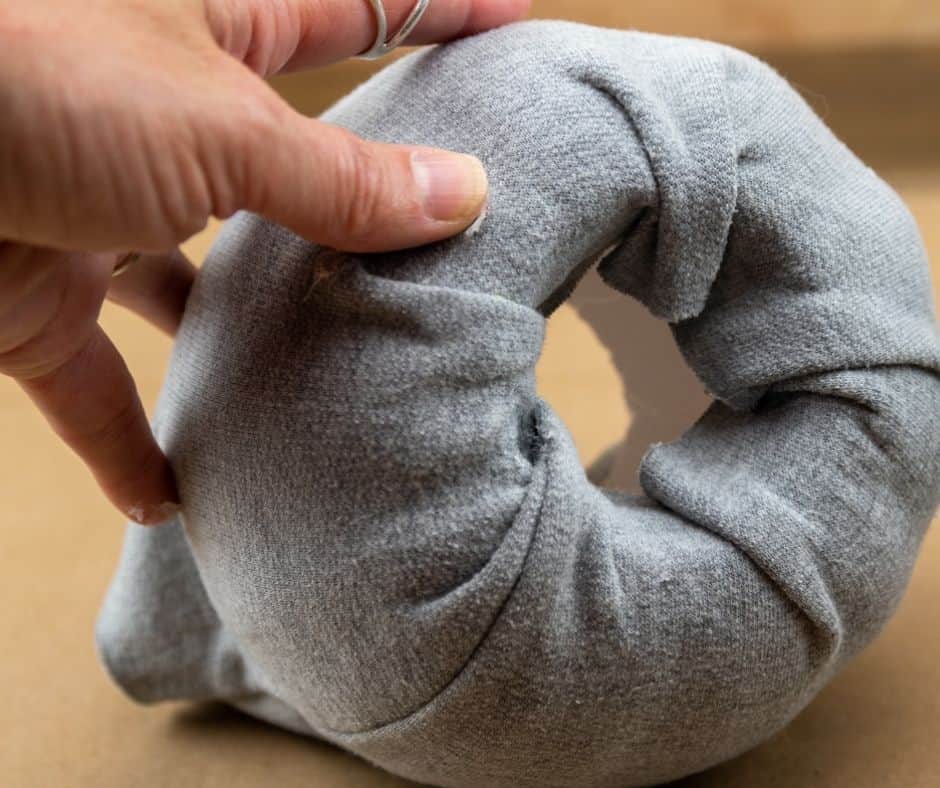
Once you have adhered the fabric to the top and bottom of the pumpkin body, repeat the same step with the bottom circle piece that you carved out earlier.
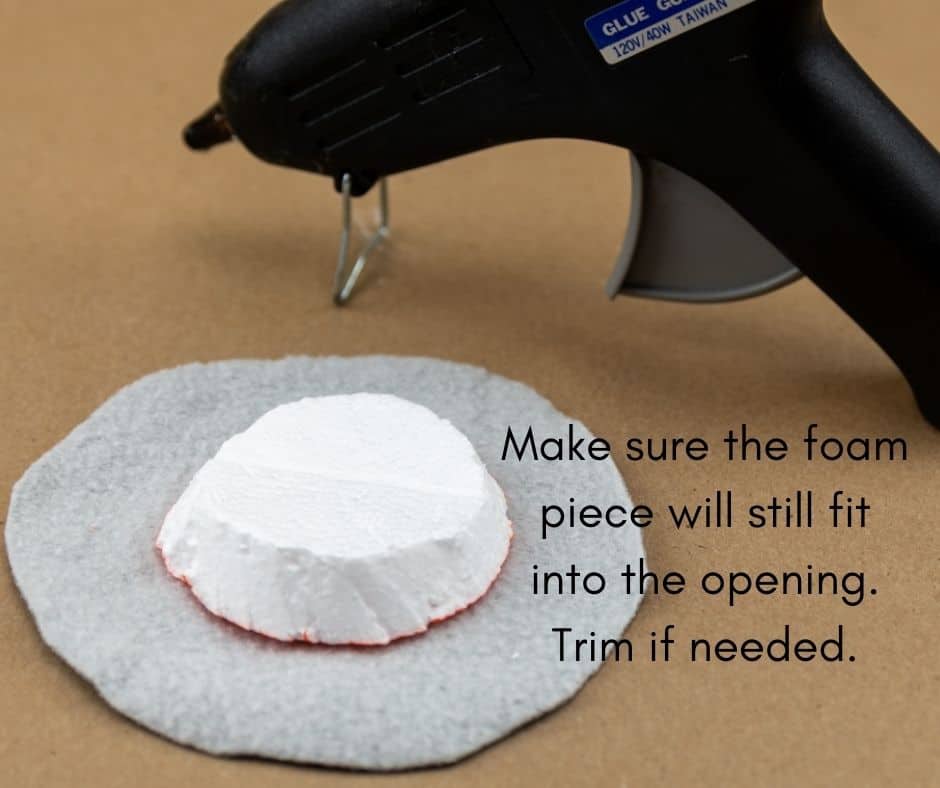
Helpful tip: Before attaching the fabric to the bottom circle you may need to reduce its size and thickness to allow it to fit well into the opening. Gently carve away any excess styrofoam.
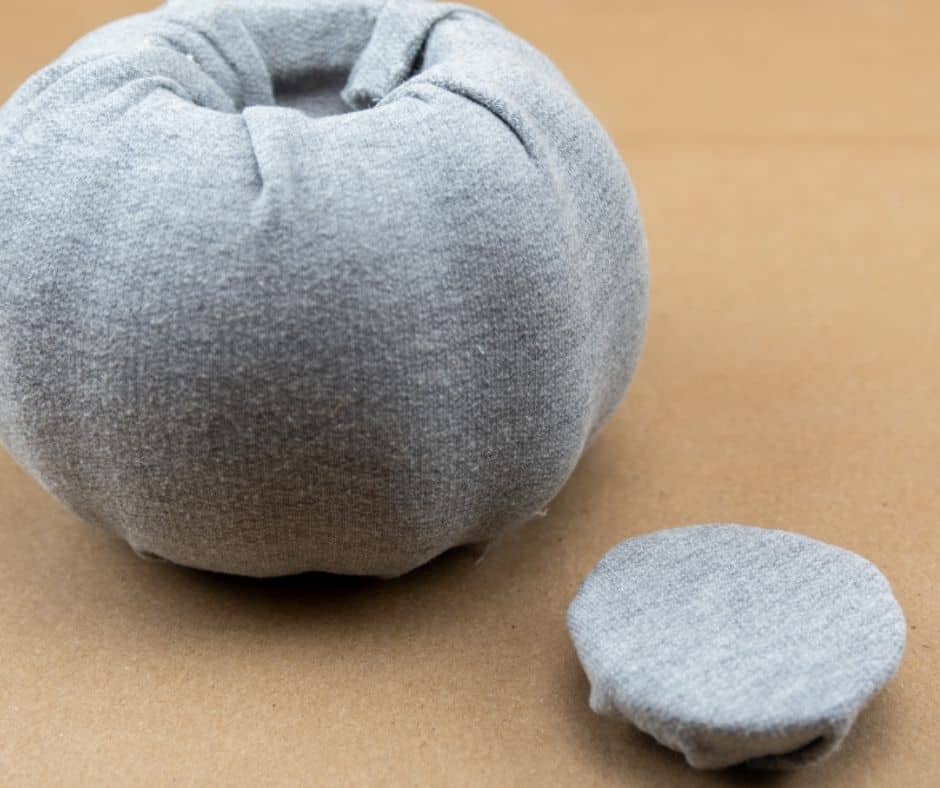
This piece will be glued back into the bottom of the pumpkin later for a clean and finished look. Now you are ready for the next step.
WRAPPING THE PUMPKIN WITH TWINE
Wrapping the pumpkin gives the pumpkin the extra rustic details that makes it stand out. To do this, cut off a generous length (about 12 ft or 4 m). While this may sound like it might be way too long, you definitely want to err on the longer side. You don’t want to wind up short and have to start all over.
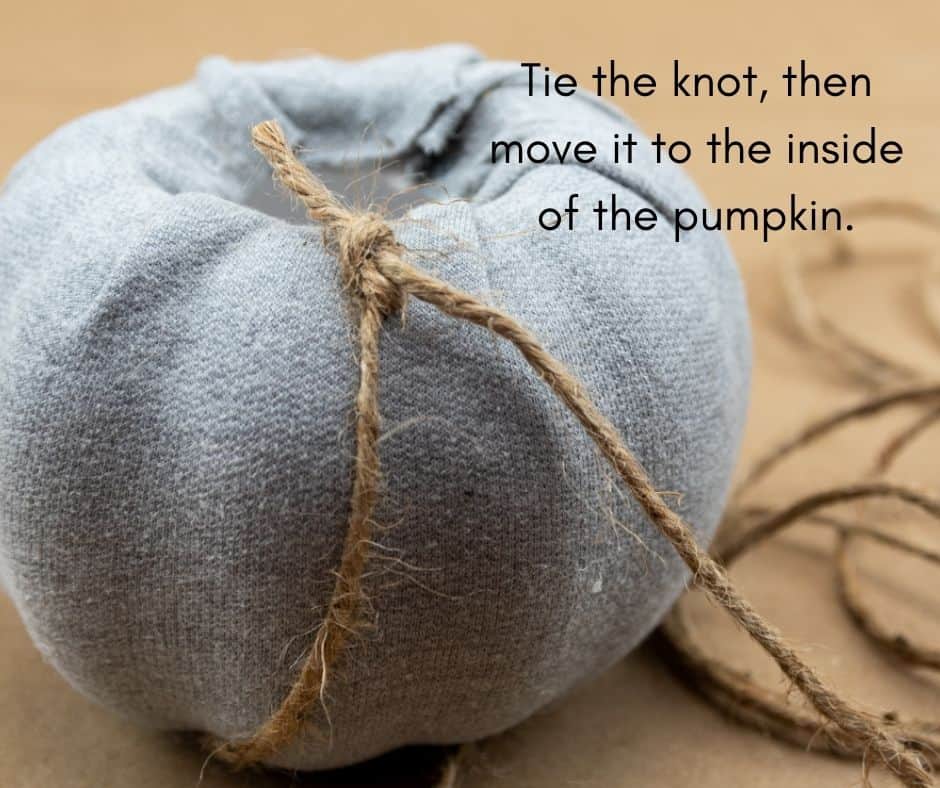
Thread the twine through the pumpkin body and tie a knot. Make sure the string is nice and snug up against the pumpkin. Keep the knot on the inside.
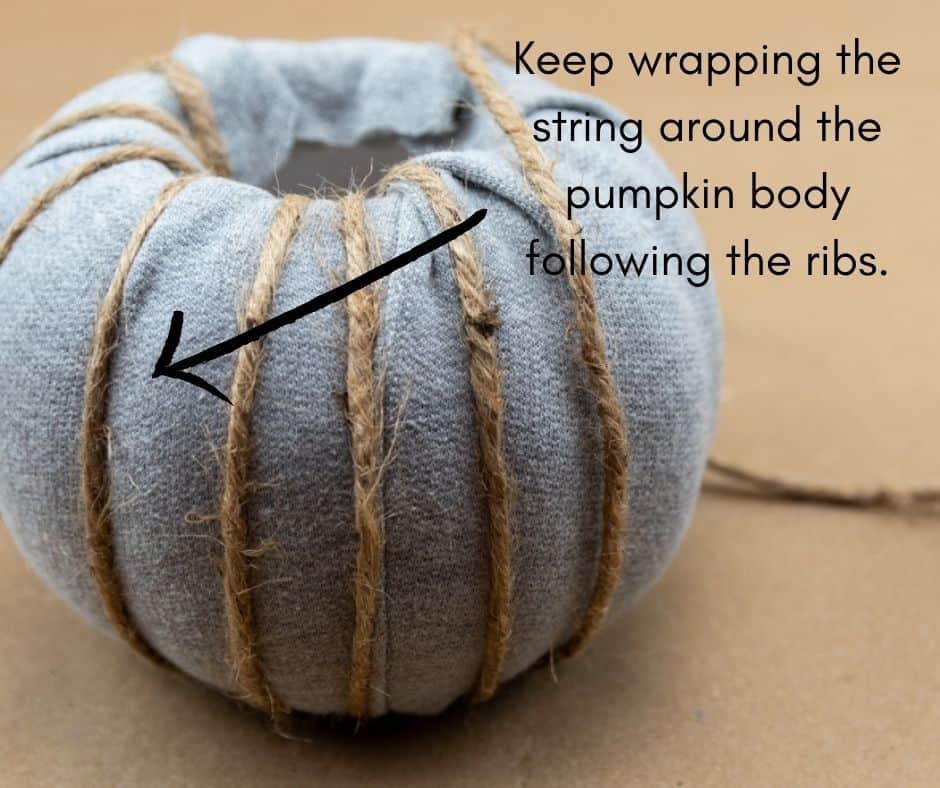
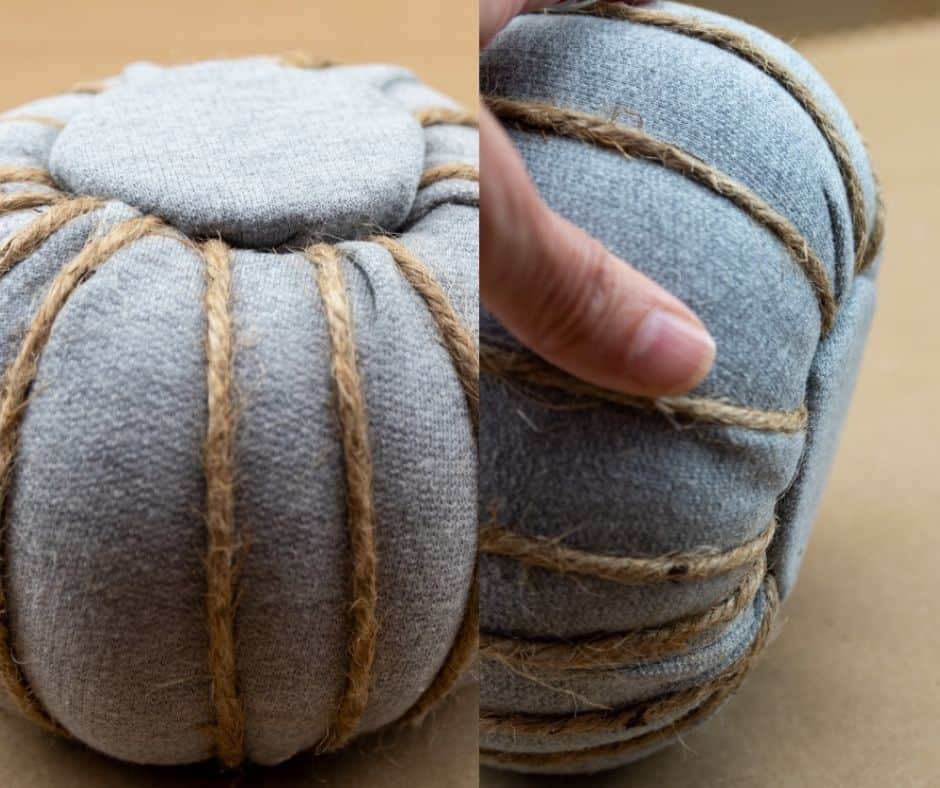
Now wrap the twine around the body of your pumpkin following the ribs. Keep going until you have gone around the entire pumpkin. Cut off the string and glue the end to the inside.
finishing touches
Place and glue the bottom piece. If you carved it to size as suggested above it should be fairly flush.
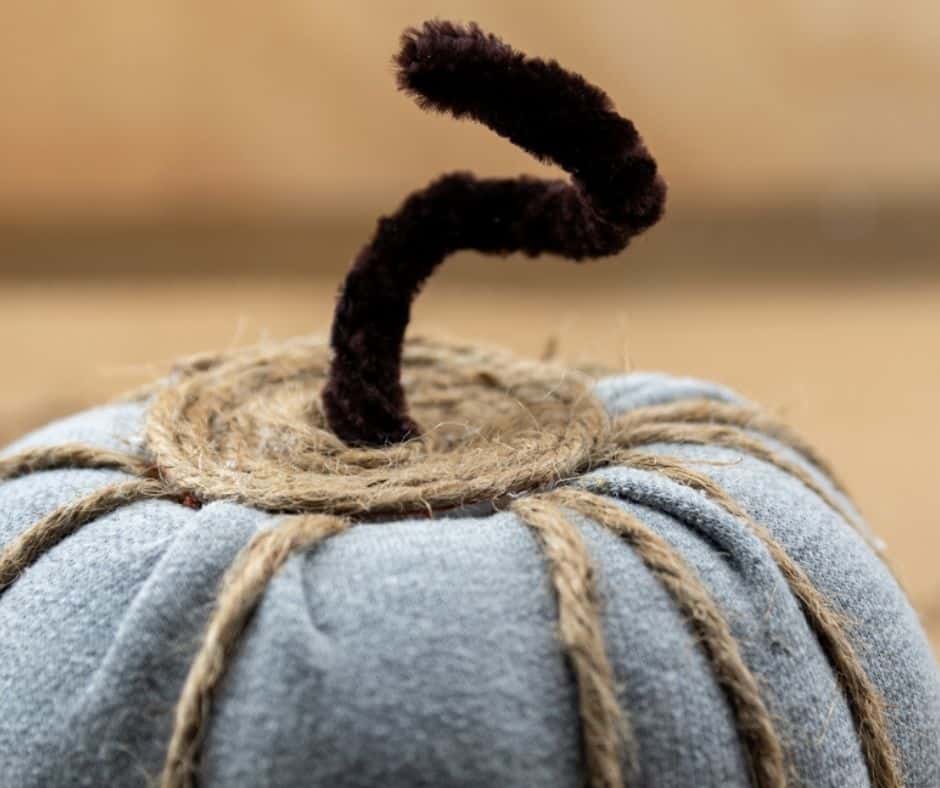
Next it’s time to create the stem. I tried several different ways to create a stem for this pumpkin. The little green stump that came with it just wasn’t going to cut it. Sticks cut to size would work, but not everyone has a yard to hunt for rogue little branches.
In the end, I came up with what I consider the perfect solution: pipe cleaners. They are cheap, easy to come by and you might already have them on hand. It’s super easy to create a fairly realistic looking vine stem with them.
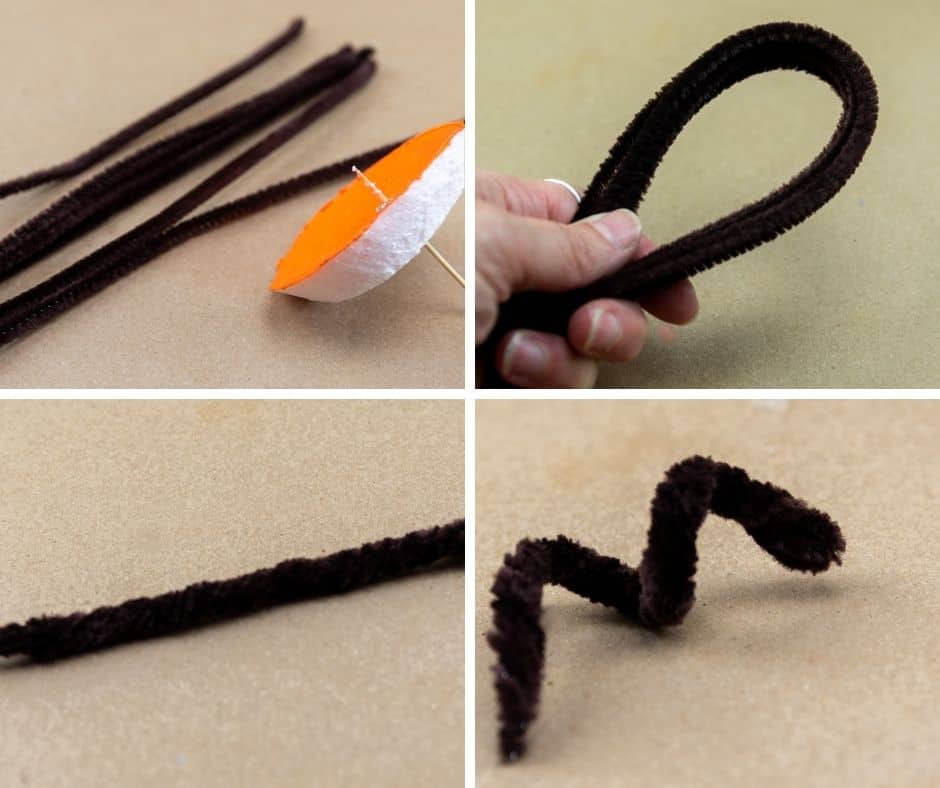
Depending on the thickness you want for your pumpkin stem, take 5 or 6 12″ pipe cleaners and fold the entire bunch in half all at once. Twist while holding the folded pipe cleaners at each end. Now you can shape the resulting stem any way you like. Trim the bottom flush with a sturdy pair of craft scissors.
Slightly enlarge the hole where the green foam stem was removed and glue the bottom of the pipe cleaner stem in place. To avoid melting the styrofoam piece, apply the hot glue to the stem before placing it in the hole.
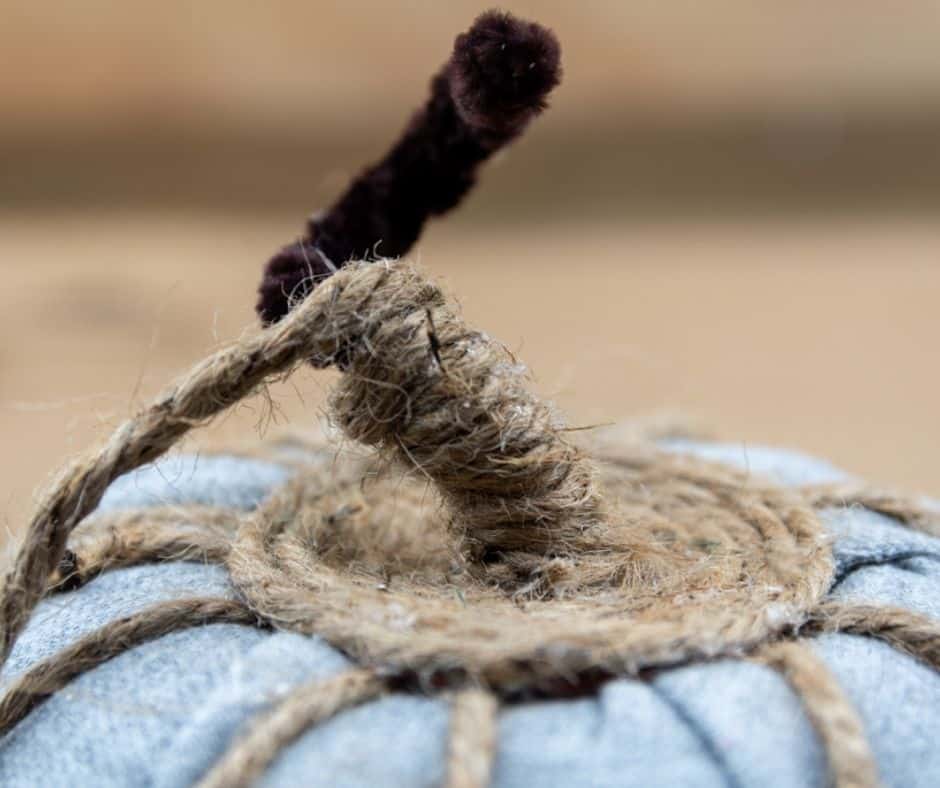
I made the mistake of putting the glue on the styrofoam, which resulted in a large indentation. Luckily, I was able to fill it just right with a piece of the leftover green stem.
Cut off another length of twine and begin gluing it in place near the center by the base of the stem. Work around in concentric circles gluing the twine in place as you go. Again, just apply a little bit of glue to the bottom of the twine and hold in place before moving on. Be careful not to touch the hot glue!
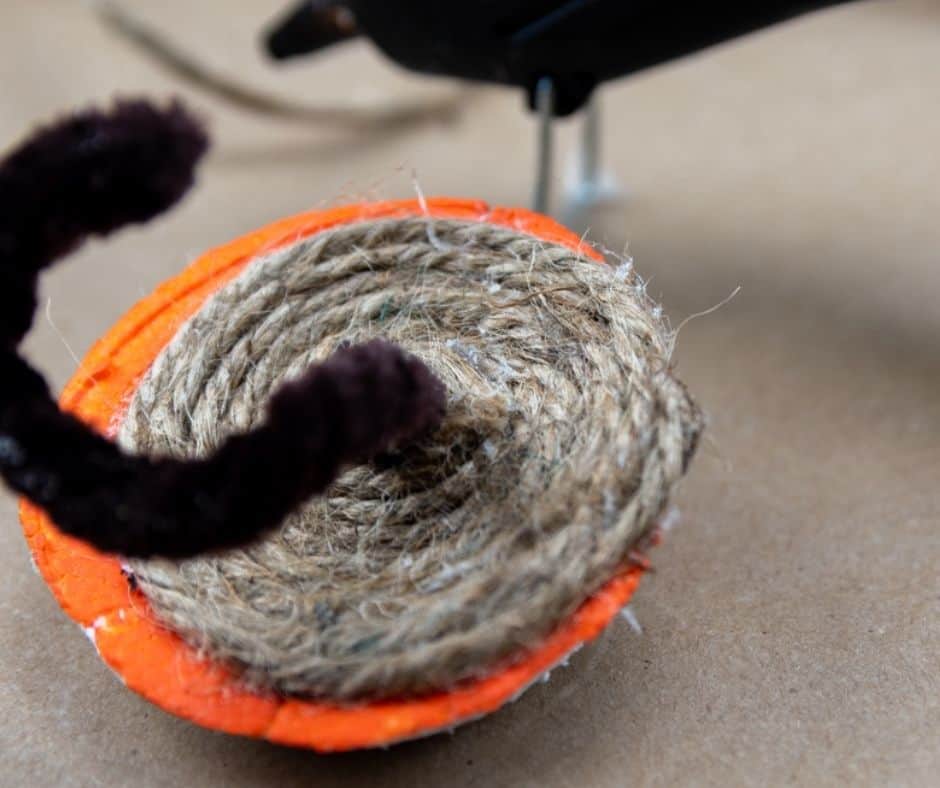
You can see here that my stem was off-center. That’s okay. Just like the bottom piece, the top will require a bit of trimming. Once you have glued on all the twine to the flat part, cut the string and fix it in place with another dab of glue. Gently cut away all of the excess styrofoam.
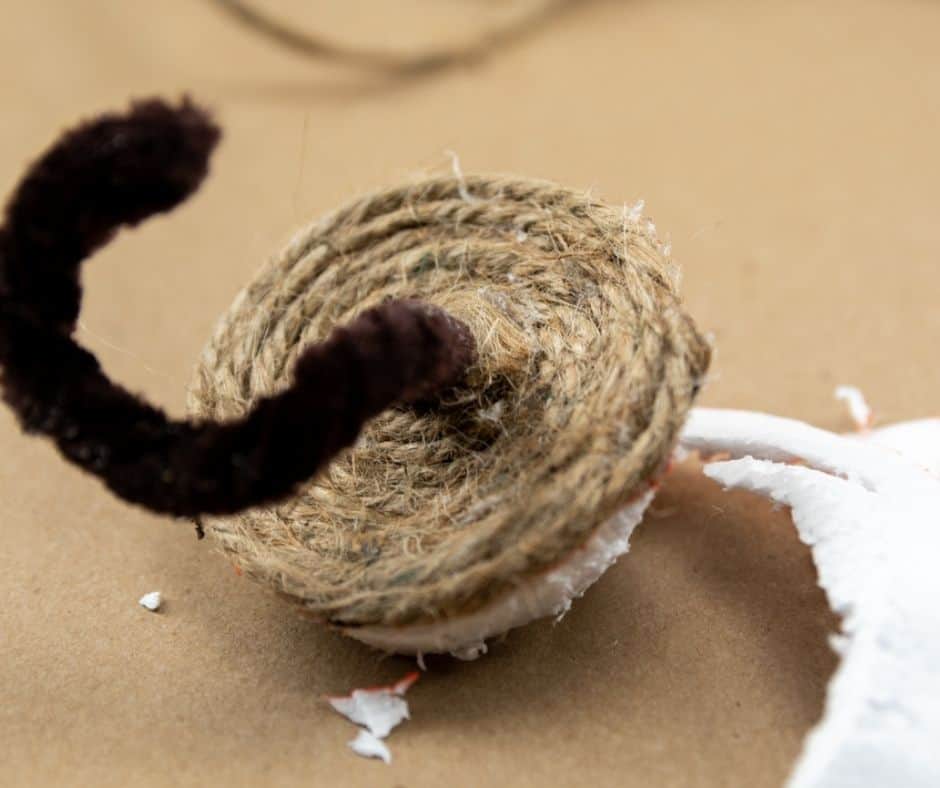
When you are happy with the fit glue the top into the top opening.
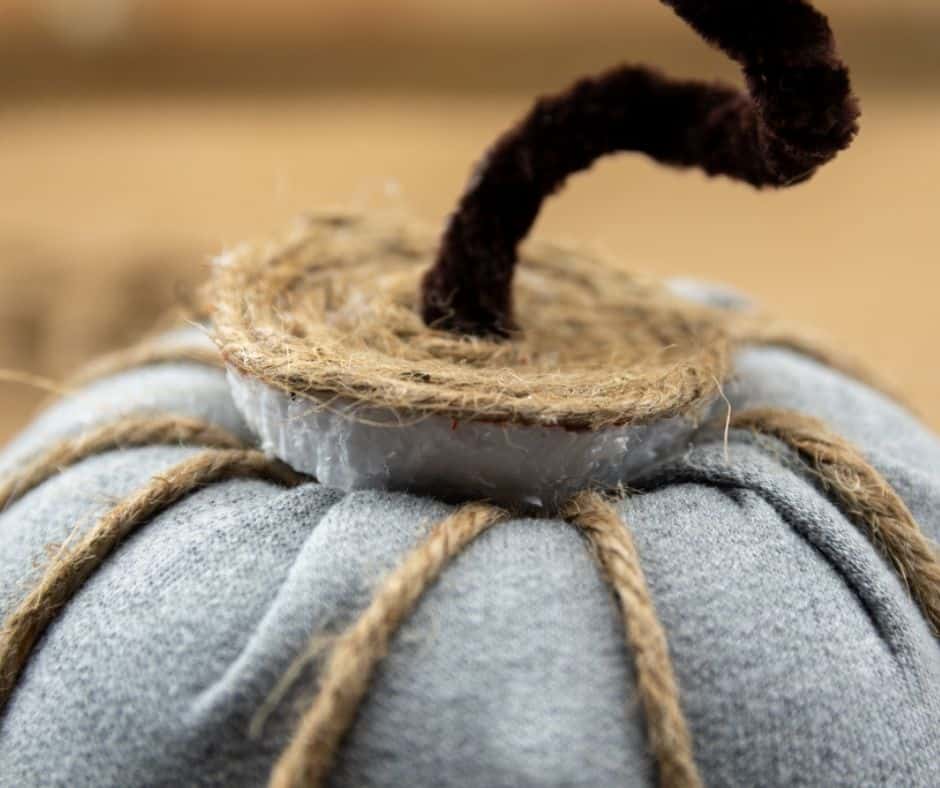
Now you are ready to wrap the stem in twine. Cut another length of string, about 3 ft (1 m) begin at the base of the stem and work your way around the stem gluing the twine as you go. To keep the stem from peaking through, keep the string rows close together. Once you are at the top, cut off the string and glue in place to conceal the pipe cleaner stem tip.
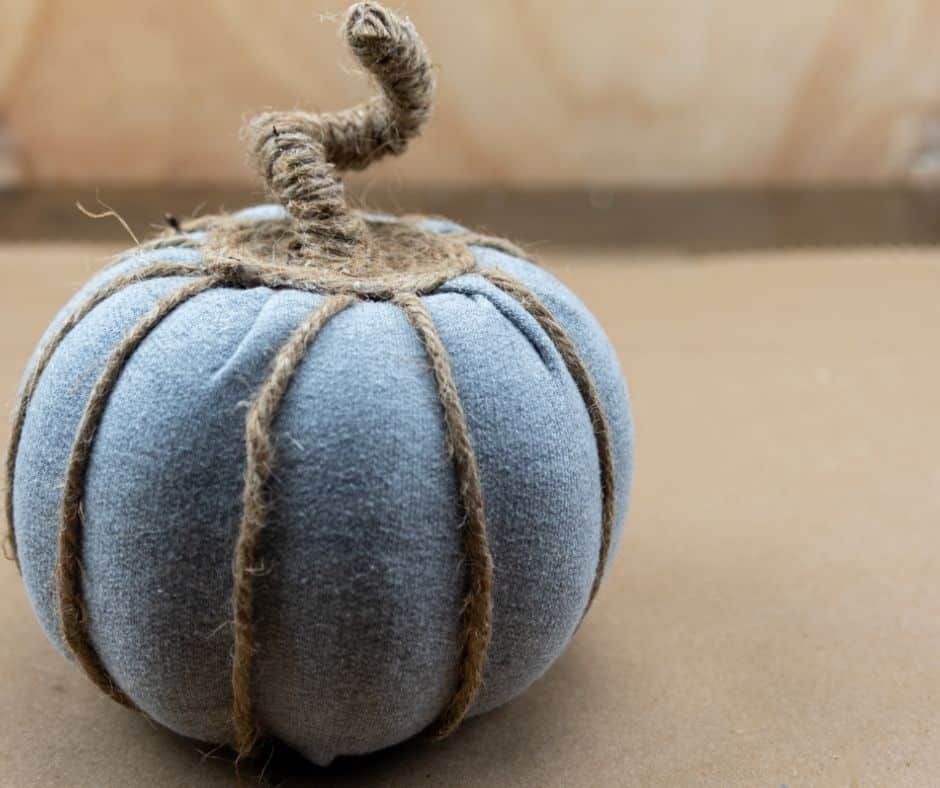
And you’re done! I am so happy with this look! What do you think?
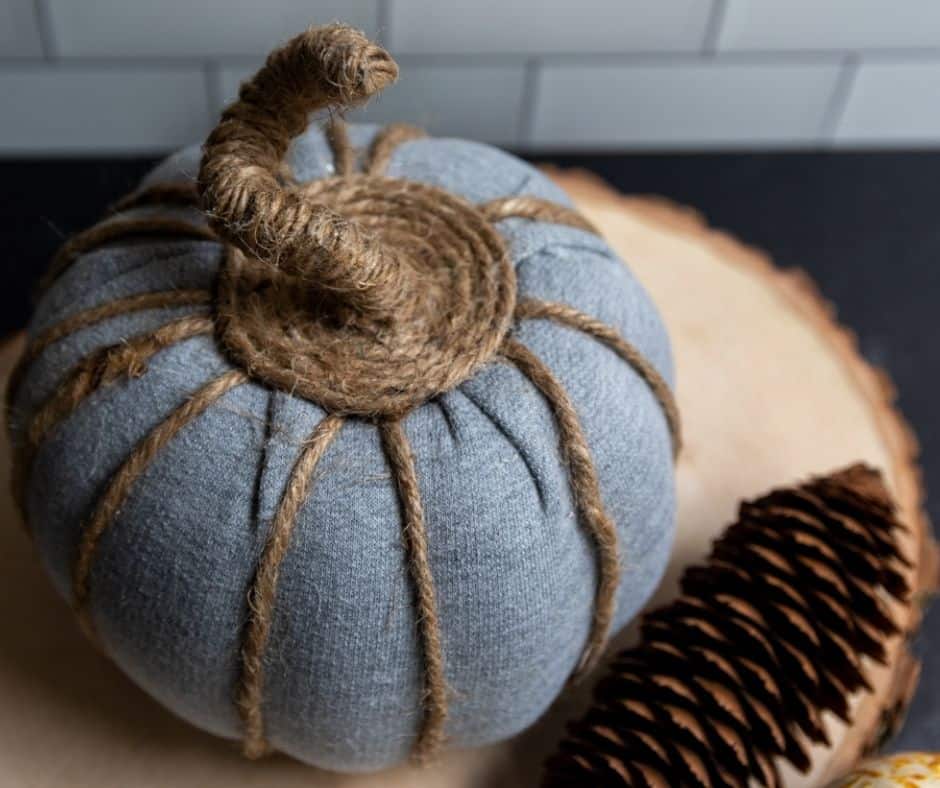
You can add ribbon or greenery or display it as part of a group of pumpkins.
This is a pretty easy project and if you have some fabric on hand, it will come in right around the $2 mark. Not bad, eh? For some other quick and easy crafts using basic materials from Dollar Tree or thrift store finds check out these posts!
EASY FRUGAL DECOR
CREATE A SIMPLE CAKE STAND FROM THRIFT STORE FINDS
HOW TO CREATE A SUCCULENT WALL PLANTER
EASY REVERSIBLE MOD PODGE SIGNS WITH SAYINGS
And now, if you’ll excuse me, I have some more Dollar Tree Pumpkins to decorate!

Looks great! Easy too! Thank you for the idea.
Thank you!
KARIN YOU ARE AWESOME. Will try to make one of these pumpkins at some point
when we are out of quarantine. Great idea. Keep em coming.
Thank you so much! Good luck with quarantine! Please do share pics on our Facebook group when you make your pumpkin. I would love to see it!