Confession: I am not really all that much into Halloween. I know. It’s a holiday that I didn’t grow up with, so there are no warm and fuzzy memories for me to reflect back on. Generally, since the kids are now grown, I don’t decorate much for Halloween especially inside. For me, orange pumpkins are more of an outdoor thing. But that doesn’t mean that I snub pumpkins altogether. A few years ago I scored a pretty gold and concrete pumpkin which I adore to this day.
Today is the second of three in my gaudy Dollar Tree pumpkin makeover series. The plan for this one was to create an easy but realistic-looking gold and concrete pumpkin planter. I was aiming for something that would look great for the entire Fall season and possibly into Christmas. Naturally, I spent quite a bit of time on Pinterest before deciding on the easiest method. What I came up with actually worked and the result is pretty darn convincing!
Many techniques involve painting several layers = more work and artistry than I was willing to invest. One even used several shades of paint and flour! My method is much simpler than that! To make it easier and faster still, make several at one time. You will want more than one, I promise!
For more ideas, printable art, cleaning and bodycare recipes be sure to check out the FREE Resource Library. Just sign up here and your password is on its way to your inbox.
* This post contains affiliate links. If you make a purchase by clicking on an affiliate link, I may earn a small commission at absolutely no additional cost to you. You can view my complete affiliate link policy HERE.
HOW TO MAKE A GOLD AND CONCRETE PUMPKIN PLANTER
Before we get into the steps, I need you to know that this is an indoor project.
SUPPLIES YOU WILL NEED TO CREATE YOUR PLANTER
- Carvable styrofoam pumpkin
- Gray latex paint – buy a sample if you don’t have any
- Baking soda
- Craft brush
- Gold acrylic craft paint
- Knife
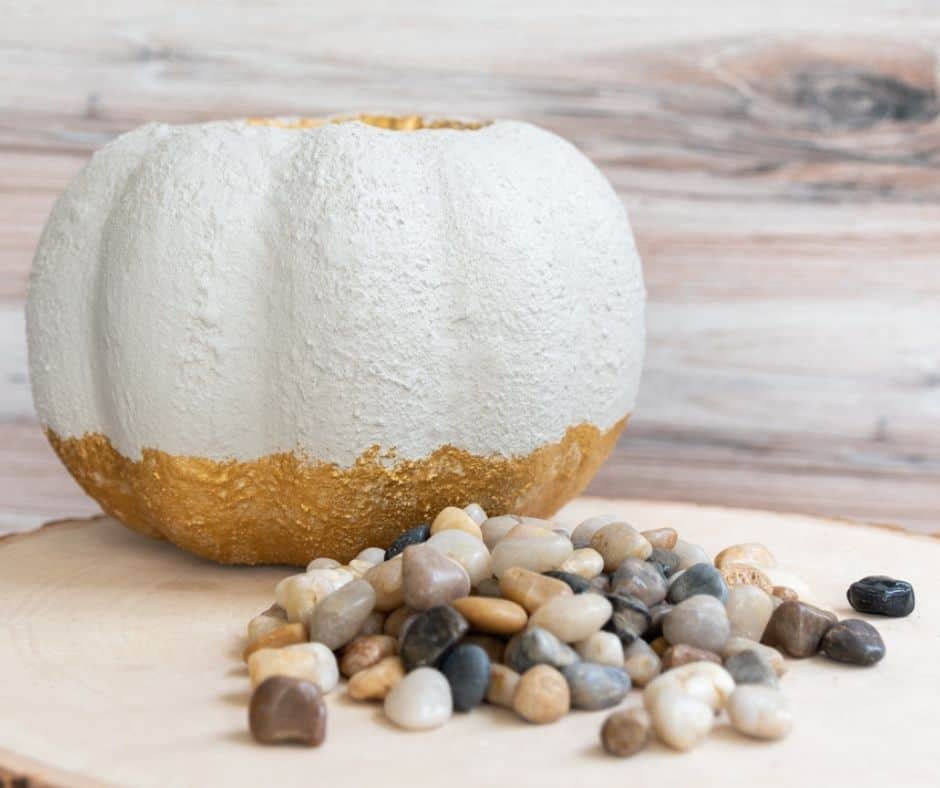
- Small rocks – from Dollar Tree
- Styrofoam cup
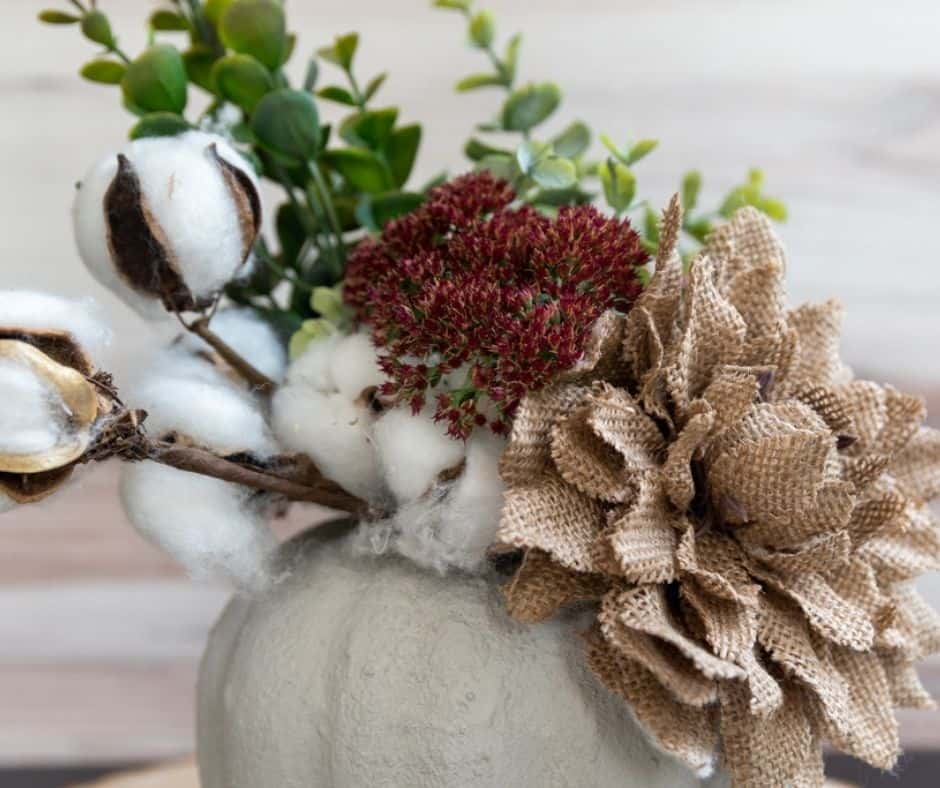
- Assorted floral picks – I used a burlap flower, faux eucalyptus, cotton picks plus live sedum from my garden


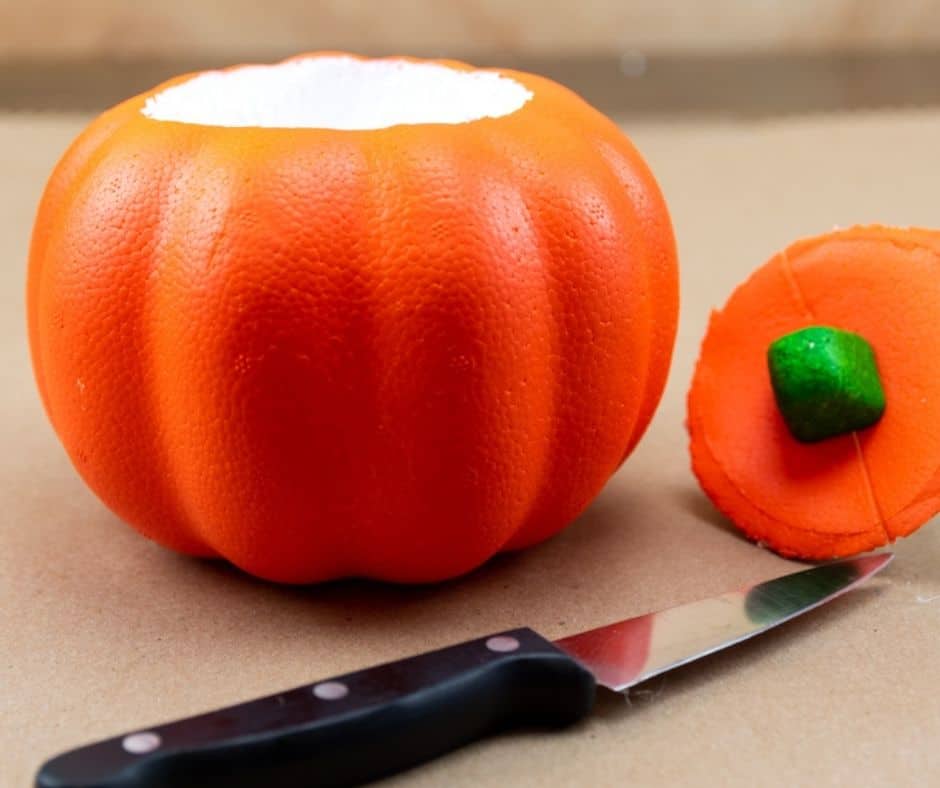
CARVE and Paint THE pumpkin
Carefully carve a circular opening in the top of your styrofoam pumpkin, much as you would a real one. The hole should be around 4″ (10 cm) in diameter.
Now you are ready to paint.
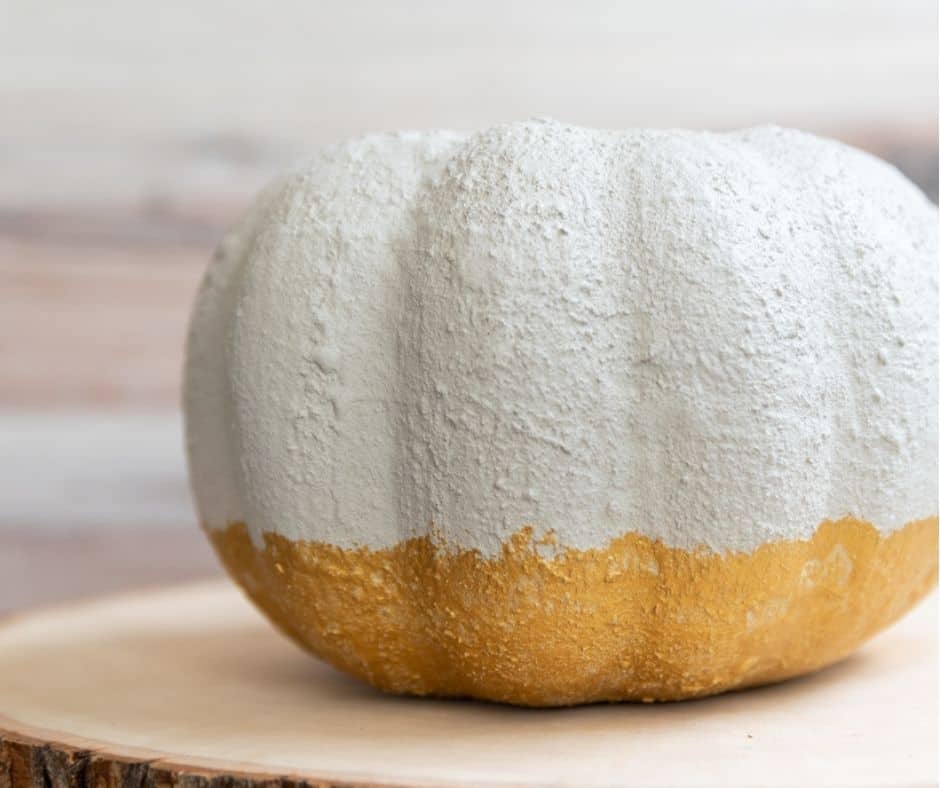
To create the texture of concrete or cement, add baking soda to the gray latex paint. There should be equal amounts of paint and baking soda. I used about 1/2 cup of each. Mix the paint and baking soda well until it resembles coarse runny peanut butter.
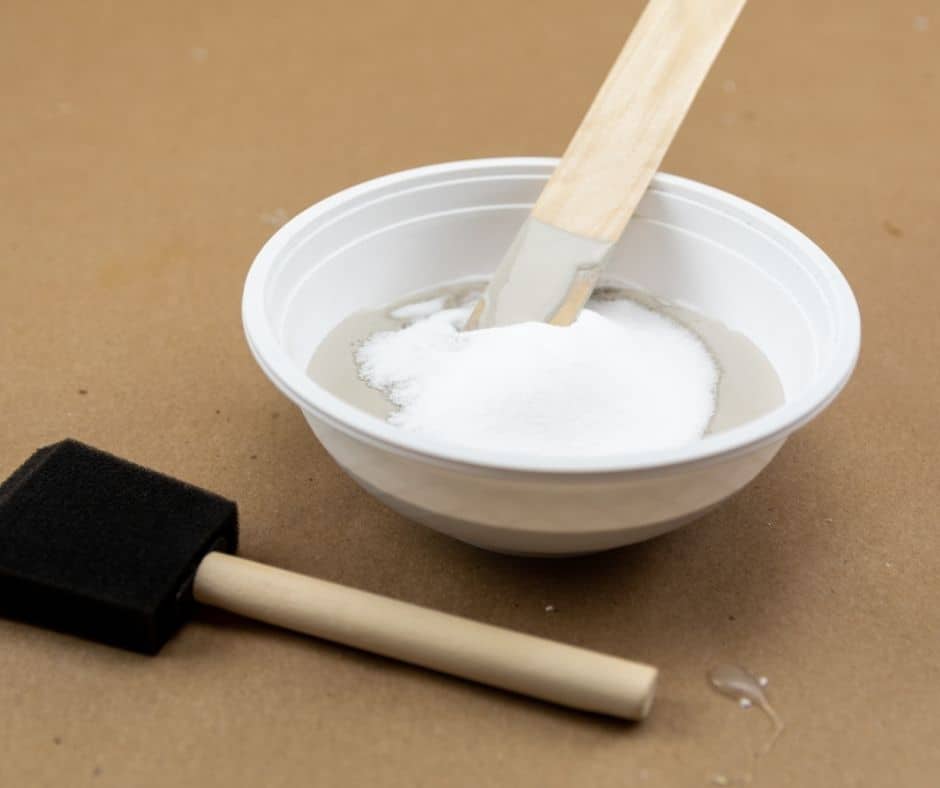
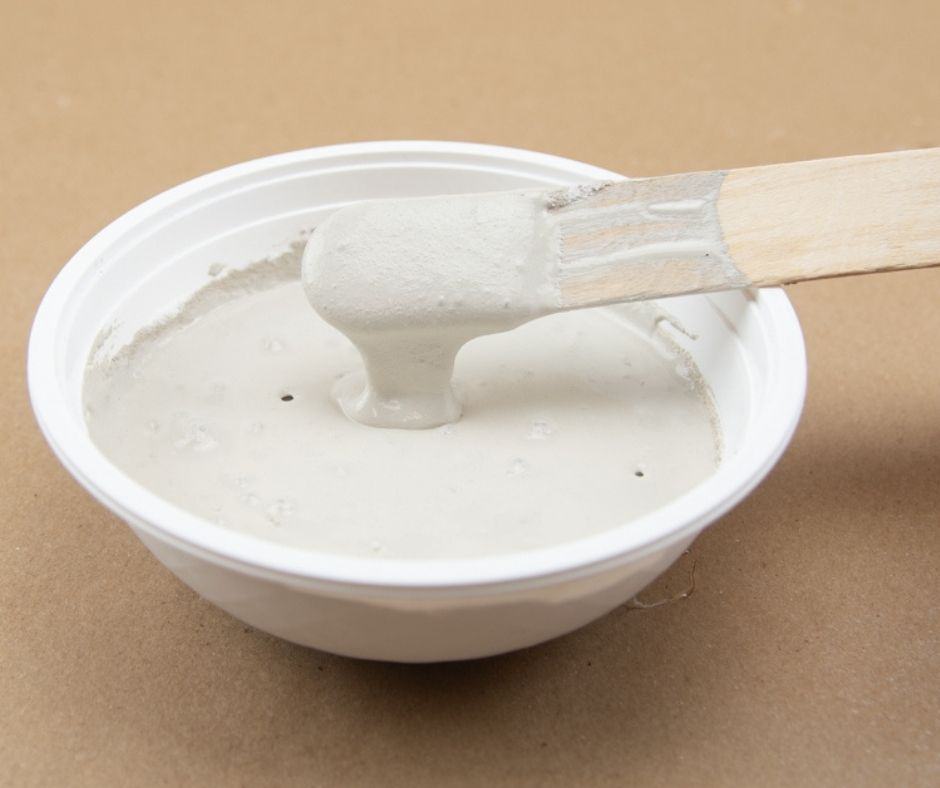

Place the pumpkin on a protected surface upside down and apply the paint/baking soda mixture with a craft brush. I tried to do this with a foam brush at first, but it didn’t work nearly as well as the craft brush. Make sure it is covered evenly. Don’t apply too much paint as it will have a tendency to run, even with the baking soda added.
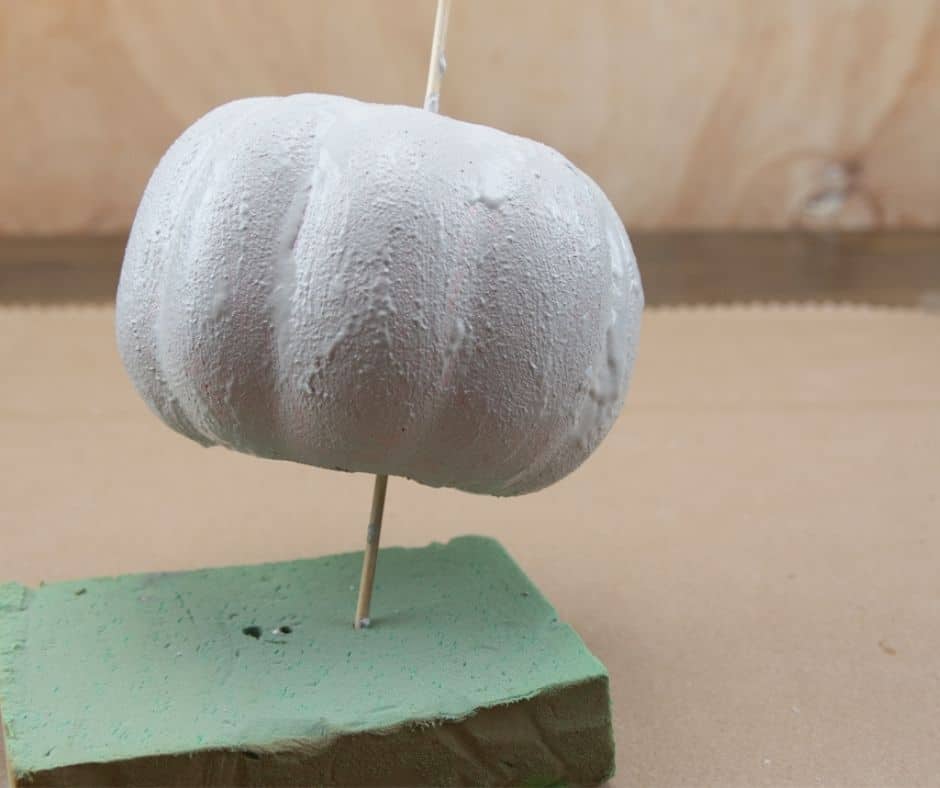
You can either put the pumpkin on a skewer to dry or set it on a small woodblock. Depending on the coverage achieved with the first coat, you may want to give it a second layer of paint or touch up thin areas. Let dry again.
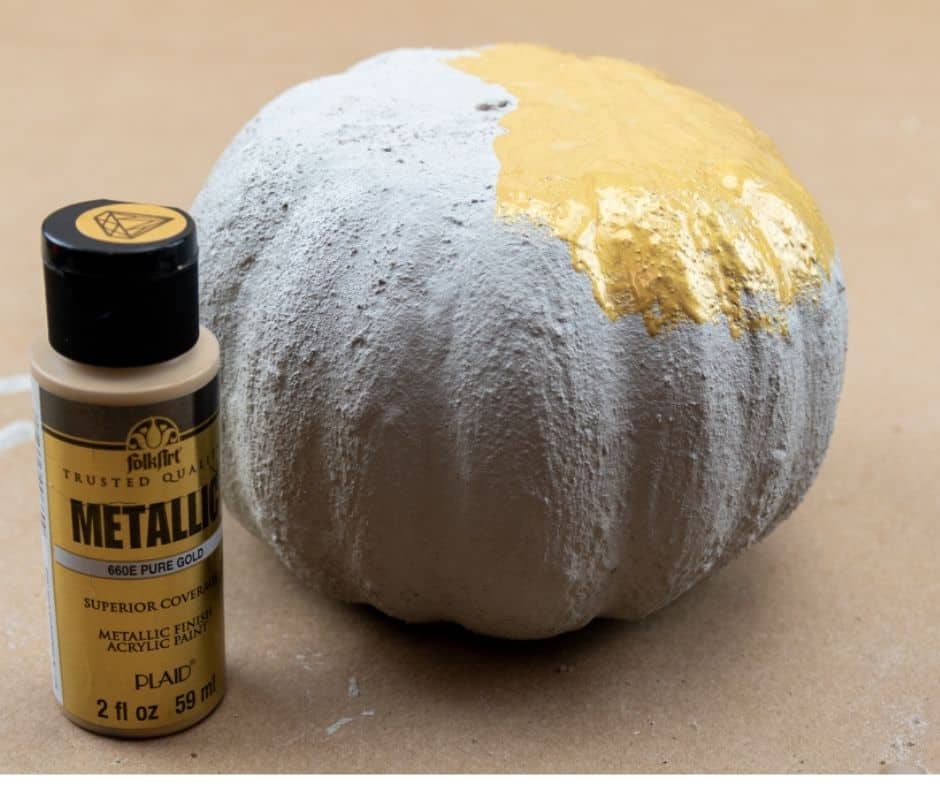
When the pumpkin is thoroughly dry, apply gold acrylic paint to the bottom. I only needed one coat for this.
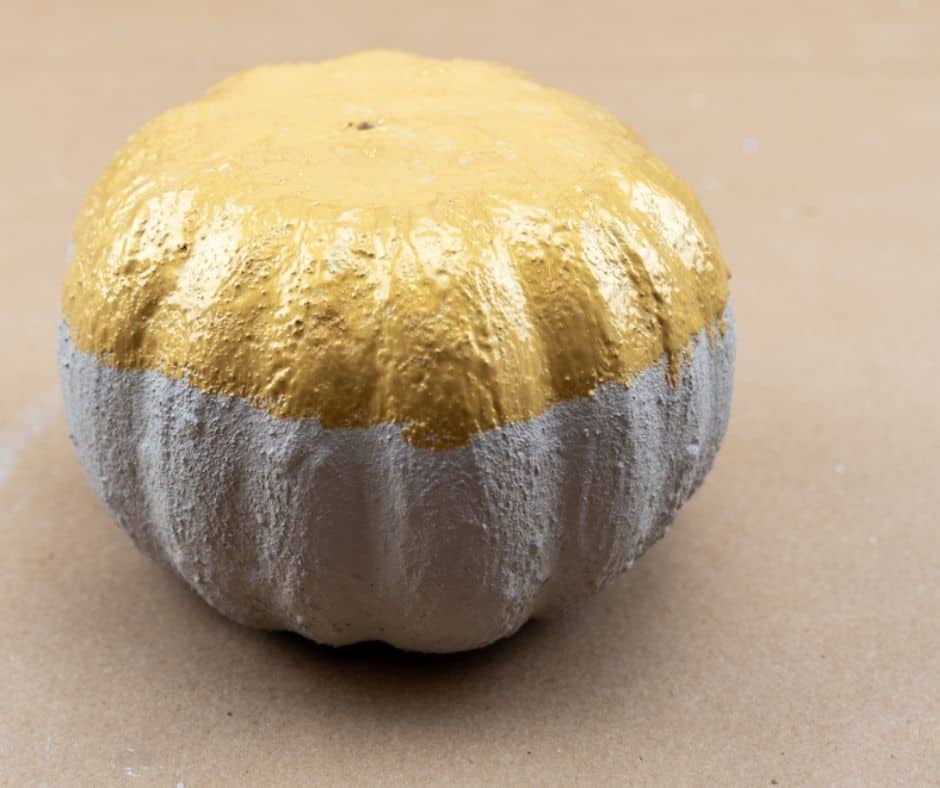
At this point, you can give your pumpkin a coat of acrylic sealer if desired.
DECORATING YOUR GOLD AND CONCRETE PUMPKIN PLANTER
We have arrived at the fun part!
Gather the floral elements you would like to add to your planter. A mix of various textures as well as height works well.
To secure them inside the planter I came up with a very simple trick. First I added a handful of small rocks (from the Dollar store) to the bottom to give the styrofoam planter some much needed weight.
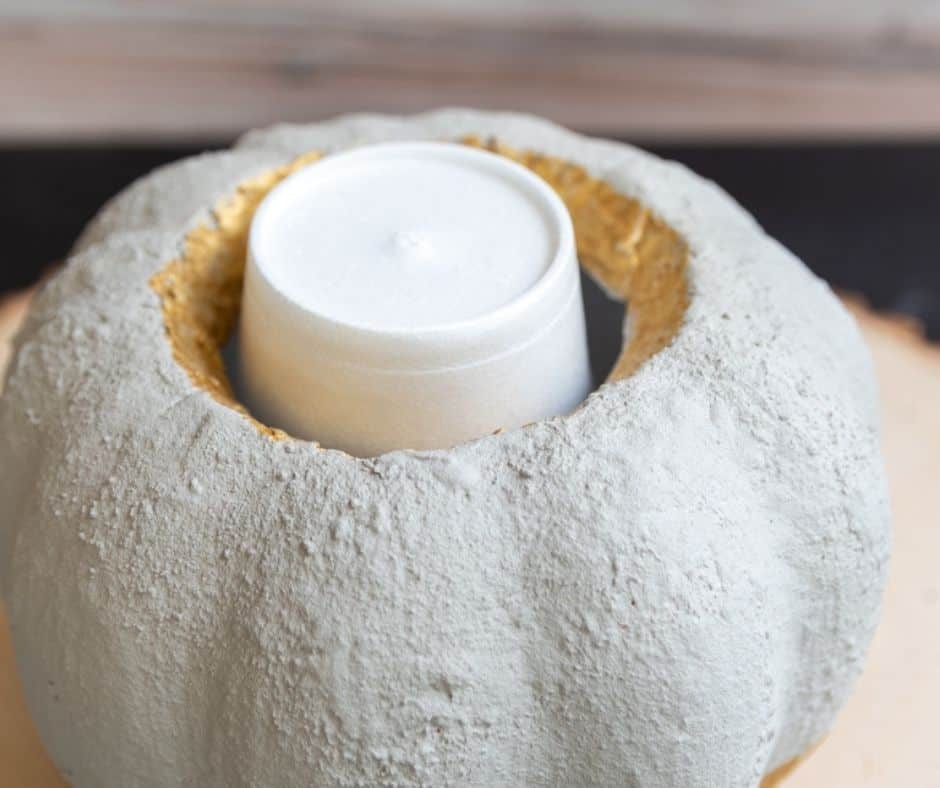
Then I placed a styrofoam cup into the center opening upside down. This is a very simple but effective way to hold all of the stems in place securely. Cut off the rim if the cup is too wide and tall.
You could also use a piece of floral foam. Just be careful when you place it inside the pumpkin.
Now it’s time to arrange the floral picks. I love the look of the burlap flower front and center. The eucalyptus sprigs right behind it give it some much-needed height, while the cotton bolls add interest to the back and side. Sedum cuttings from my garden fill in any open areas and add a little color.
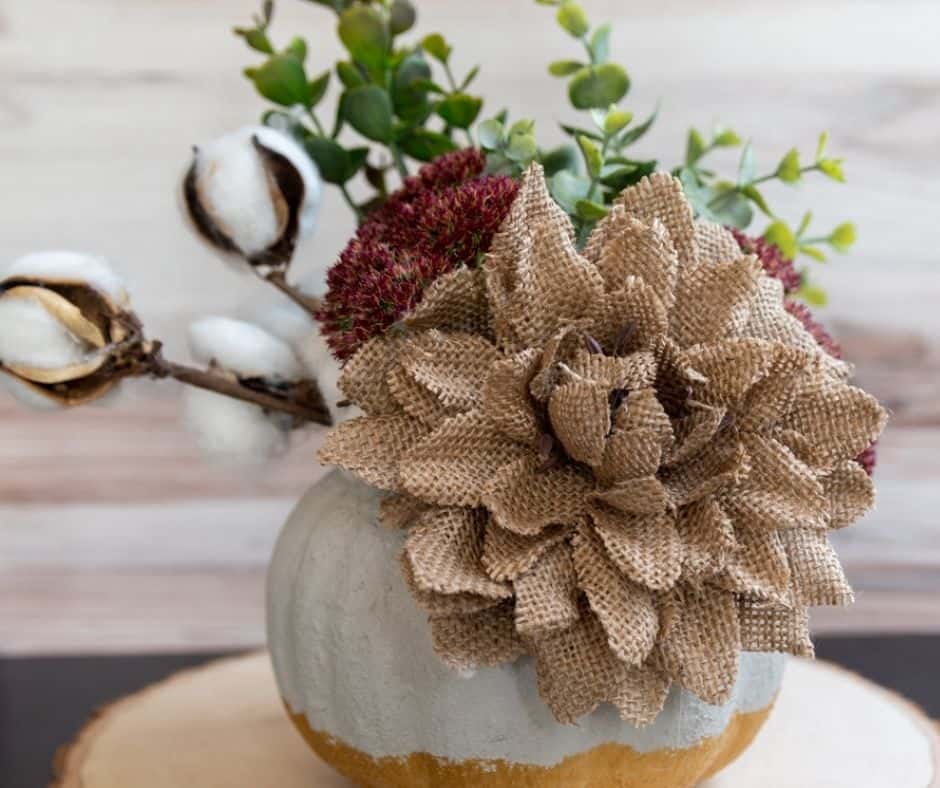
Normally, I am not a big fan of fake flowers, but I have to admit, these look pretty realistic, especially when paired with natural elements like cotton and burlap. Can’t find burlap flowers at your local craft store? I found a great tutorial for you that shows how you can make your very own burlap roses.
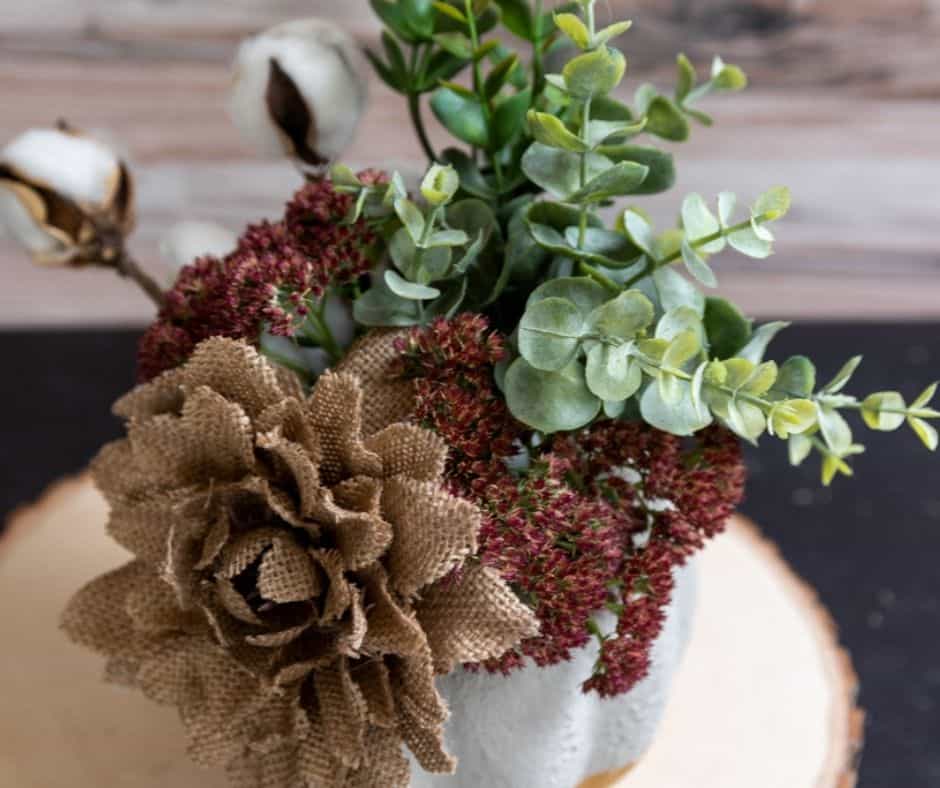
If you don’t have access to sedum, you can always fill in those areas with floral or berry picks. I plan to replace my sedum cuttings with those as they fade away.
FINAL THOUGHTS ON THIS CONCRETE PUMPKIN CRAFT
I am thrilled with the result. Honestly, when I began painting the pumpkin with the paint and baking soda mixture, I had my doubts about whether this would work out as planned. It totally did.
This is the kind of decor that looks great throughout the Fall and Winter seasons. Wouldn’t they make a nice addition to the Thanksgiving table? These gold and concrete pumpkins don’t take up much room but definitely make a statement.
Even if you can’t get your hands on a carvable pumpkin, you could certainly use this technique with other materials like glass or metal.
If you like this project, be sure to check out my easy rustic sweatshirt Dollar Tree pumpkin makeover. I know it’s getting a bit late in the season already, but I have one more pumpkin project coming this week before moving on to other fun stuff.
Do you have an avid crafter on your gift list? Treat them to something they really want from my Gift Guide For Crafters.
Follow me on Instagram and Like the TWGL Facebook page to stay in the loop. Did you sign up for your password to the FREE Resource Library?