Updated in February 2020
What do you do to maximize kitchen storage when your home is not blessed with ample space where it’s needed most? That is a question that occupies my mind a lot.
You see, even though our home would be considered quite spacious, clocking in at well over 3,000 square feet, certain areas are downright cramped. Sadly, the kitchen is one of them.
In my recent post on organizing kitchen drawers, I eluded to the fact that not all necessary items made it back into the drawer, but wound up in a new home. Today I want to show you how I squeezed a little more room out of my teeny kitchen to free up drawer space and keep measuring cups and spoons handy and invisible.
You see, our kitchen is not only super short on cabinet space, but it also lacks wall space as well. So much for all the nifty storage solutions that look so amazing on Pinterest.
Not to despair, there is still plenty of vertical room to work with, if you know where to look! Best of all, this is not limited to tiny kitchens in huge houses! It will work in bathrooms, laundry rooms, even RV’s.
When storing items this way there are a couple of considerations:
- fit
- practicality
Basically that boils down to whether there is ample room to house the items and whether it makes sense to store them there with regards to how they are being used. For me personally, I also need to make sure it looks good, even if I am most likely the only person to see it regularly.
It was actually surprisingly simple, not to mention cheap to achieve all of it! Right up my alley:)
Here is how all of the stuff in the drawer looked like before:
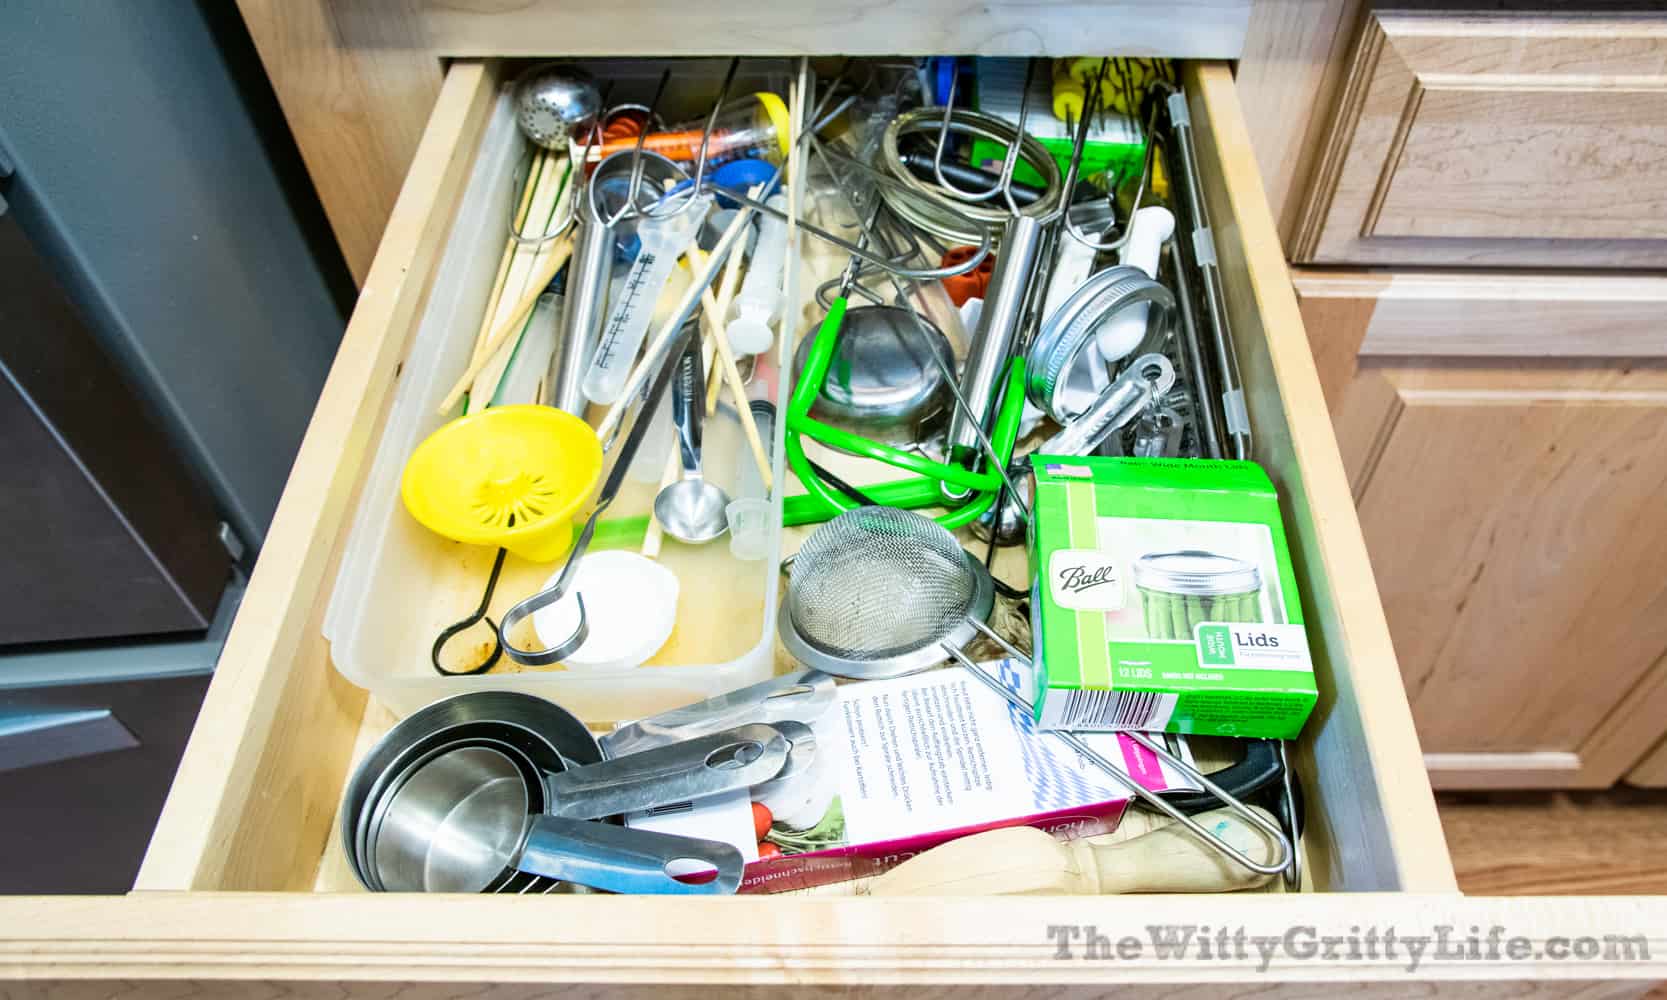
I know, not for the faint hearted. Sorry, should have warned you! Here is the after, though:
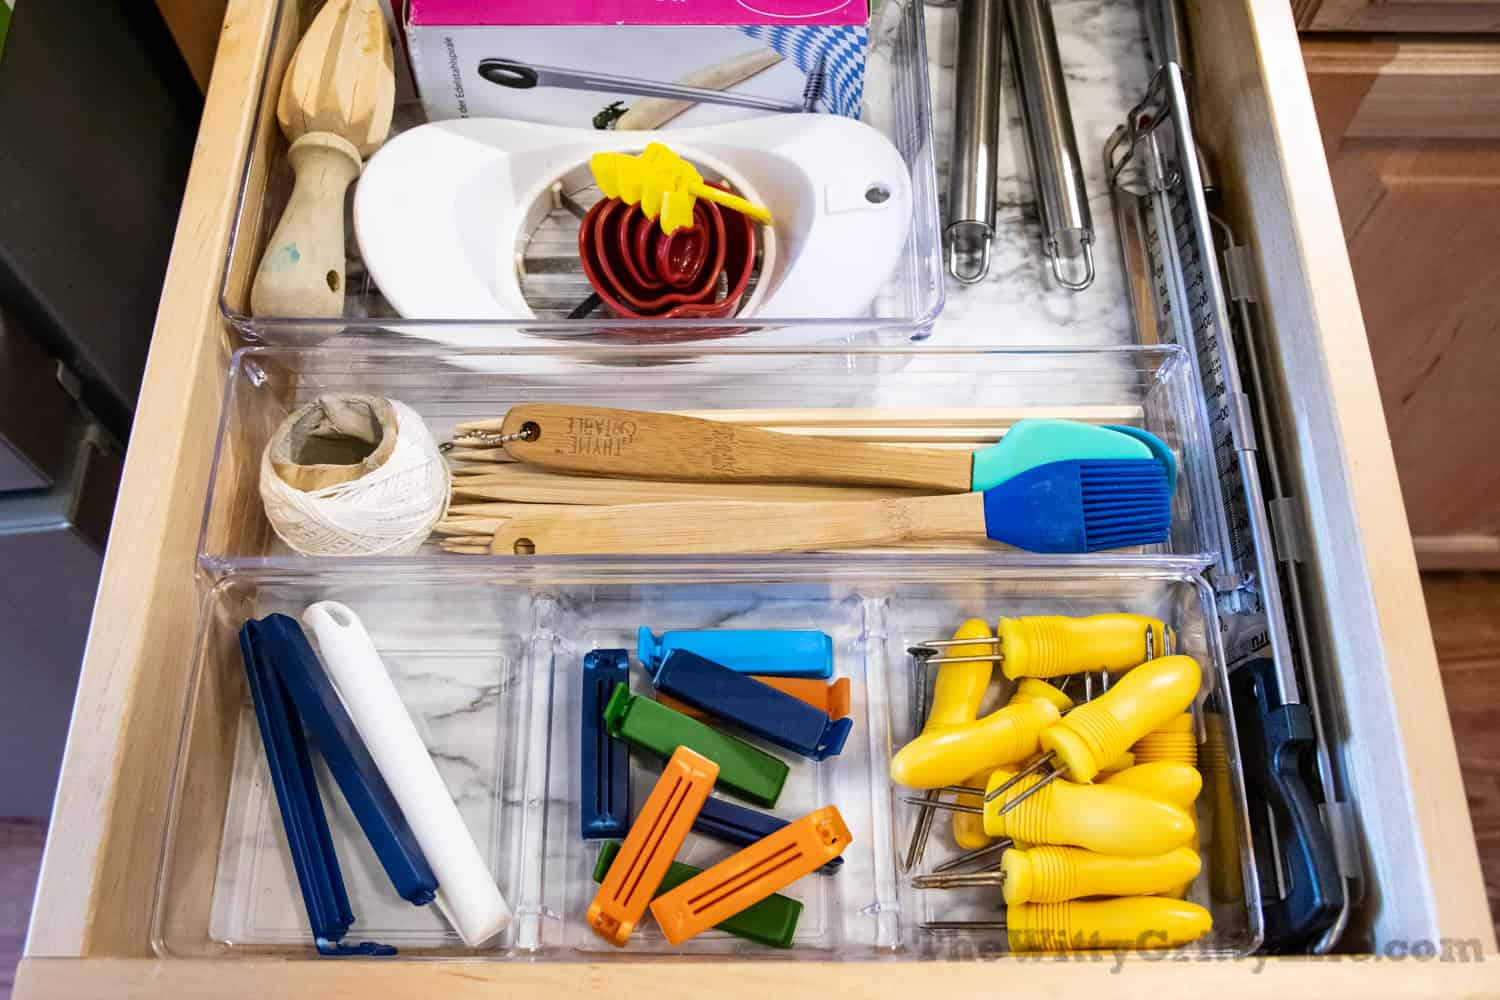
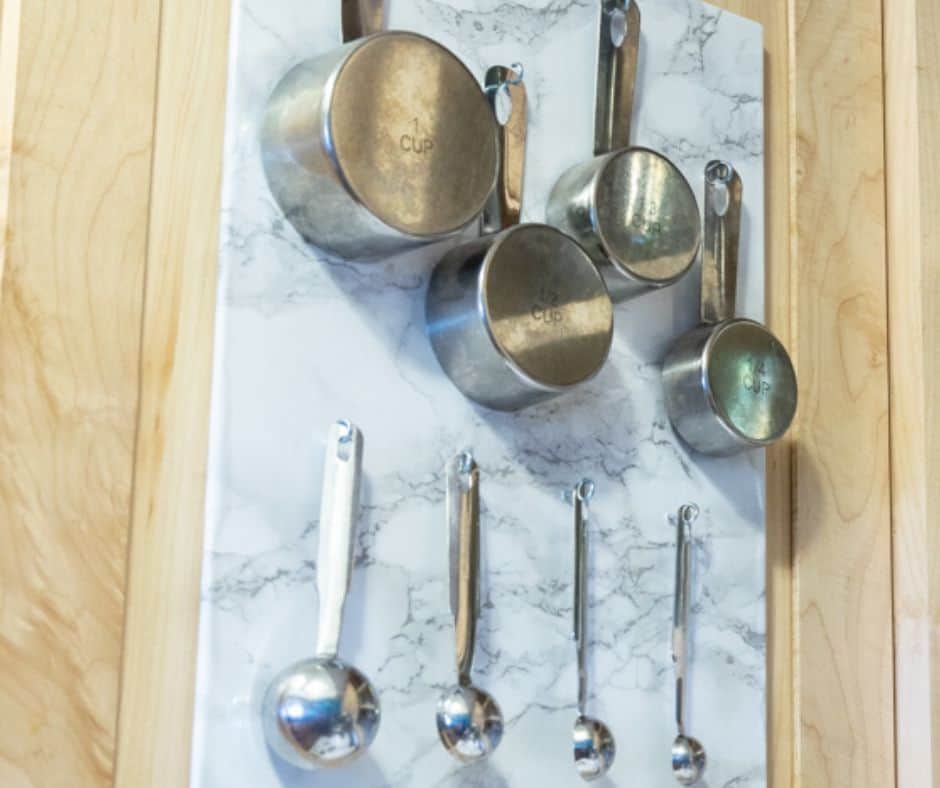
As you can see a whole lot of stuff didn’t make it back into the drawer. Among those items were the very frequently used measuring cups and spoons. One of the issues that motivated me to store them differently was that I often found myself rummaging through the drawer in search of the right size cup or spoon. They often wound up separated, so annoying. To make sure each of them had its own little spot and would be easy to locate, hanging them up just made sense.
But I was not about to drill holes into the back of the cabinet door. Nope, couldn’t do it. Turns out you don’t have to! So let’s get started, I can’t wait to show you how to create your very own in-cupboard organization!
For more helpful tips, tutorials, and printable art check out my FREE Resource Library! Just sign up here and your password is on its way to your inbox!
This post contains affiliate links for your convenience. You can read the full affiliate policy here.
MAXIMIZING KITCHEN STORAGE
Before you proceed, you need to get a good idea of which items you want to store behind cupboard doors and where. This will, of course, vary from one kitchen to the next. In my case, I opted to use the cabinet door that was right above the now newly reorganized and decluttered drawer.
Our kitchen happens to be a galley, so it is easy to have pretty much anything in reach. The cabinet door that was to be the new home of my measuring cups and spoons is right behind the workspace where they will be used frequently.
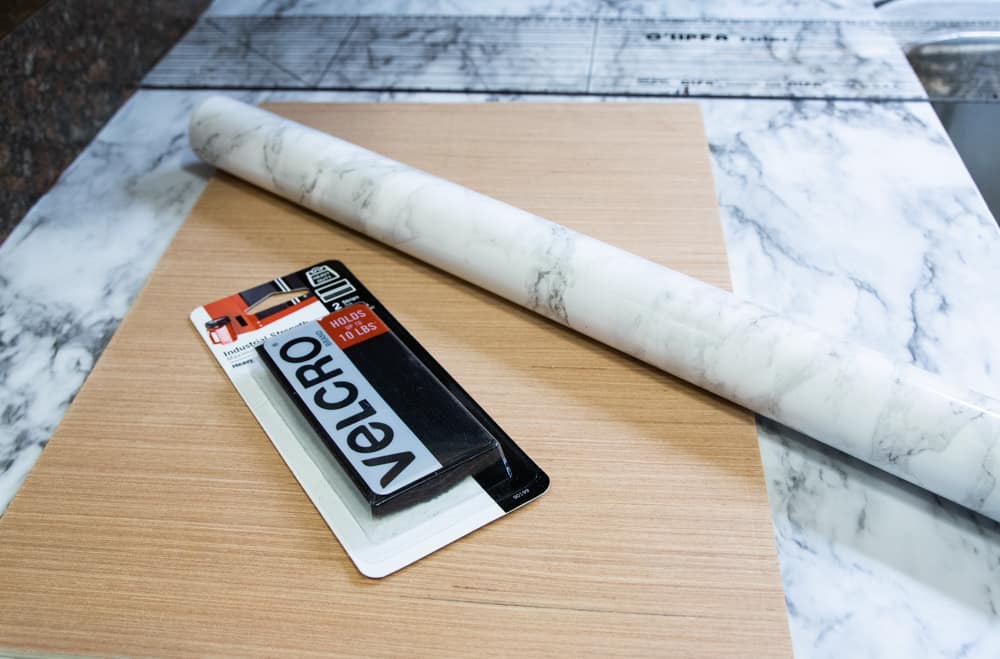
supplies and tools NEEDED
- Thin 1/4" plywood, cut to your desired measurements
- Adhesive paper (I used this marble adhesive paper)
- Ruler
- Scissors
- Small cup hooks
- Extra strong adhesive hook and loop tape
Tips: You can use any thin wood board or purchase a piece of Plexiglas cut to size. I happened to have 1/4 plywood on hand from a previous project.
It needs to be lightweight yet sturdy enough for cup hooks to be screwed into it. Choose a neutral adhesive paper or any paper that complements your kitchen's aesthetic.
As another, slightly more labor-intensive alternative, you could skip the adhesive paper and stain/polyurethane the plywood to match your cabinets.
Use only good quality adhesive hook and loop tape. Bargain versions generally lack the proper adhesive to hold your board in place securely.
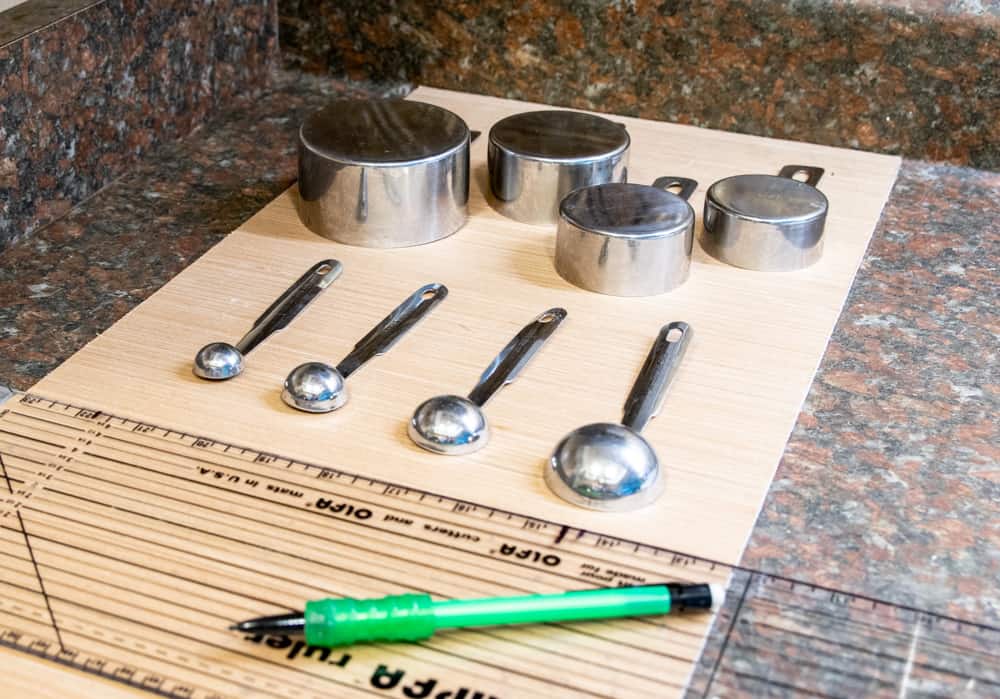
Measure YOUR AVAILABLE STORAGE SPACE
Your measurement depends on the size of your cupboard door and the items you plan to store. You can play around and get a good idea by cutting out a piece of craft paper or cardboard in the desired size and arranging your items on it flat. Consider the placement of shelves in your specific cupboard to make sure you can close the cabinet door properly with your vertical organizer in place.
Another good guideline is to keep the overall size of the organizer smaller than the cabinet door inset. You don't want to impinge on hinges and other hardware.
Cut MATERIALS TO SIZE
Now it's time to cut your thin plywood to size. You can do that with a circular saw or even a hand saw. If you prefer not to handle a saw, ask the friendly people at the home improvement store to cut them to size for you.
Once you have your wood backing cut to the proper size you can cover it with the adhesive paper of choice.
Here is the piece of plywood I used before it's covered and while I am finding the perfect layout for my space.
Attach Hook and Loop Tape
Once you have cut and covered your piece, flip it over and attach two pieces of adhesive hook and loop tape to the back. Be sure to keep both parts of the tape stuck together, it makes placement a snap.
Space them evenly to hold the weight consistently. You may use a third piece in the middle if your cabinet door is a bit wider.
Leave the protective cover on the back of the tape until you are ready to attach it inside the cabinet door.
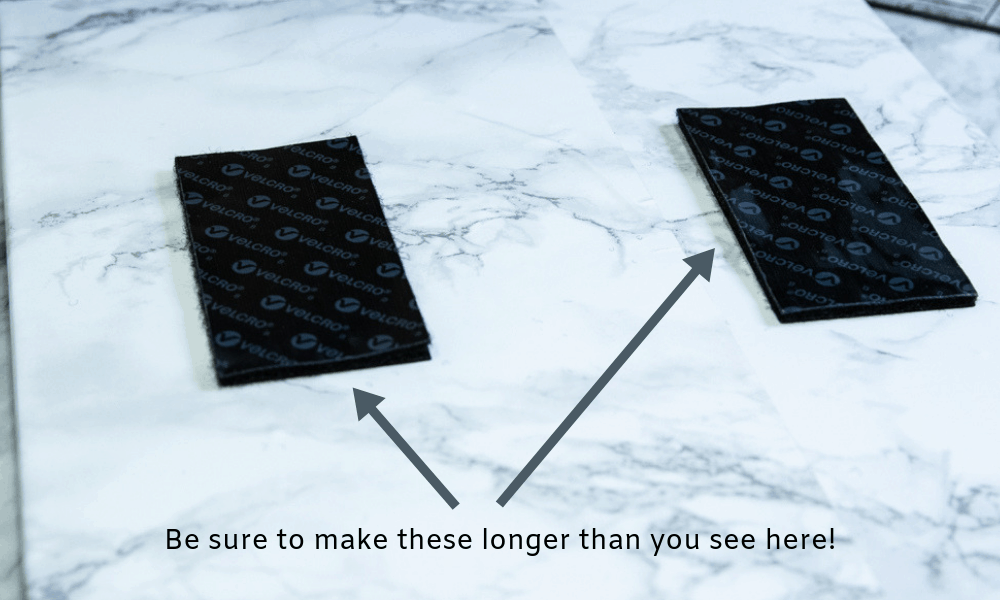
As you can see I was a little conservative when I applied my hook and loop tape. It is holding up fine, but I would definitely use twice the length shown here.
Attach Hooks to the panel
Now it's time to screw the cup hooks into the front.
Double-check your desired layout to be sure everything is exactly where you want it to be.
Make sure none of the screws go all the way through the back to avoid scratching the cabinet door.
Place the Holder Board
Make sure the inside of the cupboard door is free from any grease and grime to ensure proper hold of the adhesive on the hook and loop tape. My homemade glass cleaner recipe, available as a FREE printable in the Resource Library, is an excellent degreaser and super cheap to boot!
Prior to placing your holder board inside the cupboard door, mark its position lightly with a pencil. Use a level and just mark on each edge.
Once you are confident about the proper placement, peel the protective paper off the back of the hook and loop tape and place the holder board in the desired position. Press firmly to assure a good hold.
Hang TOOLS AND Utensils
This is the fun part! Hang your utensils on your new, awesome holder, step back and admire your handy work! ]
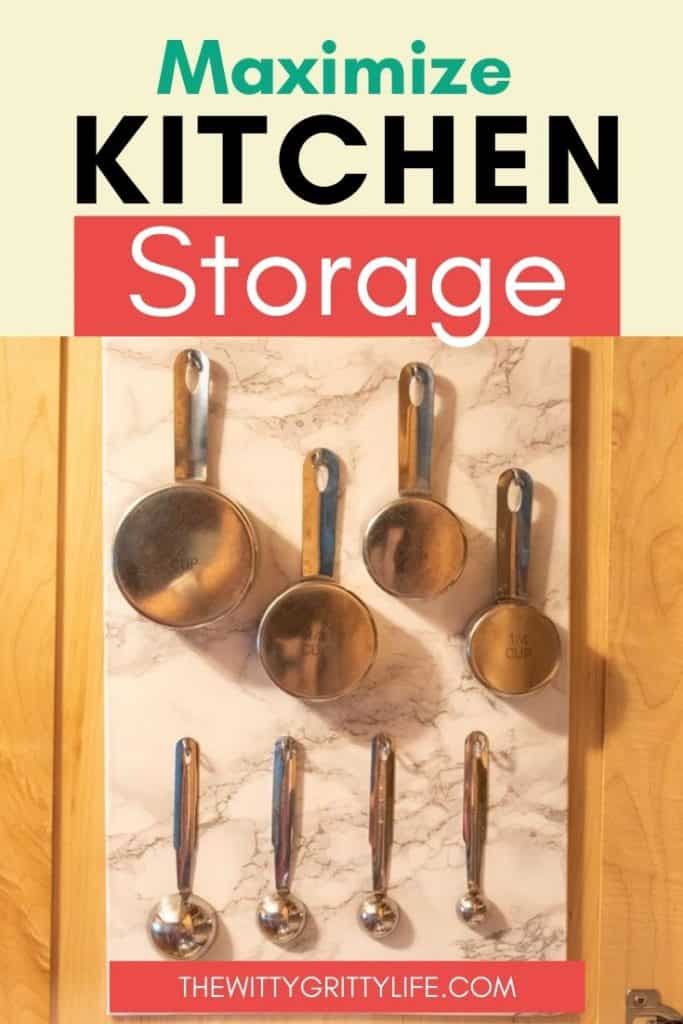
FINISHED PROJECT
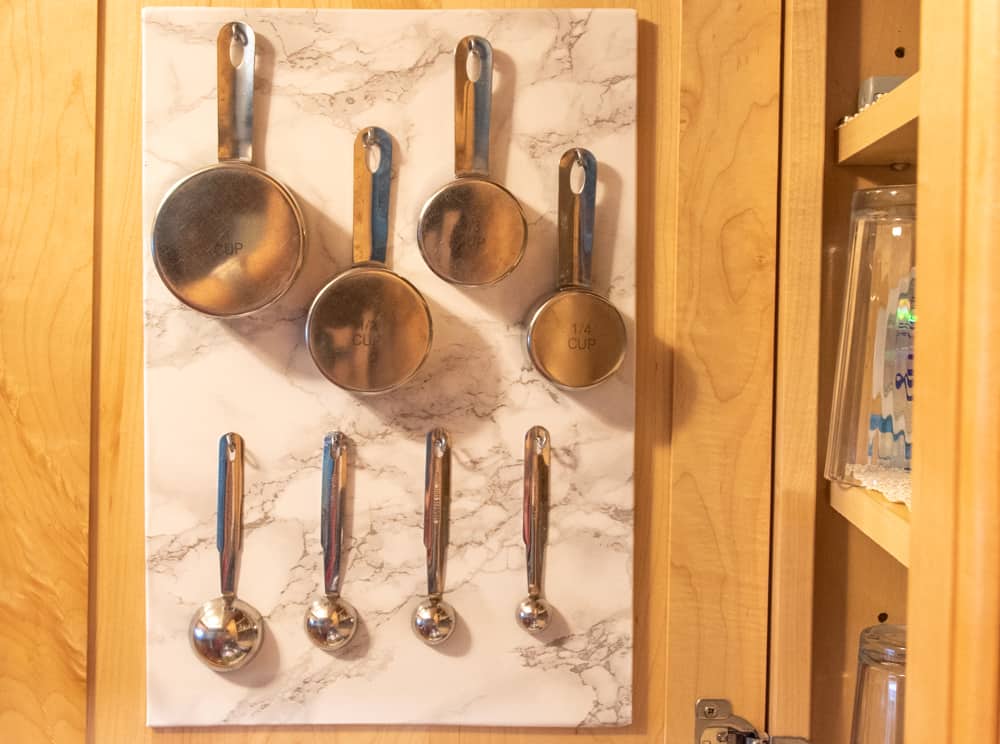
You can see I decided to organize both cups and spoons from large to small. Now that everyone knows where they go, my days of digging through a crowded, depressing drawer to find what I need are over!
I have to tell you, between my organized junk drawer and this measuring cup and spoon holder, I am feeling so much more organized in my wee play kitchen!
And while this may not be the most exciting project, I can confirm that it has made an impact at our house. I have since used this method in other small spaces like our travel trailer. It is absolutely perfect for RVs!
If you spend a lot of time working hard in the kitchen, you deserve a space that functions well. Your kitchen storage should work at least as hard as you do!
You can easily adapt this simple DIY to a variety of different spaces of all sizes. What is your favorite way to maximize kitchen storage? Share your tips in the comments below!
MORE INSPIRATION FOR CREATING WITH ADHESIVE PAPER
HOW TO MAKEOVER A SIMPLE IKEA TABLE IN 3 EASY STEPS
MARBLE LAMP KNOCKOFF- GET THE DESIGNER LOOK ON A DIME
It's been a while now since I complete the simple project in this post. I am happy to report it has held up very well and looks just like the day I made it. Now that everything has its designated spot in the kitchen, everyone knows where to find it and how to put it away! I would definitely call that a win!
If you haven't joined our TheWittyGrittyLife Facebook group, we'd love to have you! And for a dose of real-life be sure to follow me on Instagram.