Cute signs are everywhere these days. I could spend an hour just reading some of the funny quotes on them at the craft store. What I love most about them is that they are probably one of the easiest things you can make yourself. So today I want to show you how you can get the look of hand-painted and hand-lettered signs without painting a thing. You won’t need a stencil either or even crafting skills.
In my last post, I showed you how to put together an easy cake stand to bring your decor to the next level, literally. And I promised to follow up by showing you how to make the little sign I put on the finished decorated piece. Today is that day!
Before I go on I have to let you know that while I created the graphics to fit this particular size sign shown today, they also work for other sizes. So you are not completely locked into using the little stands I am using for this project, if you can’t find them. I’ll show you in a bit what I mean.

* This post contains affiliate links. If you make a purchase by clicking on an affiliate link, I may earn a small commission at absolutely no additional cost to you. You can view my complete affiliate link policy HERE.
All of the graphics used for this project and many more can be found and printed from the FREE Resource Library. Just sign up here and your password is on its way to your inbox.
EASY MOD PODGE SIGNS
This is the first year in some time I am actually making a real effort when it comes to decorating for the Fall Season. Usually, I am just returning from a trip to visit my family in Germany around this time of year. And getting the weeds under control in my yard that took over during my absence takes up most of my time and energy. Then Halloween hits, Thanksgiving is next and before we know it there are presents under the tree and a New Year to greet.
But this year is soooo different. Everything is altered and our travel plans were canceled. I am more the type of person to make lemonade out of lemons and so I welcome the opportunity to actually decorate.
Sadly, my decor was lacking in a big way. After getting rid of a lot of miscellaneous odds and ends, I decided this would be the perfect time to create many of the decor items myself. These signs are part of that effort. Let’s get started!
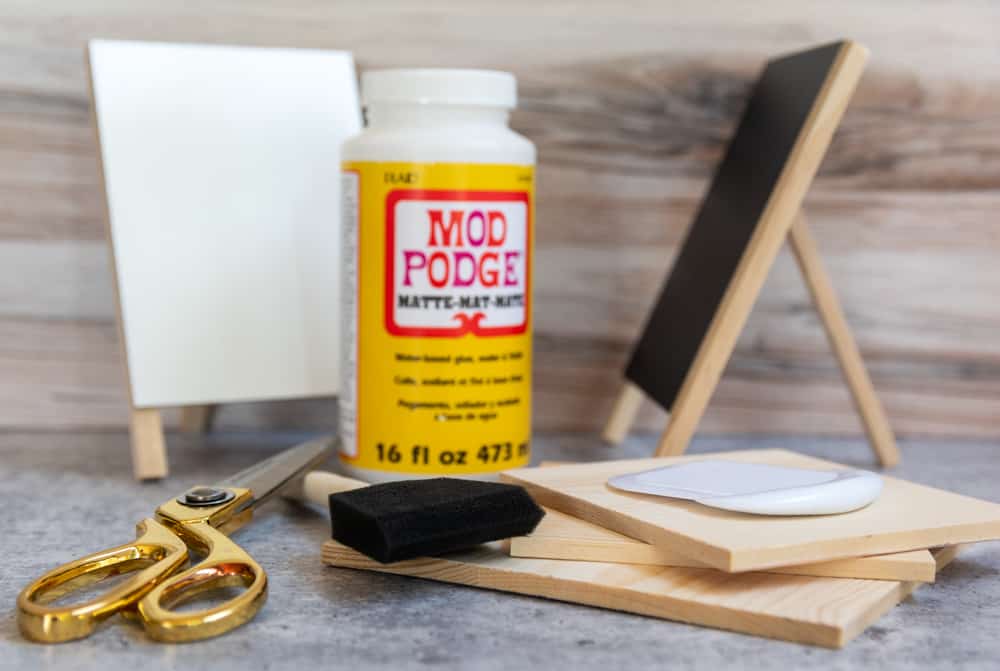
SUPPLIES FOR OUR FALL SIGNS
- Wood easels from Dollar Tree*
- Mod Podge decoupage glue – the Dollar Store carries a small size
- Brush
- Scissors
- Plastic dough scraper
- Graphics – from Free Resource Library
*Most of the graphics can be used with other wood sizes if you cannot find the easels.
STEP BY STEP INSTRUCTIONS
Gather all of your tools and supplies.
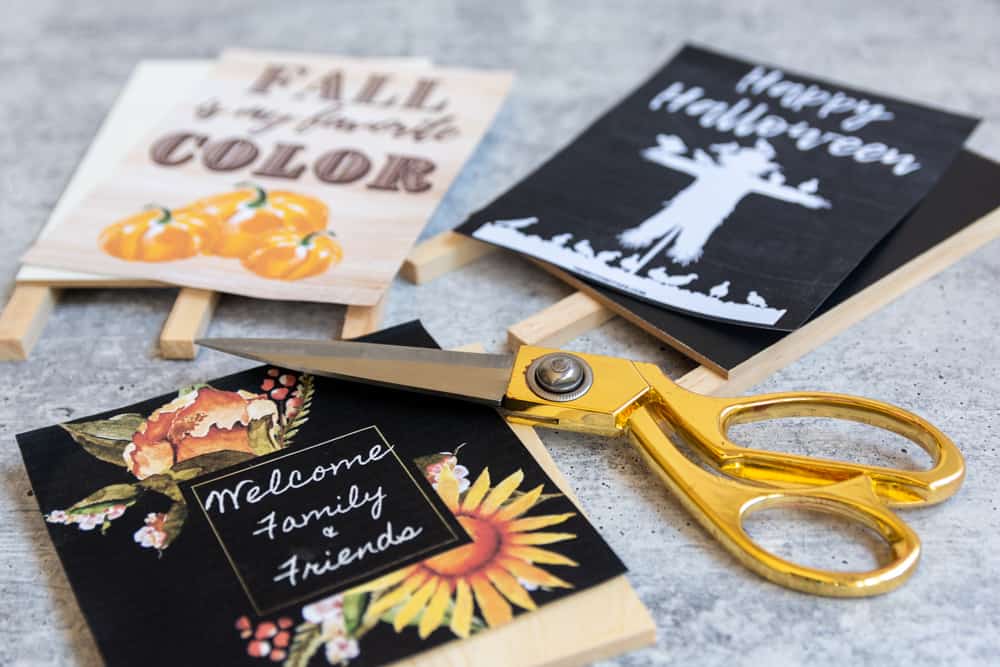
Cut out graphics and trim to the exact size of the easel board. The sign on the bottom of this picture is a 4.5″ x 4.5″ piece of craft wood I found at the Hobby Lobby. Some of the graphics can be trimmed to fit a smaller size. The craft wood pieces also come in a 6″ x 6″ size and would work well for all graphics shown.
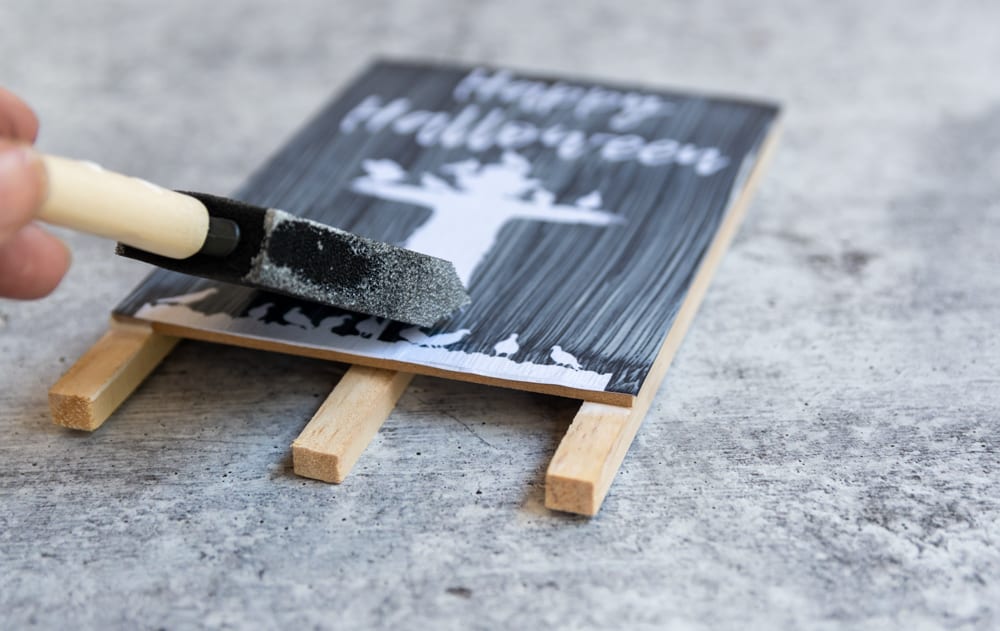
Apply a thin and even layer to the front of the board edge to edge. Always paint on mod podge in smooth strokes, working in one direction.
Gently place graphic on top of the board and smooth out any bubbles. Make sure the edges are well adhered. Let dry for 30 minutes.
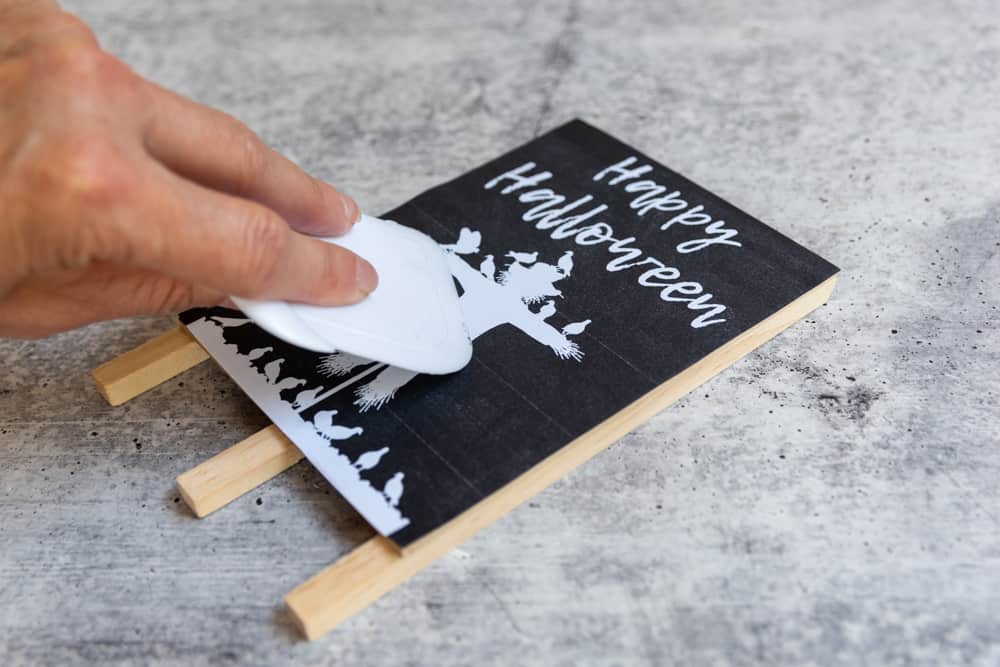
Once completely dry, apply an even thin layer over the graphic and along the edges to seal. Let dry again. Display and enjoy!
And here are the finished results! One of the reasons these little signs are a great addition to your decor is that they make a wonderful visual impact, but take up very little storage space. And at just a little over a dollar apiece, you can make a whole bunch of them in just a short time and give them as gifts. Cute, aren’t they?
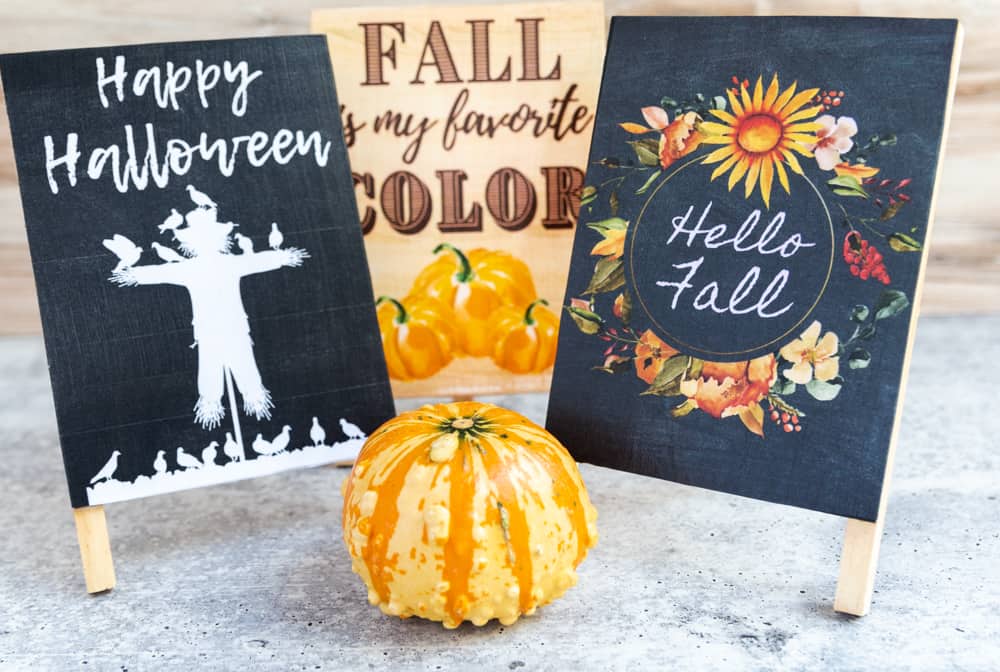
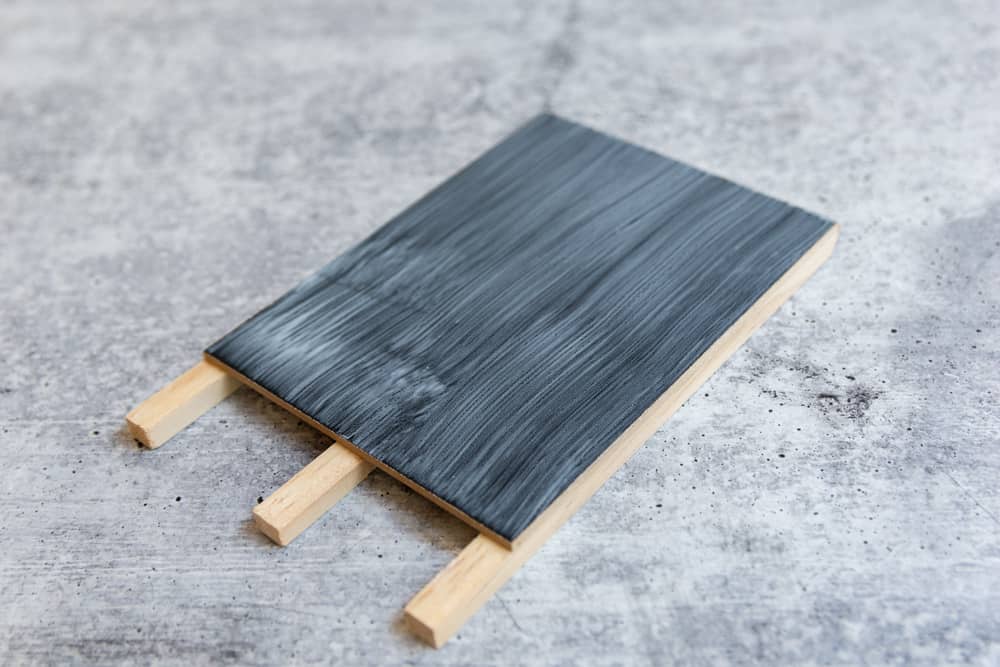
Both, the wood and chalkboard backgrounds look surprisingly realistic! This is such an easy craft anyone with absolutely zero craft skills can make this.
And as I mentioned I will be adding more seasonal graphics to the FREE Resource Library soon and will keep you posted on my Facebook group and in my newsletter as soon as that happens.
TIPS:
- Easily create several signs at a time easily by just lining them up and applying the cut to size graphics.
- Some of the ready-made graphics will work on other sizes of wood, just trim to size or use a larger piece and center the graphic.
- To display flat wood pieces, use a small plate stand to display or add a hanger to the back. A ribbon or twine loop glued to the back works well.
- Use Canva.com (free) to create your own graphics to print out. Choose a US letter size document to create graphics in your chosen size.
FINAL THOUGHTS ON FALL DECOR
Fall with its rustic nature vibe is probably the easiest season to decorate for. Many Fall accents can be found outdoors like pinecones, colorful leaves, rustic twigs and branches. Create a lovely tablescape by mixing some of your signs with real and faux pumpkins and gourds on top or a table runner. Combine your decor with some of my lovely Fall-themed essential oil room spray recipes. And please feel free to share your favorite Fall decor ideas in the comments below!
If you’re curious what you might see next on here be sure to follow me on Instagram!
RELATED POSTS
CREATE A SIMPLE CAKE STAND FROM THRIFT STORE FINDS
HOW TO PAINT GLASSES WITH SHARPIE MARKERS THE RIGHT WAY