Plants make me happy, they always have. But for many years I stayed away from adding live plants to our home because they were just one more thing to take care of. And they kept dying on me of neglect:( I hang my head in shame. But as someone who spent her childhood outdoors and has relished the calming influence of a long walk in the woods during even the most challenging times, I missed my indoor plants.
Slowly, I began adding them back into our home, and now I once again could not imagine my life without them! While there are a couple of plants I adore that are not succulents, namely my ponytail palm and the nearly 20-year-old snake plant that has endured despite my neglect, succulents have stolen my heart. To me they are like puppies and kittens of the plant world – so adorable, you wish you could take them all home! But much easier to take care of! Today I want to show you how effortless it is to put together a simple succulent planter. This fast project combines my favorite little plant with another love of mine: mid-century ceramics. This piece has it going on! The stunning green, the leafy motif, the pedestal, oh my. Love at first sight.
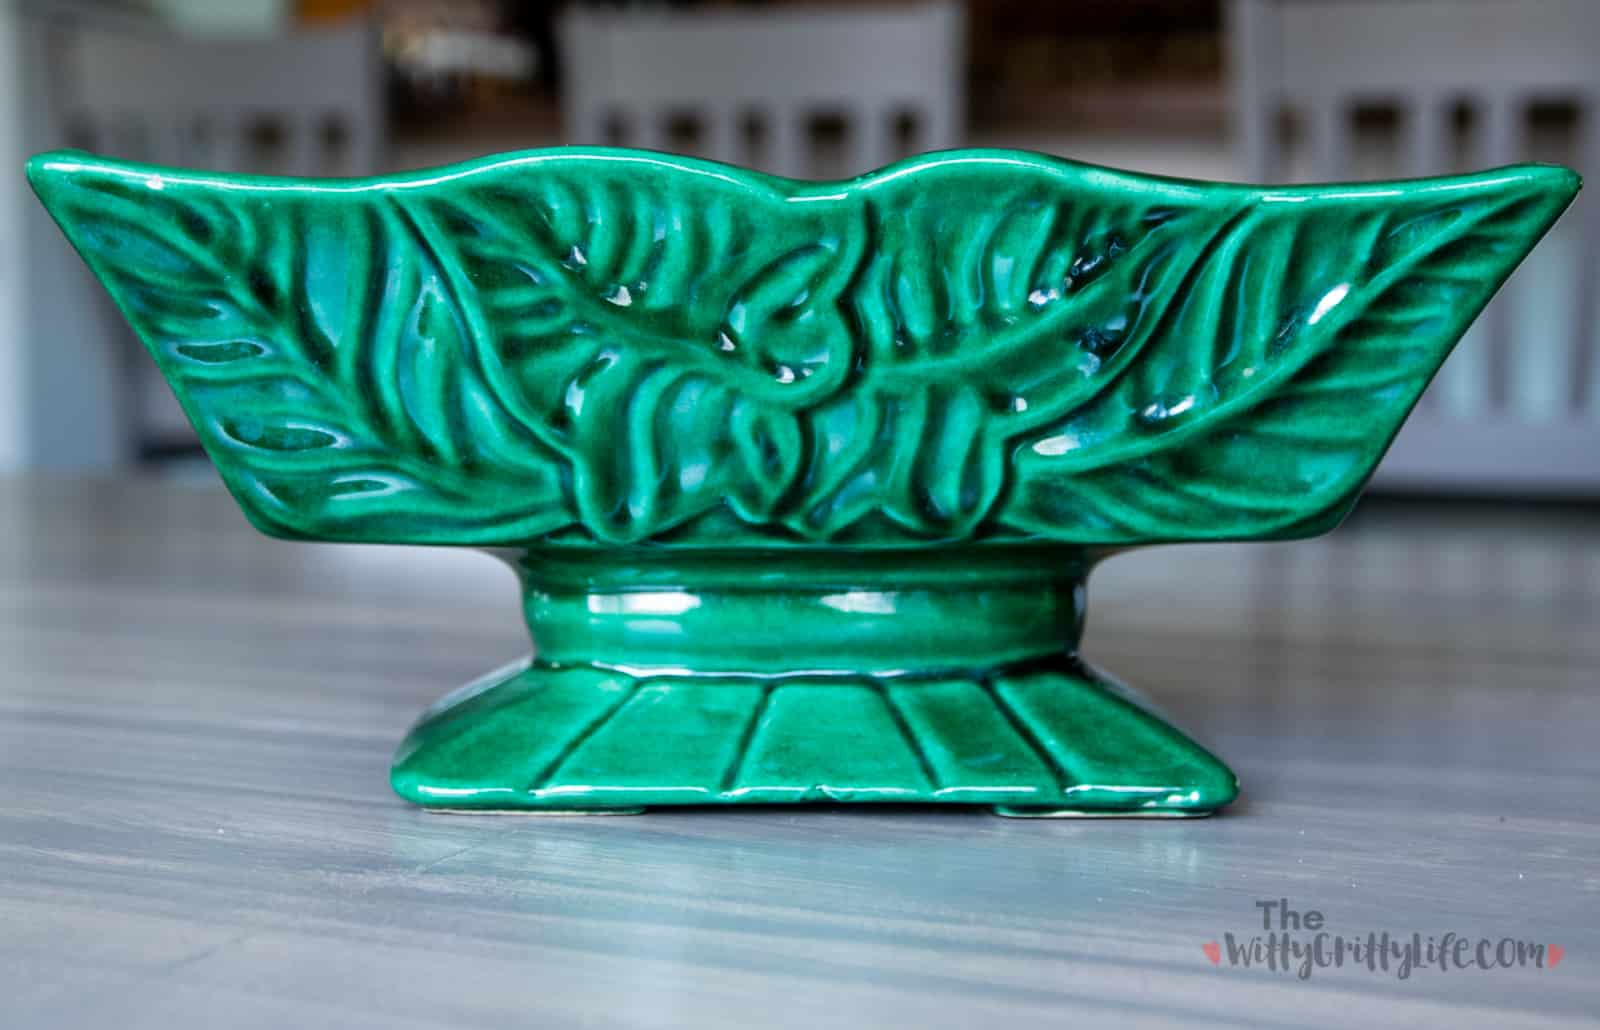
As soon as I spied this exquisite beauty, I knew right away what to do with it! Isn’t it the perfect vessel to create a simple succulent planter? Succulents have always fascinated me. I could spend hours just admiring all of the different, often otherworldly shapes and colors. There are fuzzy ones, you cannot help but pet, strong chunky plants that seem invincible and other ones that look too weird to be real. Unlike many other house plants, they tend to be pretty impervious to pests and actually thrive on a little bit of neglect. Set them up on a weekly watering schedule and you are good to go, even if you miss a week. You can put them outside during Summer and Mother Nature will take care of them for you! More on that later.
Be sure to sign up for the FREE Resource Library! It’s filled with useful tips, printable art, and tutorials!
This post contains affiliate links for your convenience. That means if you make a purchase through one of those links, I may earn a small commission at NO EXTRA COST TO YOU. You can read my full affiliate link policy here.
A SIMPLE SUCCULENT PLANTER
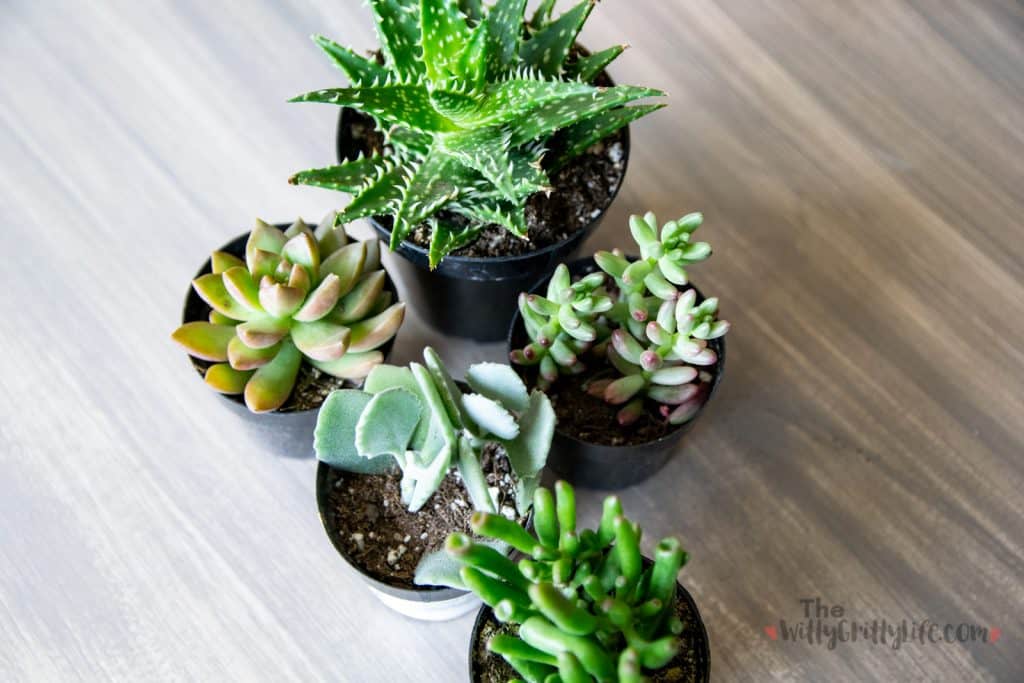
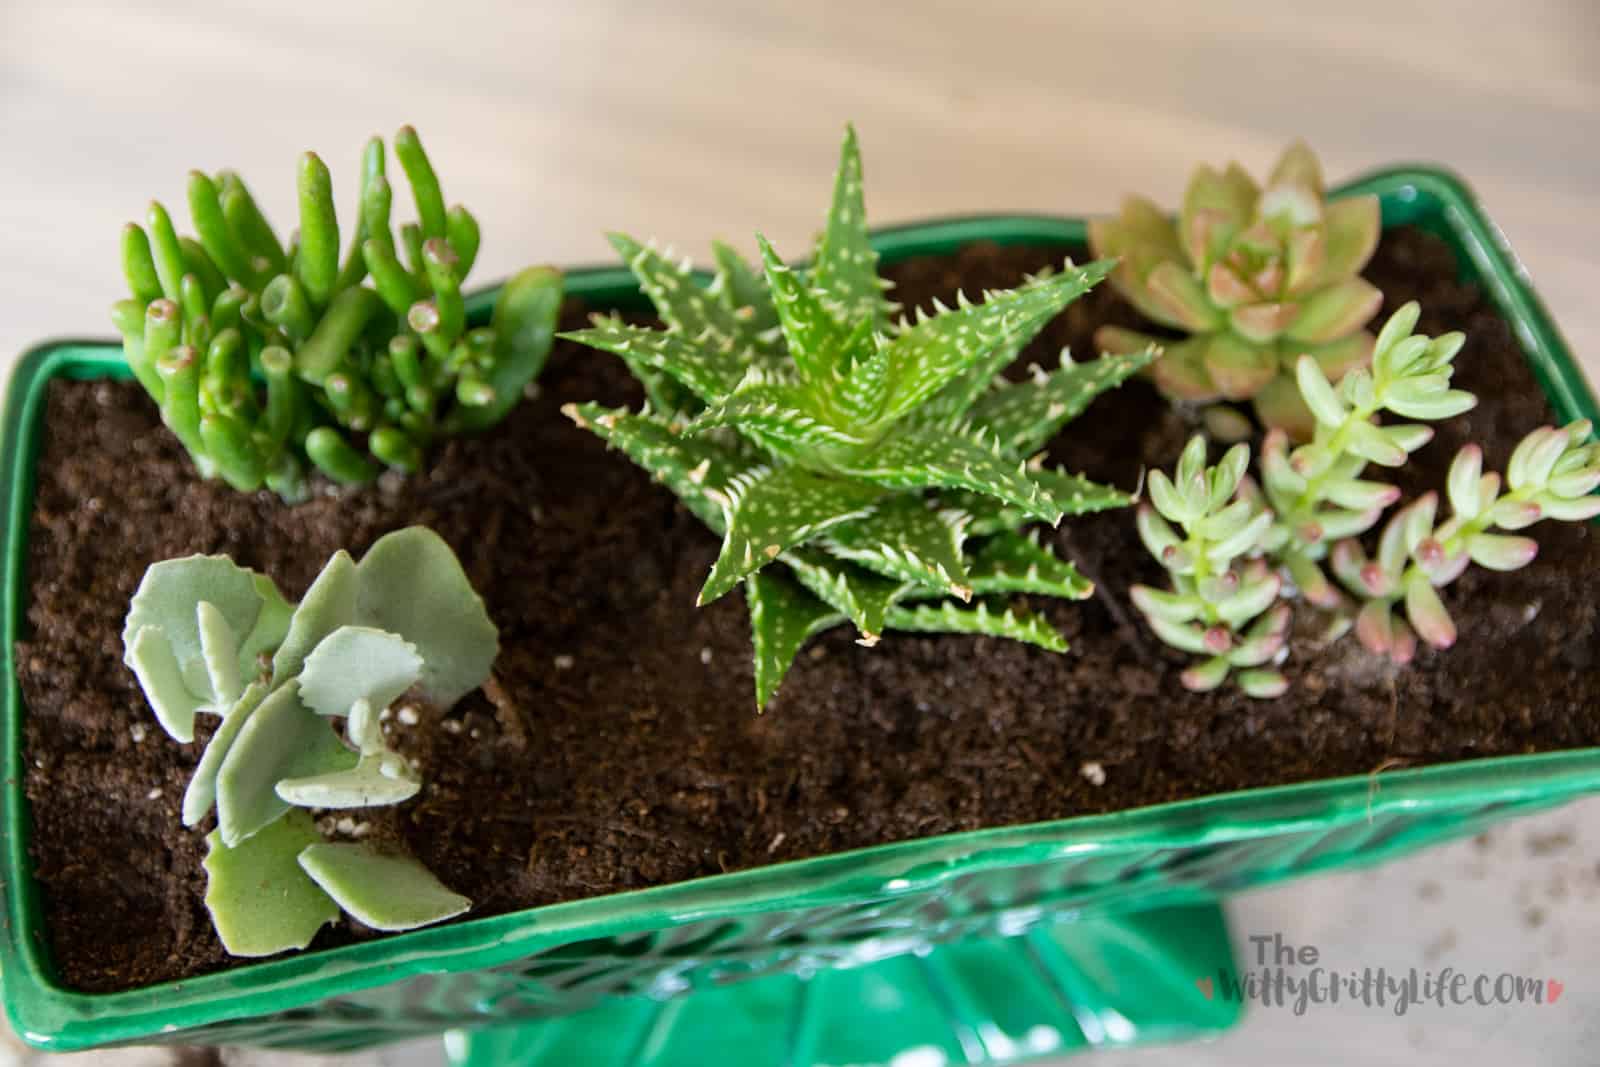
Succulents are easy to find at your local garden center, home improvement store, or even online. I purchased the ones you see here at Home Depot. When buying succulents, get enough plants to fill the planter just enough so each of them has room to grow all around. For interest, vary the plant heights, textures, and colors. While there is no rule, I always like to aim for an uneven number of plants – I’m weird that way;) Also consider how you plan to display your planter. Since mine is rectangular and will be admired from all sides, I chose to go with a slightly taller, larger plant (Aloe Minnie Belle) in the center. If you plan to display your planter in a way that one side is featured, you will want to place a taller plant in the back.
Here is a list of materials you will need:
- ceramic planter
- assorted succulents
- succulent planting mix
- small pebbles
- larger pebbles
- coffee filter(s)
- optional: a brush to clean off leaves
Money-saving tip: find inexpensive pebbles and rocks at the Dollar store.
Step 1: Getting your planter ready
Place small pebbles on the bottom of your planter. Do this whether your planter has a drainage hole or not. It creates a little extra buffer zone so plants will never sit in water.
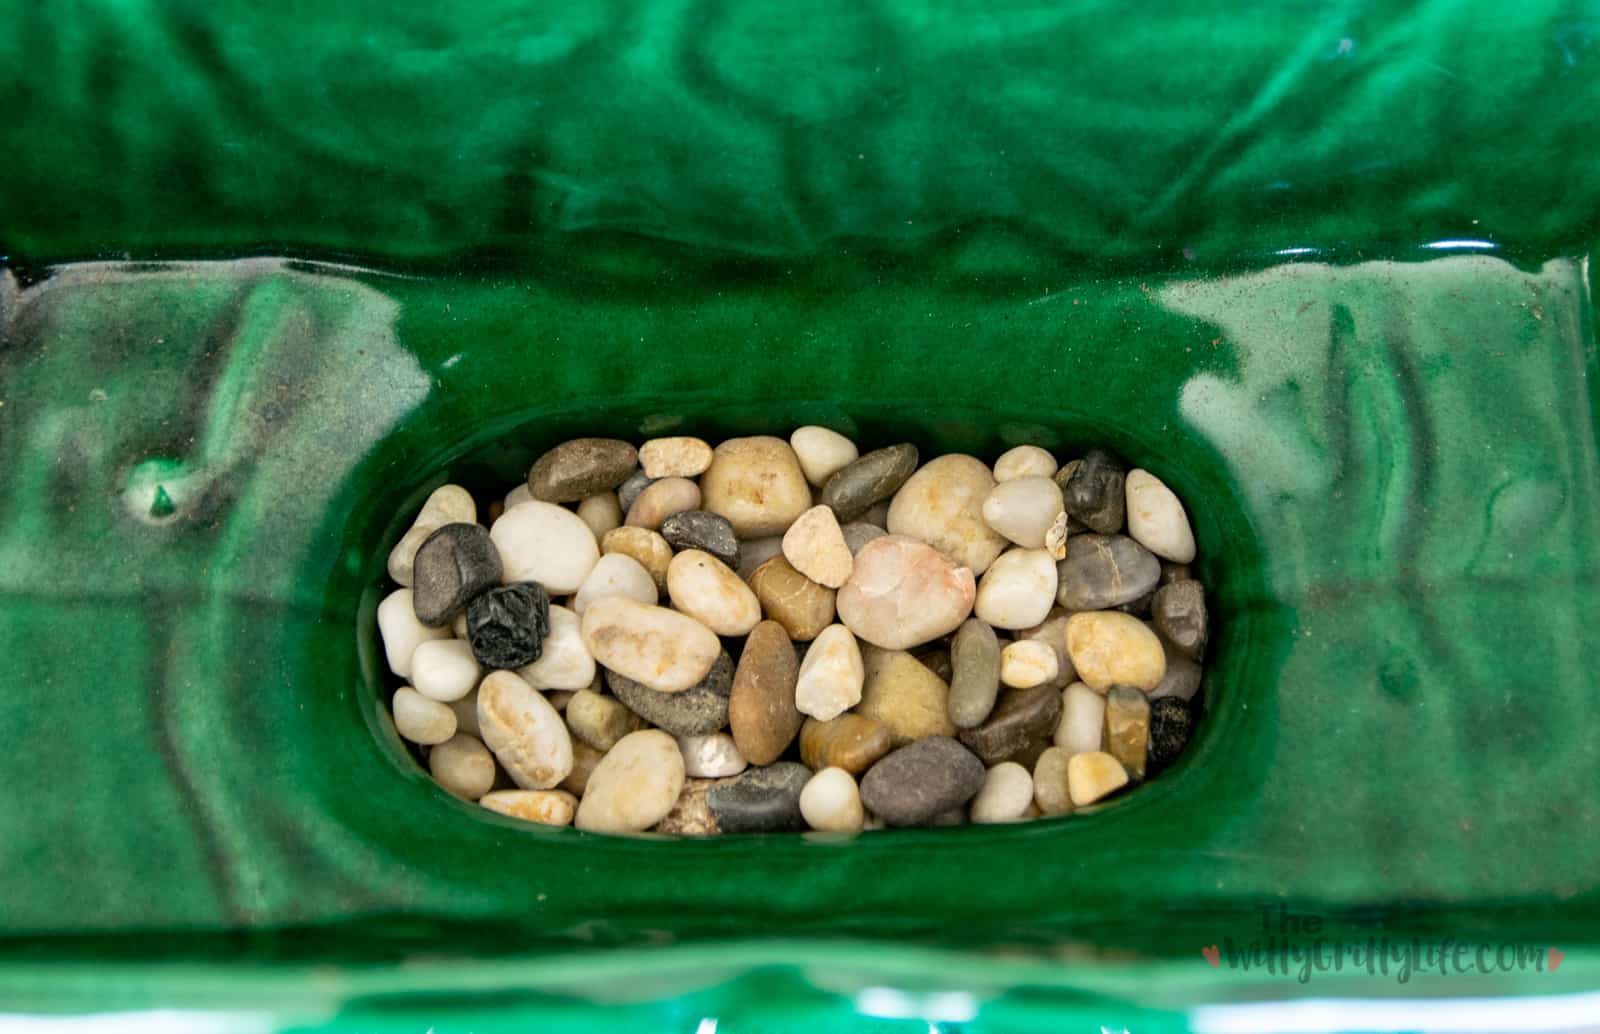
This particular planter has a bottom opening that is perfect for the number of pebbles I had on hand. No matter what style or size planter you use, aim for a layer about an inch deep to give your plants proper drainage.
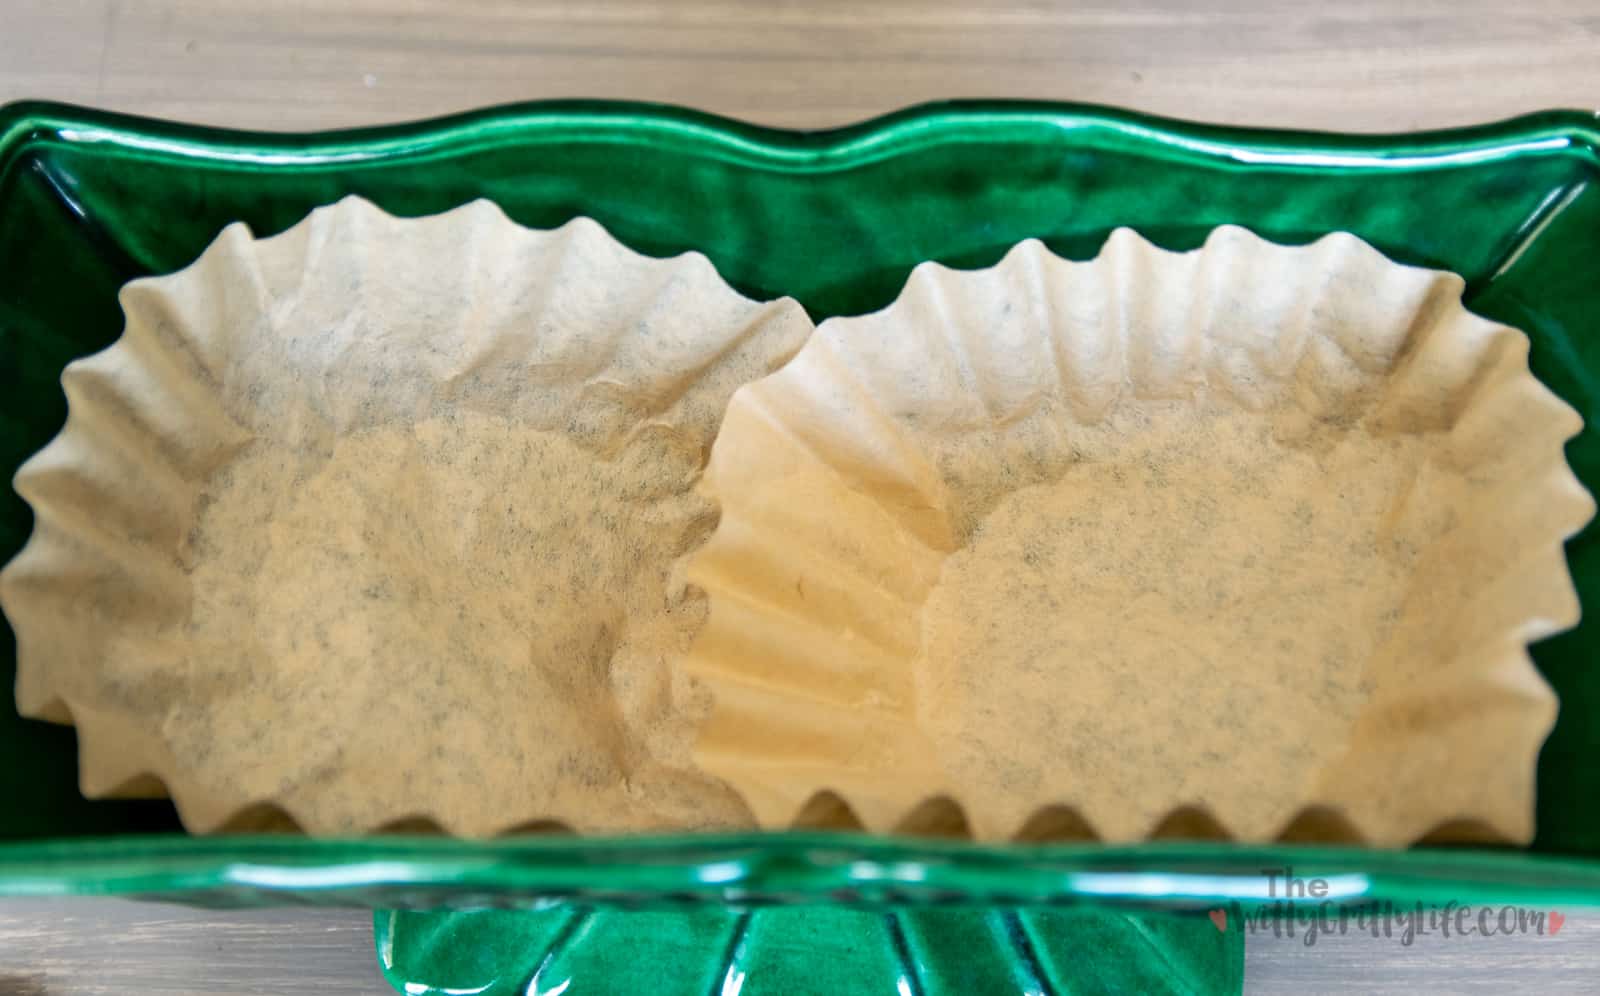
Next, add the coffee filter(s) on top of the pebbles. The coffee filter keeps the soil from washing down into the pebbles. You may need to use more than one, depending on the size and shape of your planter. I needed two here to cover the bottom of my rectangular planter.
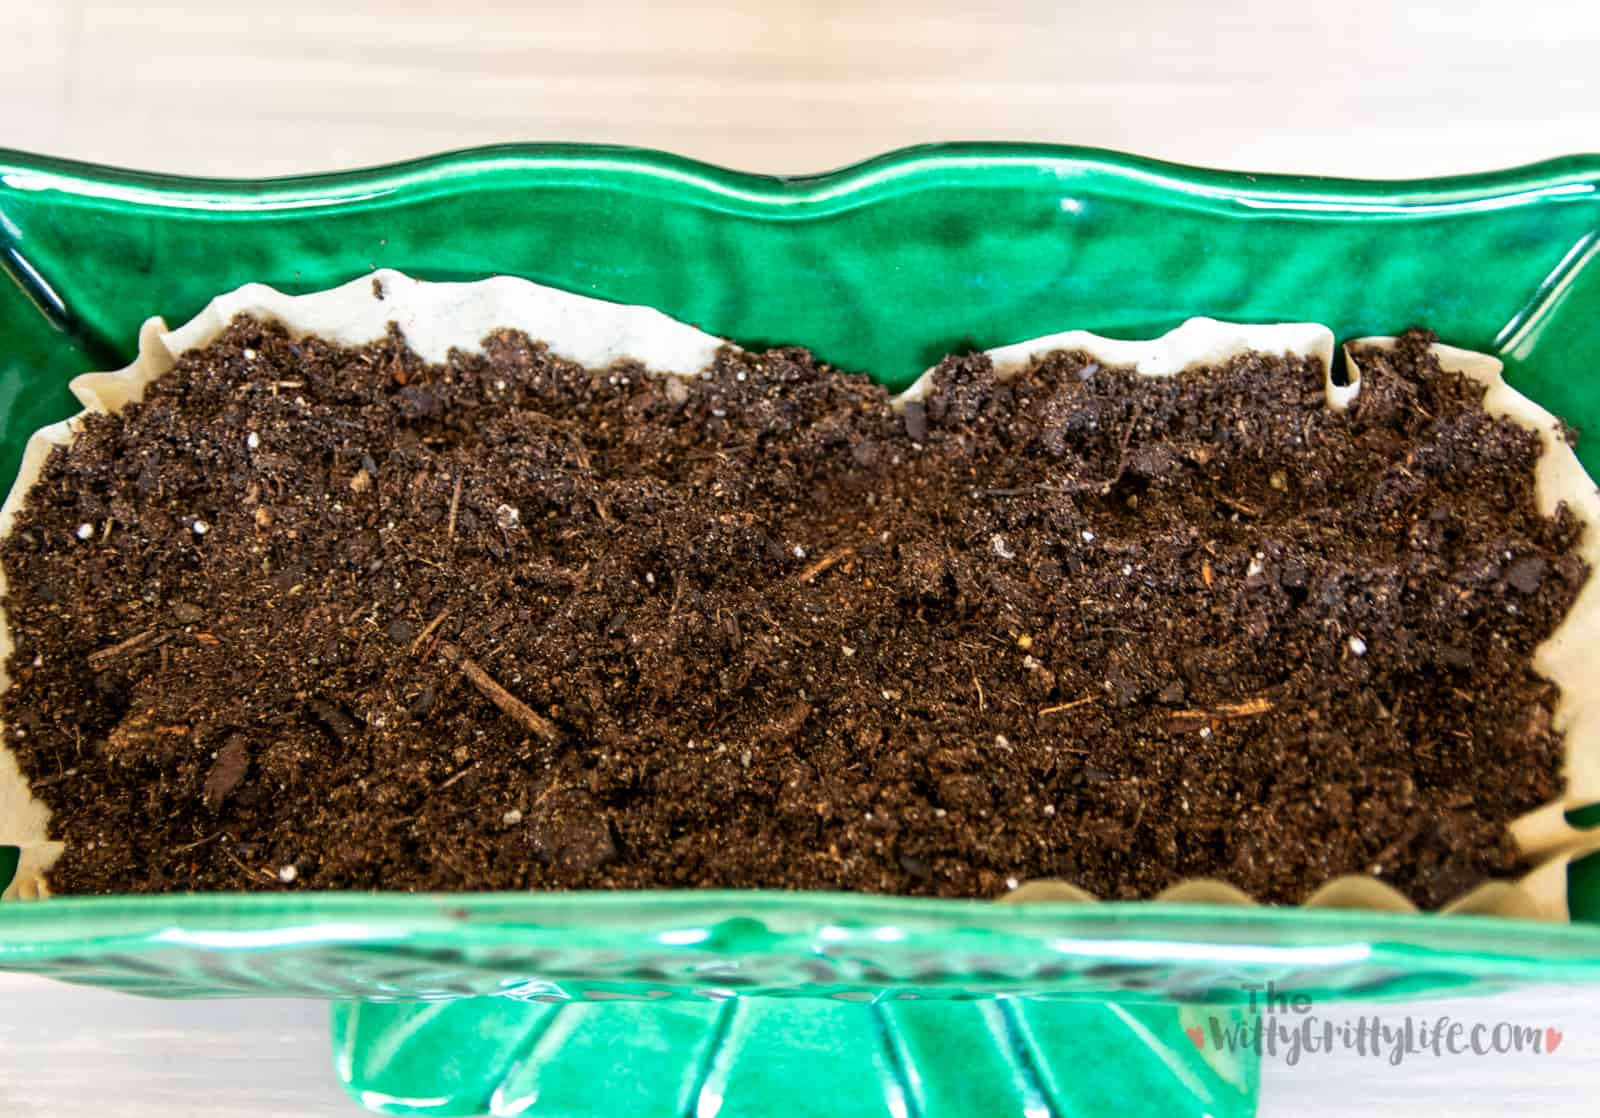
Step 2: Add Planting Medium
Proper soil is important to ensure your succulents will thrive. This specially formulated succulent soil mix is just right and even contains fertilizer to give your new little plant friends a good start.

Cover the top of the coffee filters with a layer of potting soil. You want enough soil so that the bottom part of the plants (right above the soil) is even with the rim of your planter.
Step 3: Add Plants
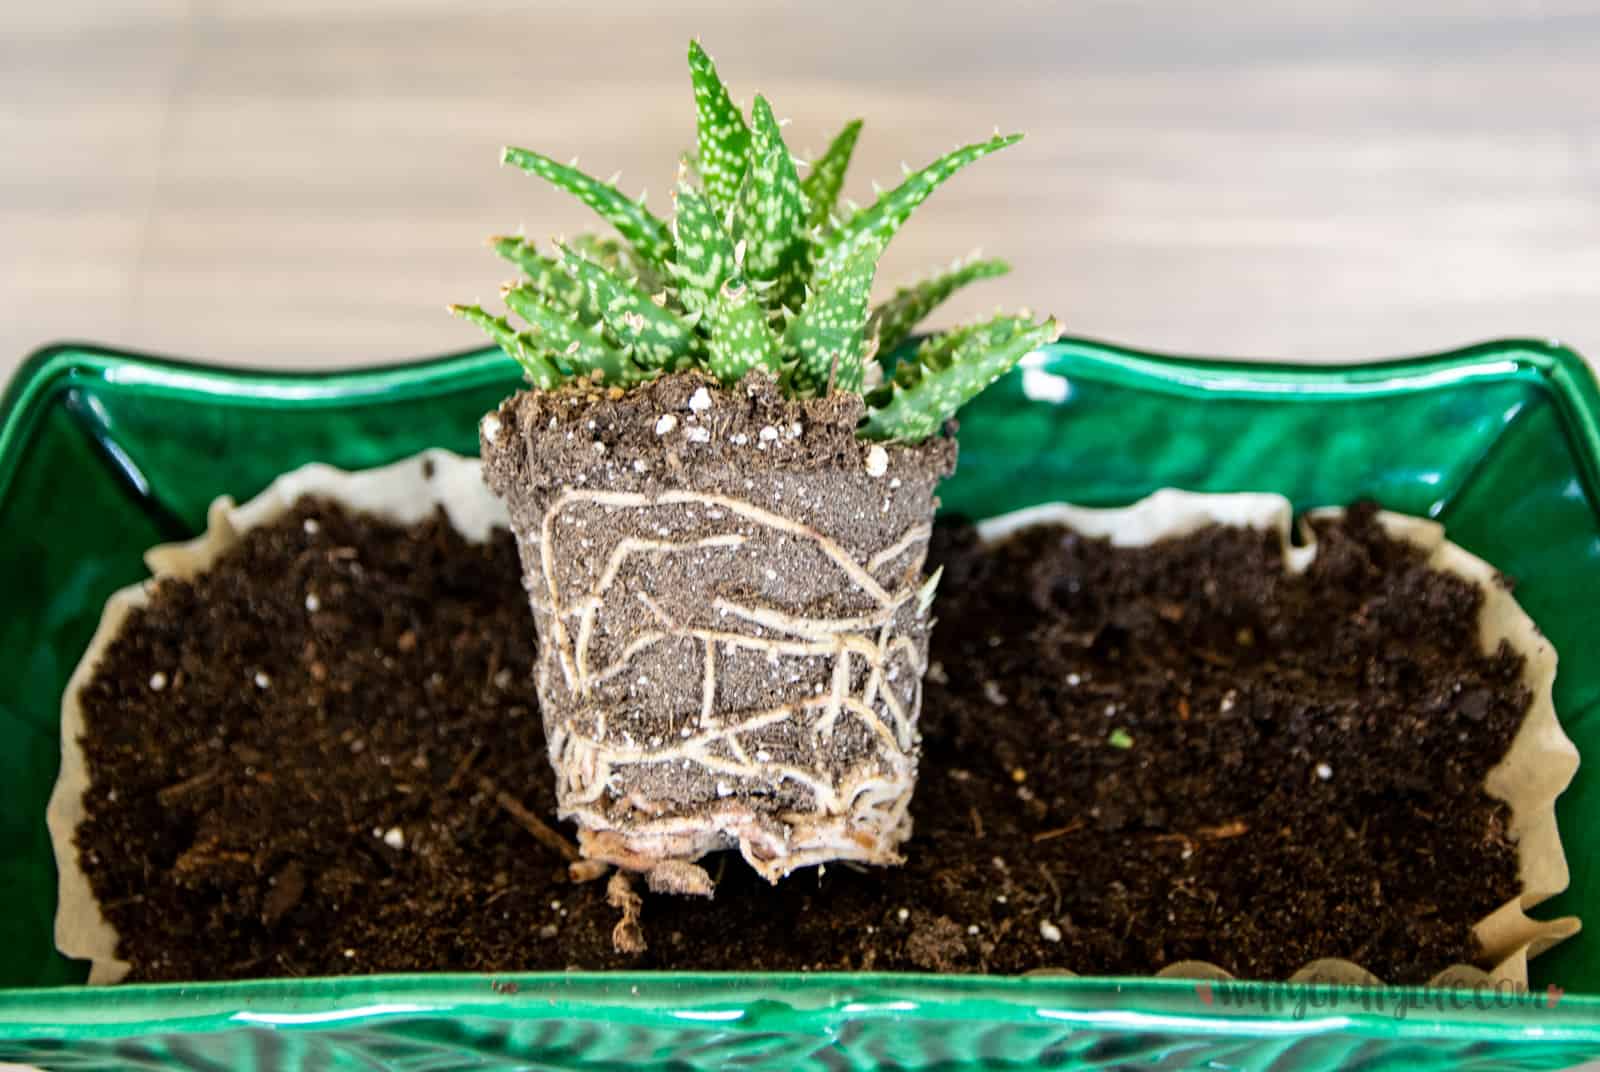
Be sure to loosen the soil and spread the roots a little as you plant.
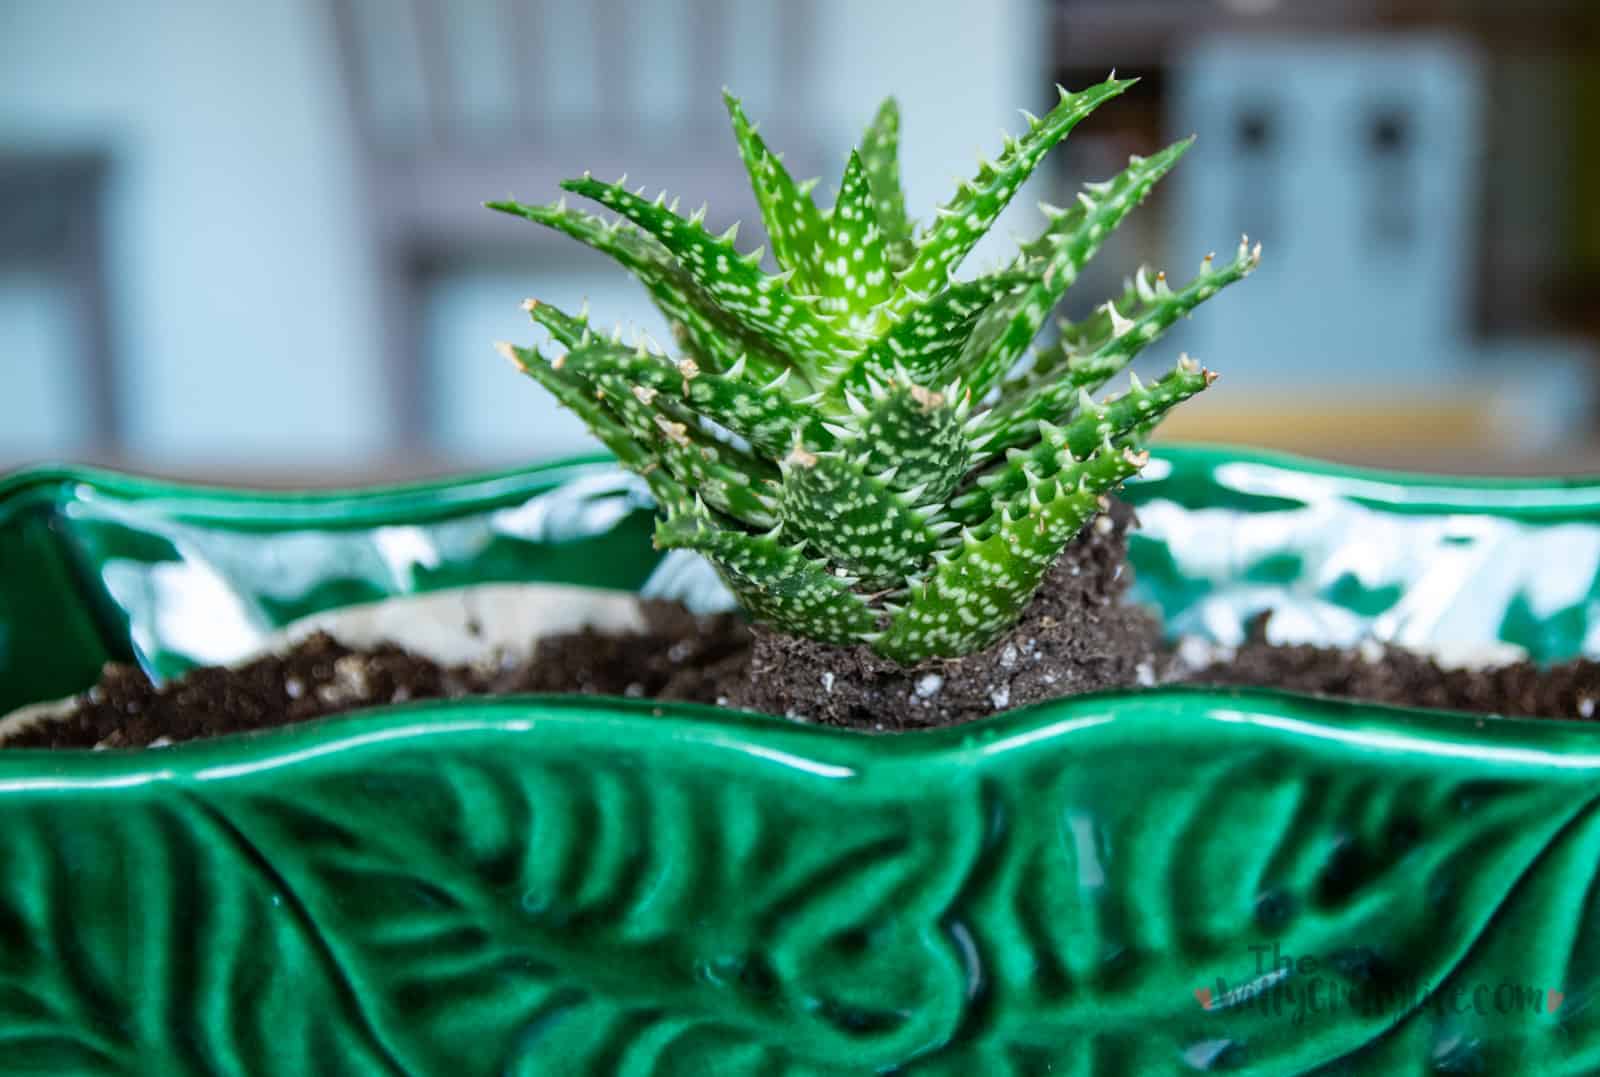
Here are the names of the succulent plants I used: Aloe “Minnie Belle” (middle), jade plant “Gollum” (top left), Kalanchoe millotii (bottom left), Sedum “Aurora”(bottom right), “Golden Glow” stonecrop (top right).
Carefully fill in potting soil around each plant and pat down gently. Make sure there are no air pockets around the plants. If needed, gently brush any soil off the plant’s leaves.
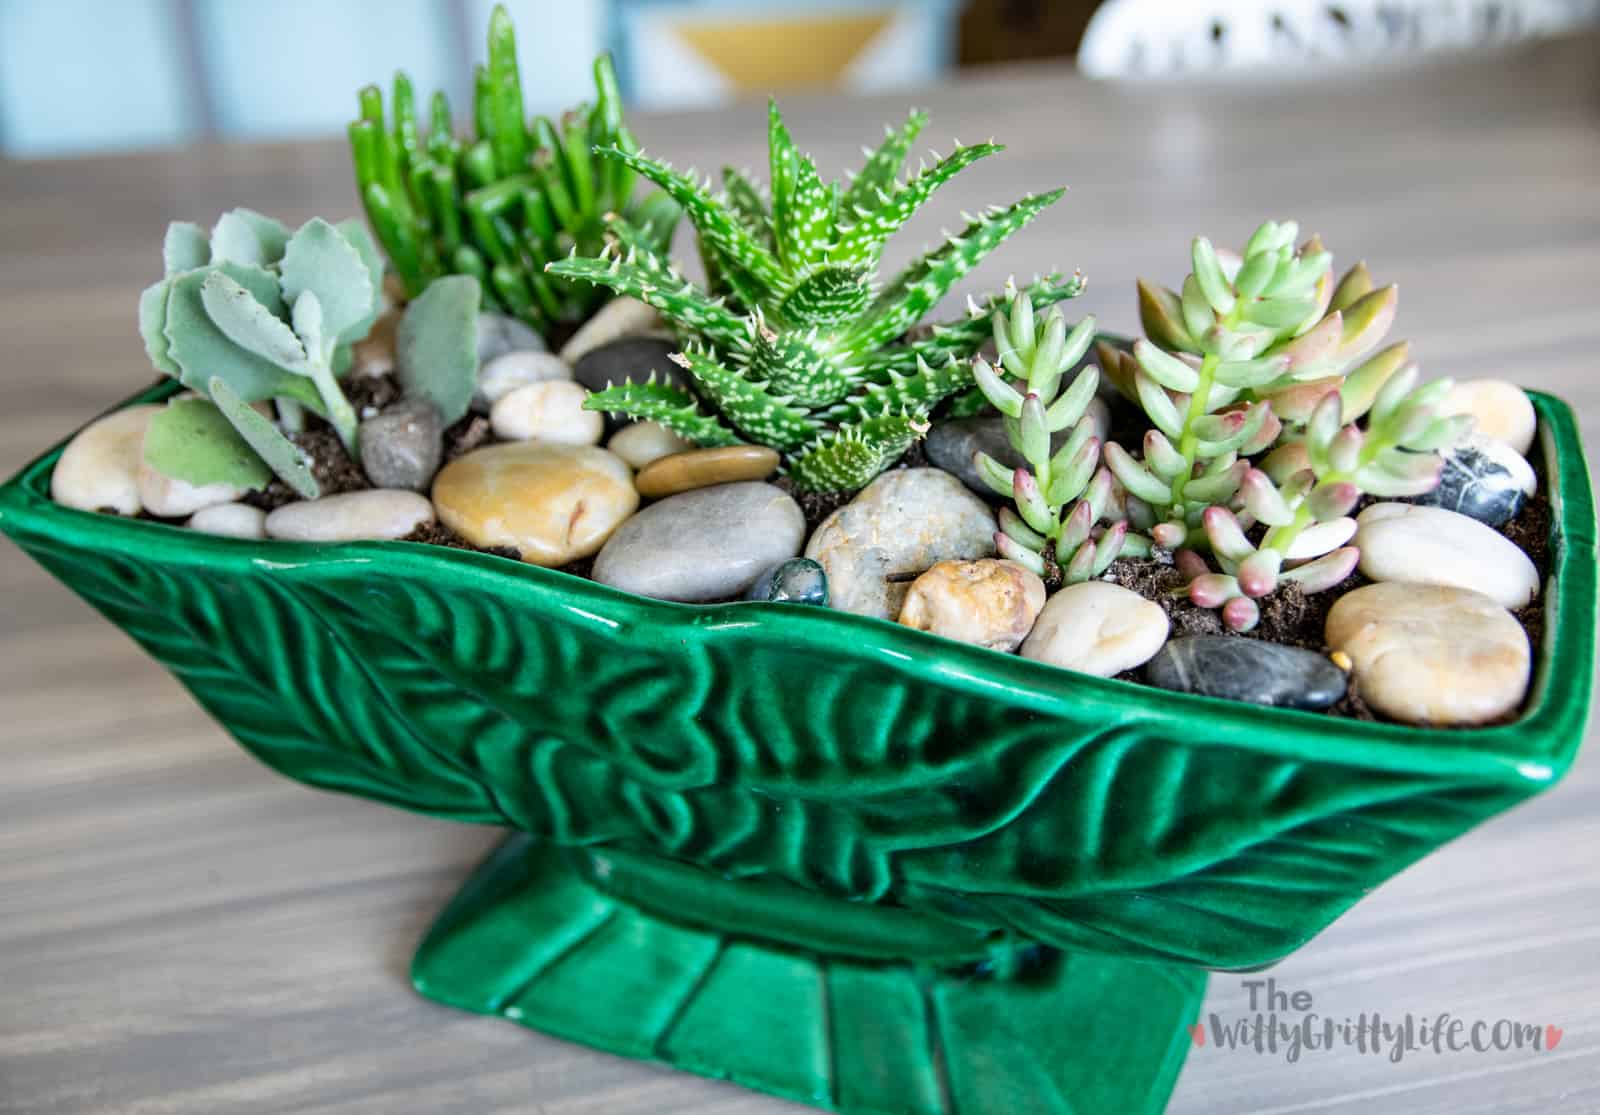
Next add the larger pebbles around the plants. Be sure not to crowd the bottoms of your succulents.
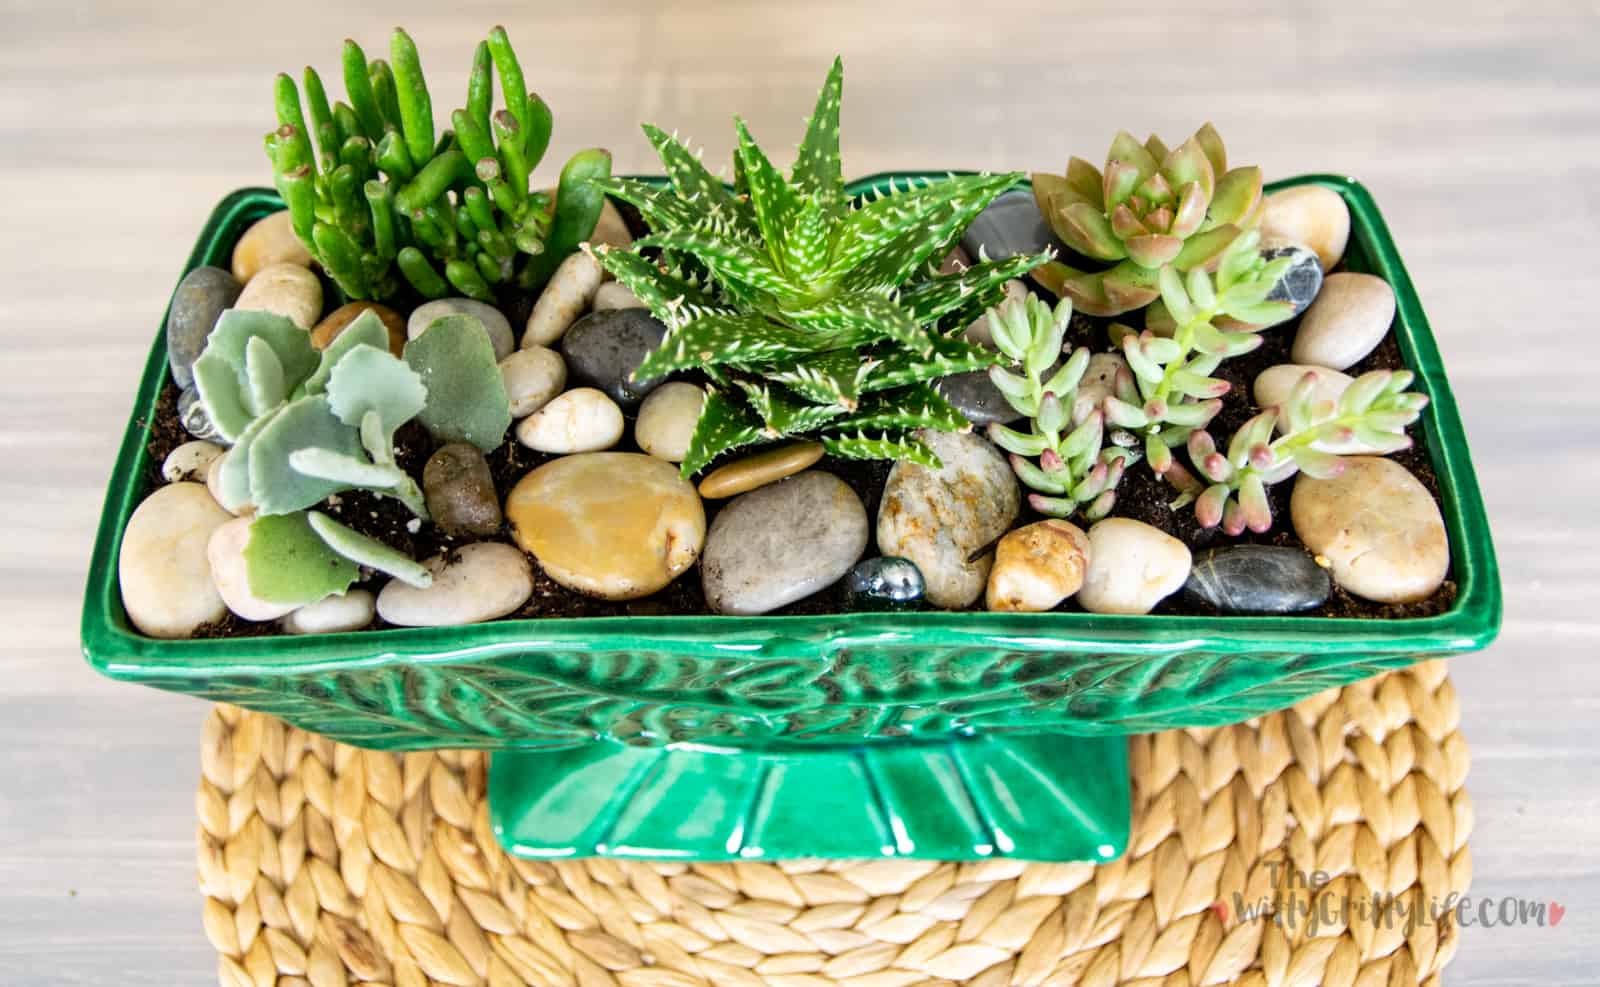
That’s it! Your beautiful planter is done. Give your newly planted succulents a little drink of water to help them settle in. Succulents like a bright spot that gets ample sunshine each day. You can move your planter outdoors in the Summer.
Just make sure your succulents always have adequate drainage and water sparingly once the soil is dried out. If you opt to bring them outdoors for the warmer season, it is best to keep them in a spot where they won’t be subject to drenching rain. Overwatering is the number one cause of succulent death!
So simple and pretty, right? I loved this planter so much before, but now it’s a total show stopper. It was made for this, don’t you think?
Are you a green thumb or a brown thumb? Have you ever wanted to give planting your own succulents a try? You really should! Plants like this add that extra little something to any home decor, especially if they find such a gorgeous home. Why not grab that gorgeous planter at the thrift store or a garage sale? If you do, be sure to share a picture of it over in the TheWittyGrittyLife Facebook group! Not a member? Come on over and join us!
To find out what I am doing and what my latest finds are, follow me on Instagram! Happy planting!
Check out some of my other posts about plants and thrifting here:
Fun Ways to Add Plants to Your Life
Turn the Table on Weeds – Eat them!
Thrift Shops – How to Get the Most Bang for Your Buck