Do you love well-made vintage furniture? There is just something about knowing a piece has lived a previous life, that gives it the kind of soul brand new department store furniture lacks. We are fortunate to have so many quality furniture makers in this country, who have produced work that stands the test of time!
Today, garage sales, Facebook Marketplace, and Craigslist make finding older, affordable pieces a snap. Recently, I gave one such find a new lease on life and thought I’d bring you along.
Of course, every project has its little challenges and this one was no different. There was even the drama of a big mistake that turned this into a bit of an ordeal… What was it? Well, you’ll just have to read on! But I can assure you, it was a doozy that I won’t ever repeat for sure!
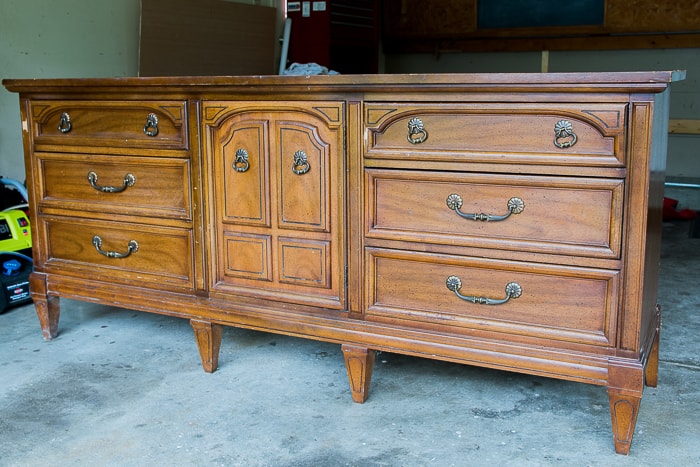
For a long time, I had been looking for just the right dresser to transform. I could picture the finished piece in my head. All that was missing was the actual dresser. But I knew that sooner or later it would show up, and finally, it did.
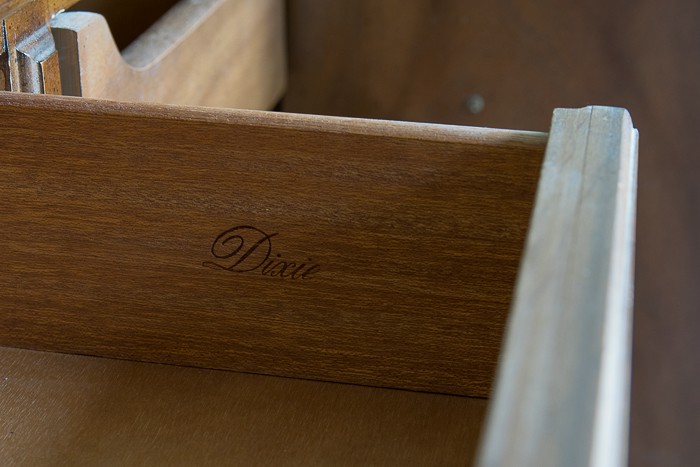
I’m calling this piece Dixie, because of her manufacturer. The dresser was a chance find by my husband. While he considered it perfect for our son’s starter apartment, I knew immediately that she was exactly what I had been looking for to kick start my bedroom makeover. The right size, style, lines – just perfect. The $20 price tag sealed the deal.
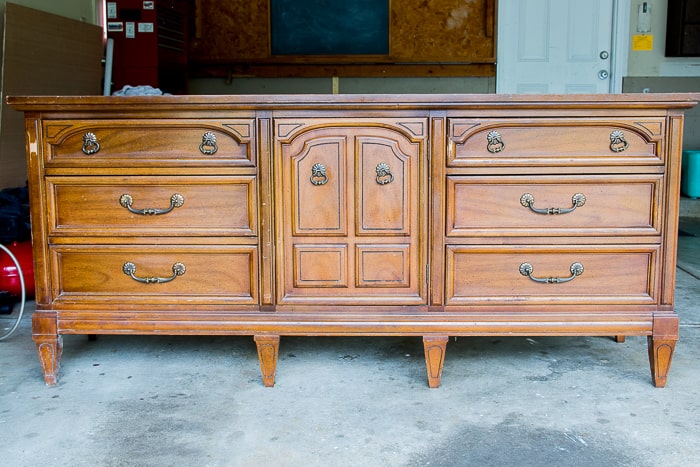
Meet Dixie:
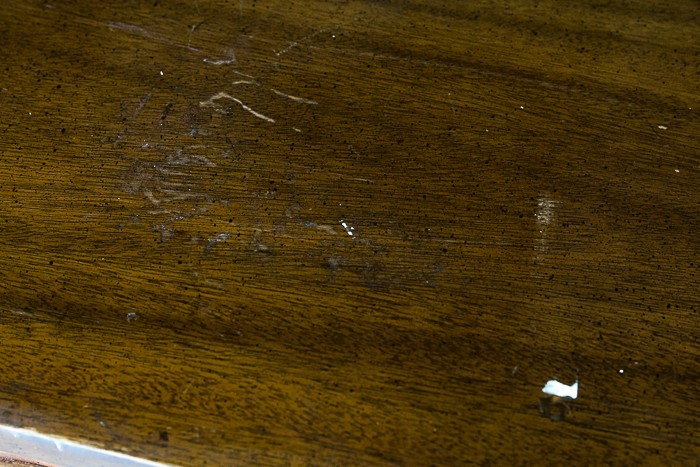
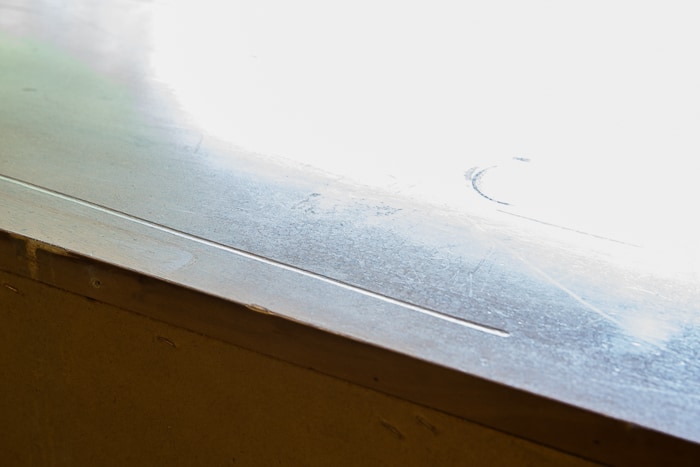
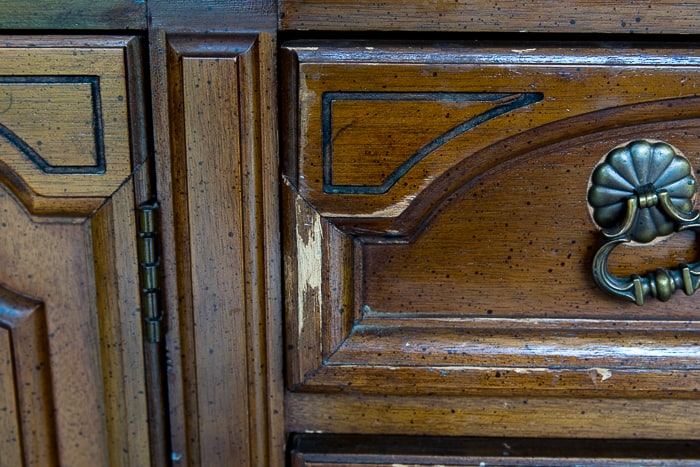
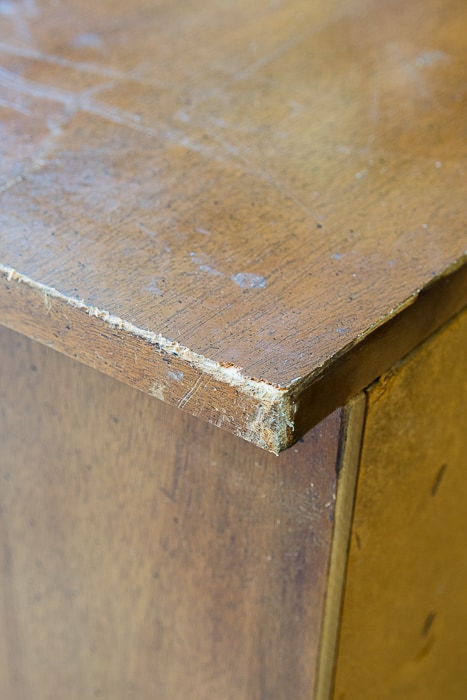
Like any woman her age, she came with a little baggage. Turns out the poor old girl has lived a bit of a rough life, as evidenced by a few scrapes, gouges, rough patches. Sadly, her previous owners smoked, giving her a stale cigarette aroma and a yellowish film. But I have a surefire trick to deal with that sort of problem which I will share in a bit.
Close up you can really tell that some serious love and care was in order! Can you spot the classy “fly poop” finish in this picture? But even with all of those minor flaws she was structurally sound and had good bones.
Poor baby!
This is not my first time at the dresser re-do rodeo and I have learned a few lessons from previous projects. It would be the same with this makeover. While Pinterest is full of quick and easy dresser re-dos, I knew from the start that this project would not be of the quick and easy variety. No shortcuts for Dixie the dresser!
Since there is quite a bit more to this type of makeover project than meets the eye, I decided to break the process up into several parts.
Today I’ll walk you through my version of “demo day”. Well, not demo per se, but dismantling, cleaning and prep prior to actually painting. All of the not-so-fun, but oh so necessary, stuff that leads us to the good part.
This post contains affiliate links. You can read my complete affiliate link policy here.
STEP ONE: INSPECT AND CLEAN
We happen to live in an area of the country that has a hardy and thriving bed bug population. Those little critters give me the heebee jeebees in ways I cannot even begin to describe. So, no and I mean NO piece of used furniture ever enters our abode without spending time in quarantine. That means a thorough inspection, followed by a thorough cleaning in the garage.
Bugs are not the only issue when it comes to furniture. Before purchasing any used piece, be sure to thoroughly inspect it for any signs of mold or mildew. If you notice any signs of either, pass. Mold is a serious health risk and frankly not worth even a small investment.
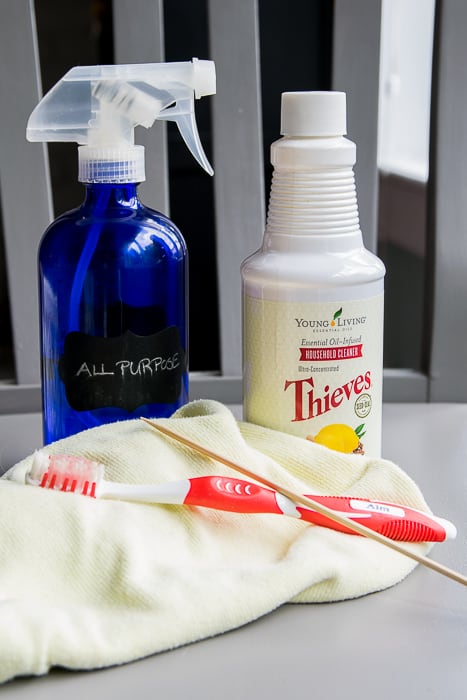
When initially cleaning a piece like Dixie the dresser, a mask and gloves, as well as a good cleaning solution, are always in order. Krud Kutter Tough Task is my hands-down favorite cleaner that cuts through residue like a boss. It also happens to be my secret weapon for eliminating tough set-in odors like cigarettes. Any yellow residue wipes off with ease.
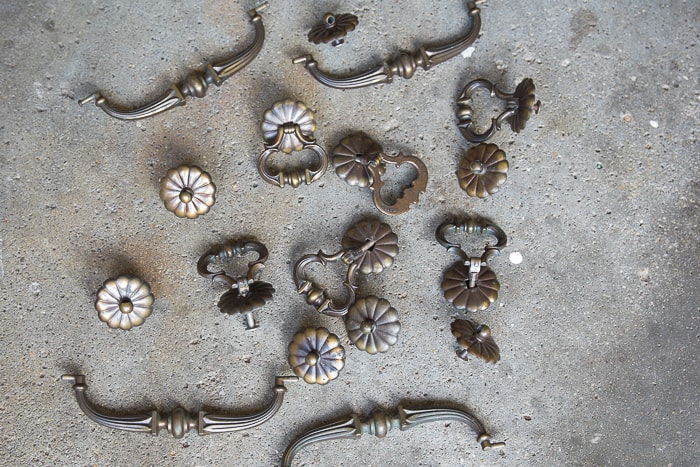
STEP TWO: REMOVE ALL HARDWARE
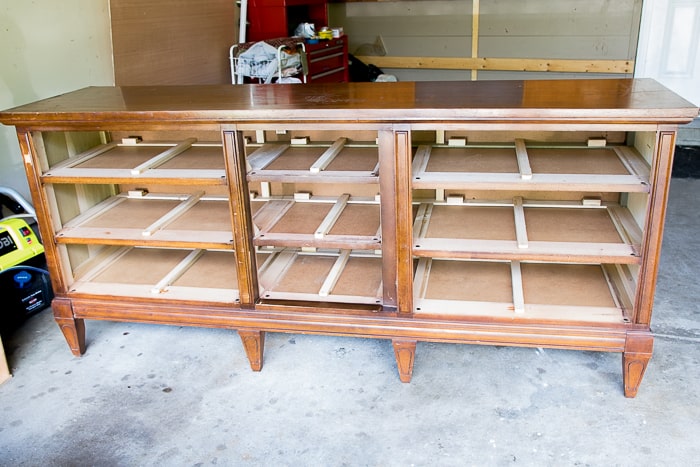
After carefully unscrewing and removing every piece of brass hardware for cleaning and refreshing, remove all of the drawers and set them aside. You may want to label them to make things easier later. Spray cleaning solution – find recipes here or use something like this – inside the dresser and each of the drawers and let them sit for at least a few minutes.
This helps to keep any potential spores and other dust particles in check. The task of wiping everything down with a cloth dipped in a cleaning solution is a bit tedious, but extremely important. To stay on track it helps to either work from side to side or top to bottom.
Make sure your cloth is damp enough to moisten the surface, but not too wet. Try to work in a way that won’t kick up dust. Clean the entire dresser inside, wipe down all of the outside surfaces and repeat yet again with all of the drawers.
Once everything is thoroughly dry, vacuum any loose particles with a shop vac. I know this seems counter-intuitive, but it is important to wet wipe any potentially invisible mildew before it could be disturbed by a vacuum.
To get into hard-to-reach grooves and crevices I prefer a bamboo skewer and an old toothbrush.
And then repeat the entire wipe-down process. This ensures that any remaining particles that escaped wiping and vacuuming get picked up.
Next up comes the actual prep part. I am not going to sugarcoat this. It’s a pain. It takes time and lots of elbow grease. It’ll never be done exactly the way you want. But it is the most important step of all because it lays the foundation for a successful and professional-looking paint job. Being thorough and meticulous will pay off – I promise.
With all of the cleaning done, you may think it’s time to fill in any nicks, gouges, and scratches. Well, that’s what I went with, anyway. Why sand more than once? For Dixie, this also meant taking care of some frizzy edges and rough back corners. Since I already had it on hand, I decided to give this wood filler a try.
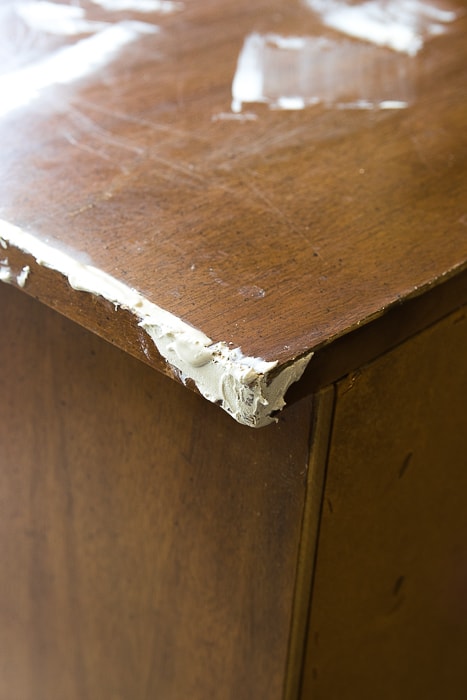
I carefully applied it to all of the areas, not too thick, and waited for it to dry. And waited and waited and waited…
Join me for part two to find out about my major mistake and what it took to make it right!
Have you ever tried your hand at re-doing a craigslist or garage sale find? Any successes or war stories you care to share?