Welcome back for “How to prep your walls for paint”, the second installment of my “How to paint your walls like a pro” series! If you haven’t checked it out yet you can catch up here on part one.
The prep phase of any painting project is hands down the most important but also the most tedious part. If there were a way to skip it, I gladly would. But we are aiming for a gorgeous, professional-looking result, so there is no getting around this one. And if you are going to invest all this time into doing it yourself, you might as well do it properly.
The aim of this post is to get you to the point where you are ready to begin painting from beginning to beautiful end.

While I am not a professional painter, all of the steps were learned from personal experience over the course of many paint jobs over a number of years.
Always follow all safety precautions as described on any tools and materials you use. The use of proper safety equipment is a must.
If working in a home built before 1978, always check for lead paint. Keep in mind that lead-containing paint was still sold for some time after that.
Consult your professional at the paint store on how to check for and properly work with walls that may contain lead paint.
Here are the steps that will be covered in this post:
- Room Preparation
- Wall Repair and Preparation
- Cleanup after Painting
- Taping
This post contains affiliate links. If you make a purchase through one of those links I will earn a small commission at absolutely no extra cost to you. You can read my affiliate link policy here.
For more helpful tips, tutorials and printables be sure to sign up for access to my FREE Resource Library! It’s easy and your password is on its way to your inbox as soon as you sign up!
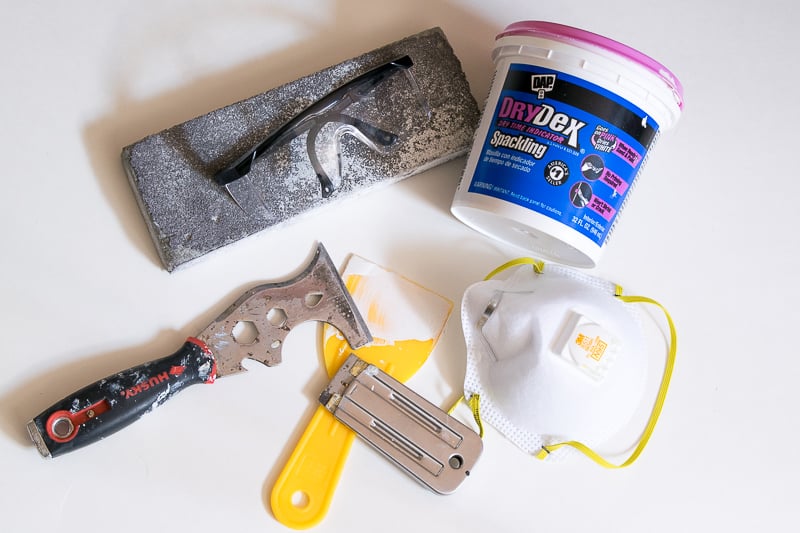
LIST OF SUPPLIES FOR PAINT PREPARATION
- paint scraper and/or razor tool
- non-slip drop cloth
- drywall sanding sponge
- spackle compound
- dust mask
- safety glasses
- disposable gloves
- multipurpose screwdriver
- plastic sheeting – to cover furniture
- putty knife
- painters tape
- microfiber cloths
- drywall repair kit (optional)
- lead paint test kit (optional)
GET YOUR ROOM READY FOR PAINTING
To make painting easy and safe, take the time to properly prepare your room. This involves a couple of common-sense steps.
CLEAR THE ROOM
Working in an empty room is easiest. Remove any furniture, curtains, curtain rods, and wall decor.
Remove all outlet covers and switch plates. Wash and clean them well, place in a plastic bag until you are ready to reinstall them.
Sometimes, removing larger pieces of furniture may not be practical. In that case, place them in the center of the room. Leave enough space so you can easily scoot your step stool or ladder along as you progress.
You want to be able to move along each wall unimpeded.
PROTECT SURFACES AND FLOORS
Properly protecting your floor will save you lots of cleanup down the road. It is virtually impossible to avoid little paint droplets and splatters.
Having the proper covers in place will save you from having to scrape stray paint off the hardwoods with a razor on your hands and knees.
Not all floor covering options work for use while painting.
Never use thin plastic sheets to cover your floors. They are slippery and tear easily. Reserve thin plastic sheeting for covering and protecting furniture.
Many professional painters will opt to cover floors in Rosin paper.
Most recommend old fashioned heavy-duty drop cloths. They now come with nonslip backing that prevents the cloth from shifting underneath.
While they may seem like a bit of an investment, initially, keep in mind that safety is the most important part of any DIY project. And reusable supplies like this are almost always cheaper in the long run. Since you will be moving your step stool or ladder around the room, a flat, non-slip surface is important.
Take any pictures or decorations off the walls and remove curtain rods and shades. I prefer doing this after the room has been emptied or the furniture has been moved out of the way. They are just easier to reach that way.
WALL REPAIR AND PREPARATION
Wall repair and prep is not difficult but can be a bit tedious.
If you live in a home that was built before 1978, chances are high that lead paint was used. It is very important that you test for lead paint every time before you begin any wall repairs and sanding. Lead painted walls require special treatment.
You owe it to yourself and your family not to skip this important safety step. Brittany from prettyhandygirl.com is a licensed general contractor and shows her easy method for testing for lead paint in this post.
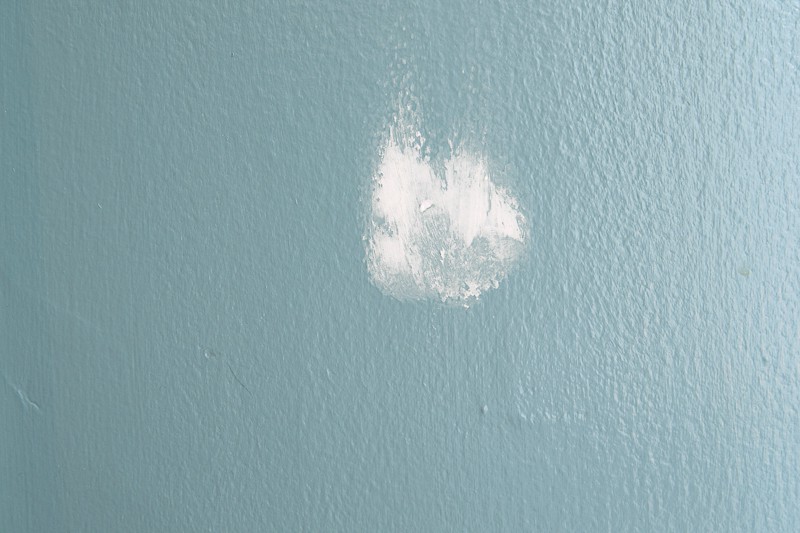
The easiest way is to work your way around the room, begin filling all nail holes as well as minor dents and gouges. Be sure to use just enough, but not too much spackle compound to avoid having to sand a lot. It’s better to come back for a second round than to goop it on thick the first time.
You are aiming for something that looks like this:
As you work your way around feel for any uneven, bumpy spots on the wall and scrape them off gently with a scraper. A razor tool works very well for this job.
Just be sure to stay at a fairly shallow angle to prevent causing damage to the wall. Easy does it!
Larger holes and dents may require a drywall repair kit or different spackle compound, as well as more drying time. If your walls need more extensive repairs, complete those first, then move on to the smaller stuff.
You may also find gaps like this above your baseboards:
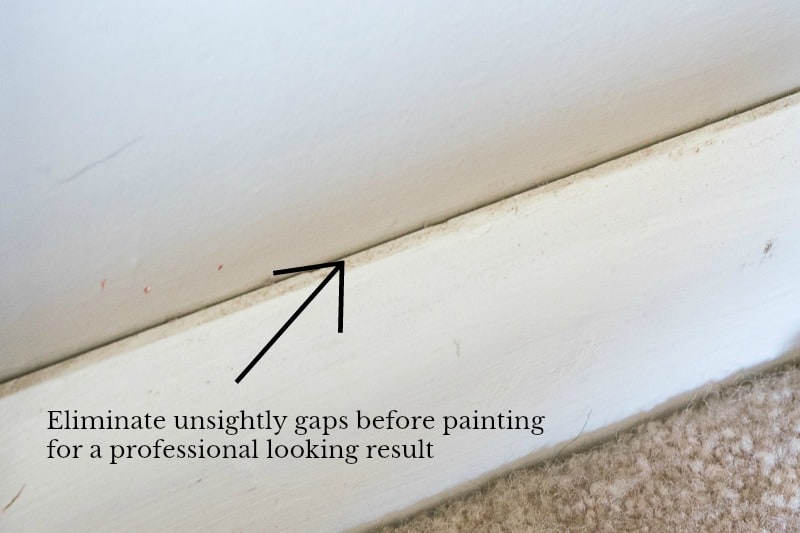
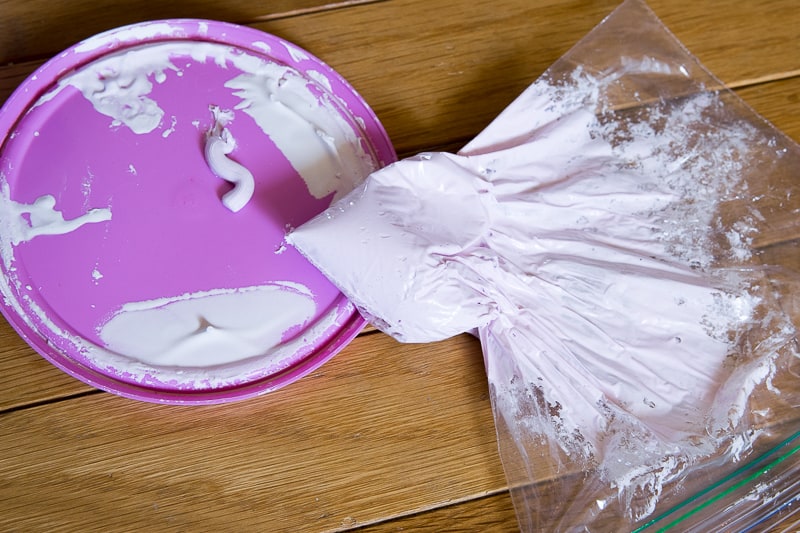
First, clean the baseboards well. Then put spackle compound in a plastic zip bag, cut a small hole in one corner and you are ready to pipe the spackling compound like icing on a cake.
Smooth the bead of spackle with your gloved finger and let dry. Much faster, not to mention less mess – no fancy equipment required:) After it is all sanded it looks amazing!
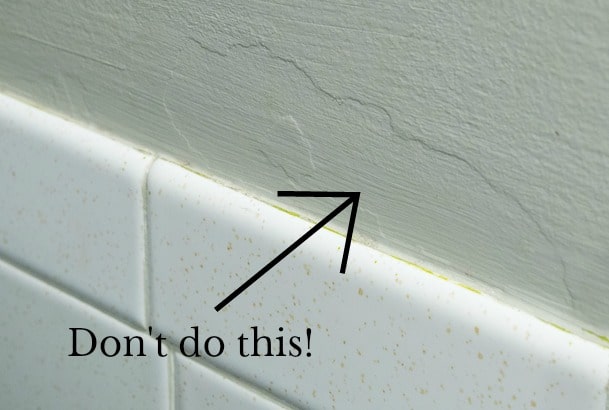
Here is a sad example of a lazy prep job. This wall used to be covered in wallpaper that was apparently stuck on with super glue. I thought I could get away with painting over it. As you can clearly see, that didn’t pan out. Don’t be me!
Once all repairs are thoroughly dry, sand everything well with a drywall sanding sponge. A good sanding sponge can be vacuumed in between and should last through several jobs.
Sanding is tedious, but doing it well will make your finished project look great.
Always wear a dust mask and safety glasses for this part of the project!
Drywall dust belongs on the floor, not in your lungs and eyes. A well-fitting dust mask and safety glasses are important tools you should never go without.
If you have ever had a piece of drywall in your eye because you were too lazy to put on safety glasses, you’ll know why they are important. Not that I have and experience with that sort of thing…
CLEANUP PRIOR TO PAINTING
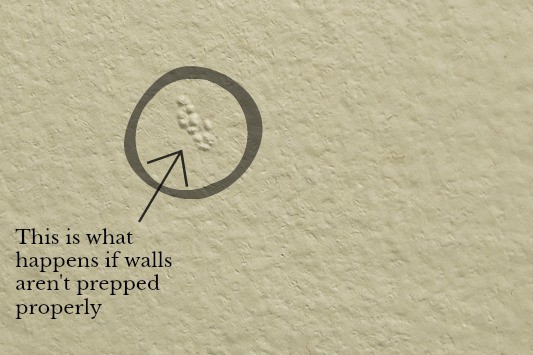
Now it’s time to clean. To keep dust particles from winding up in your paint and back on your wall, clean all surfaces well.
Work from the top down by sweeping any dust off the walls and ceilings first. Dust particles stay airborne, so give them time to settle before vacuuming everything with a shop vac (one with a good filter, of course).
Wipe down all of the walls with a damp microfiber rag to ensure the cleanest, smoothest surface possible.
Not cleaning the walls thoroughly may result in something unsightly like this:
TAPING THE WALLS
With the walls sanded and nice and clean, it’s time to tape along the edges, if you don’t feel comfortable enough to freehand it.
While taping is not a must, it can be very helpful in keeping paint off unwanted areas like the ceiling and along baseboards. It also makes painting very tight spots like between a doorframe and the wall much easier.
Whether you tape or not is entirely up to you, but I suggest you have a roll of good quality painters tape on hand just in case.
Once you are finished, pat yourself on the back, you are ready to begin priming and painting!
Join me next time for the last part of this little series: Painting. Contact me with any questions or comments! I’d love to hear from you!


