When I first published my Easy Sew Washable Face Mask pattern I had no idea how popular it would become. Nor would I have guessed that we would still be wearing them almost a year later. And it looks like they will be with us just a little while yet. Shortly after I designed my pattern, it became more and more difficult just to find the basics like thread, fabric, and elastic ribbon. Thankfully that is no longer an issue. And today I would like to show you how to add a nose wire to my easy-sew mask.
But this method is not limited to my face mask pattern. As long as your mask has a filter pocket this simple process will work. So why not upgrade your mask today?
Luckily, since that time a number of useful notions have come on the market that allow anyone to customize masks for a much more comfortable fit and a better wearing experience. As someone who has to wear glasses when out and about, I know how annoying the constant fog in front of your eyes can be.
During my time working in the medical field and often wearing a mask for hours at a time, I learned that in order to keep the glasses from fogging, the glasses should be slightly over the mask. That is not an easy feat with a mask that cannot be fitted because it lacks a nose wire. Thankfully it is very simple to add one to my mask. Whether you have an existing cloth mask or are in the process of making one, you are good to go.
To grab the original printable instructions for my easy-sew face mask from the FREE Resource Library just sign up here and your password is on its way to your inbox!
* This post contains affiliate links. If you make a purchase by clicking on an affiliate link, I may earn a small commission at absolutely no additional cost to you. You can view my complete affiliate link policy HERE.
WHAT TYPES OF MASKS ARE THERE?
Since mask wearing has become a thing, three basic designs of homemade masks have evolved: pleated, fitted cup and gaiters.
Gaiters are the least reliable as they only have one layer and a tendency to slip constantly. They can also get pretty hot during the warmer months. Adding a nose wire is not really possible.
Fitted cup style masks have become one of the most popular styles because they tend to fit the contours of the face quite well and come up slightly higher over the nose. Some of them have nose wires or you can add one depending on the pattern. Curves and a multipiece design make them just a little more challenging to sew.
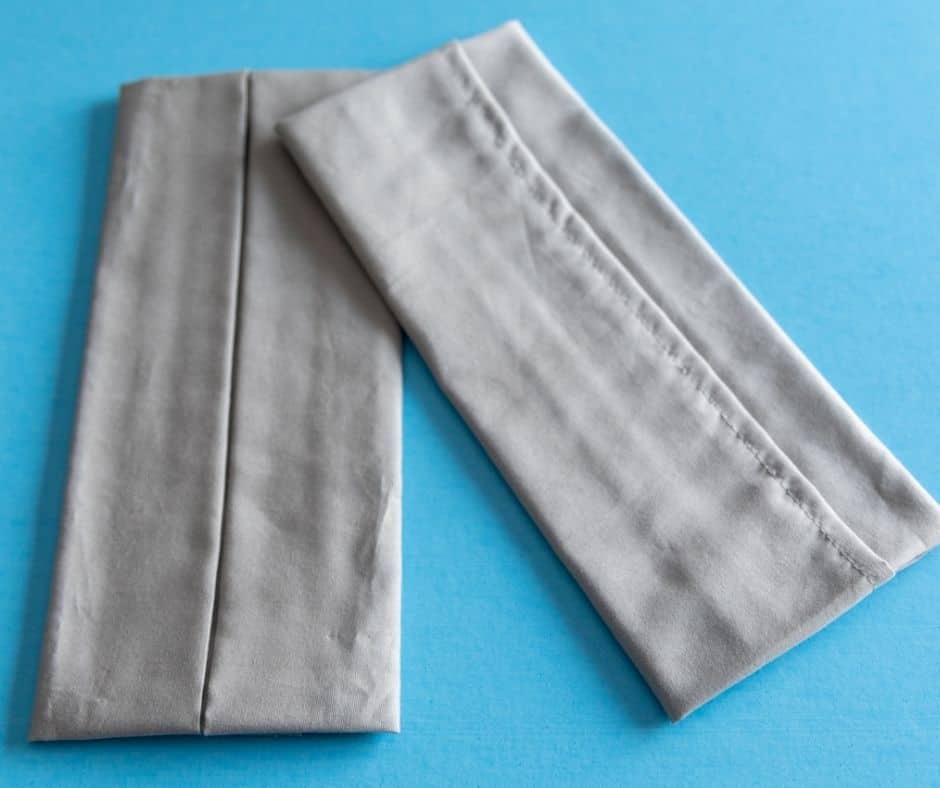
The third popular type is a pleated mask pattern. My original mask pattern falls into this category. It is constructed from a single rectangular piece of fabric and features a pocket into which filter material can be inserted. More on what filter I recommend now in a little bit. While my pattern has an inverted pleat, pleated masks come in a variety of different styles. Depending on the design of the mask, you may be able to add a nose wire with ease.
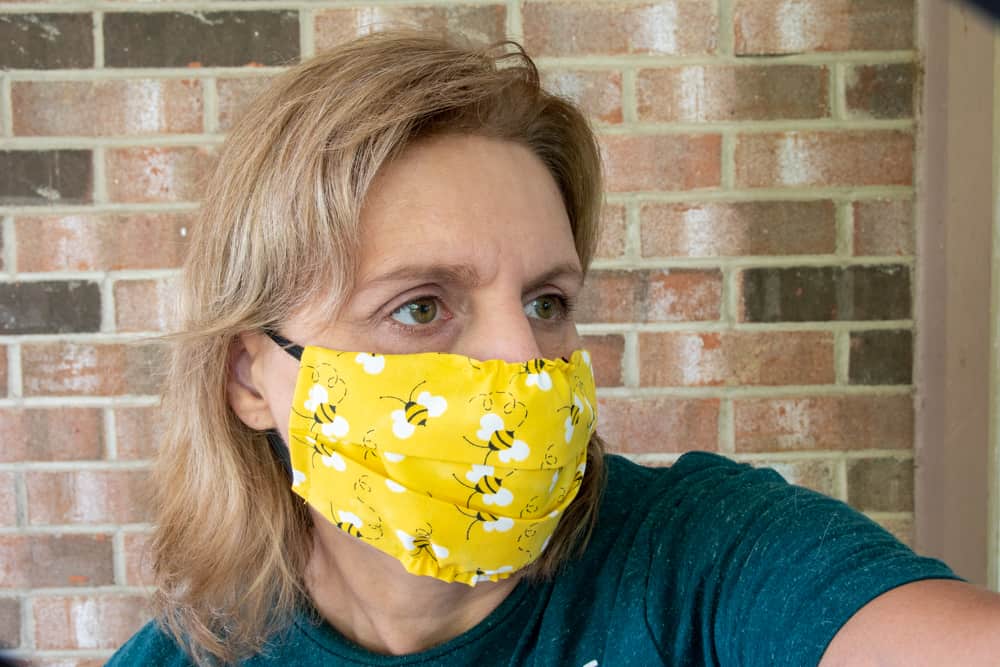
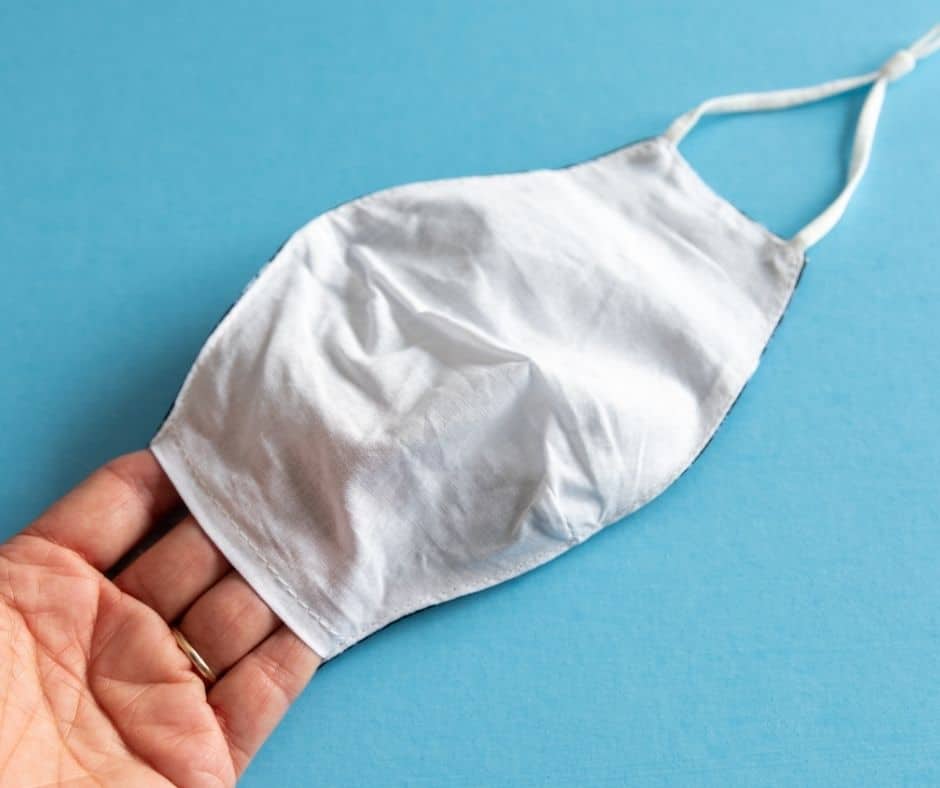
In this picture, I am wearing one of my masks. Before nose wires became available, I added elastic in the center of the top and bottom edges for a closer fit. You can learn how in this post.
WHAT IS A NOSE WIRE AND WHAT DOES IT DO?
Nose wires for face masks can be made of thin strips of aluminum or plastic with embedded wire. They fit over the bridge of the nose to allow for a better, more comfortable fit. Commercially available nose wires are generally straight and are bent into shape by the mask wearer to adjust as needed.
If you wear glasses and have an issue with them fogging up while wearing a mask, you will definitely want to add a nose wire! Better fit around the nose and eyes can also give you greater protection from particles that may otherwise penetrate the gap that often exists between the nose and eyes. The CDC now recommends wearing a well-fitting mask with a nose wire for that reason.
HOW TO ADD A NOSE WIRE TO AN EXISTING MASK
If your favorite cloth mask doesn’t have a nose wire, it’s a snap to add one. While this post is geared towards adding one to masks created from my easy-sew washable mask pattern, you can easily do this with any mask that has a filter pocket.
Here is what you will need:
- Cloth mask with filter pocket
- Thread to match, pins, scissors
- Aluminum or plastic nose wire
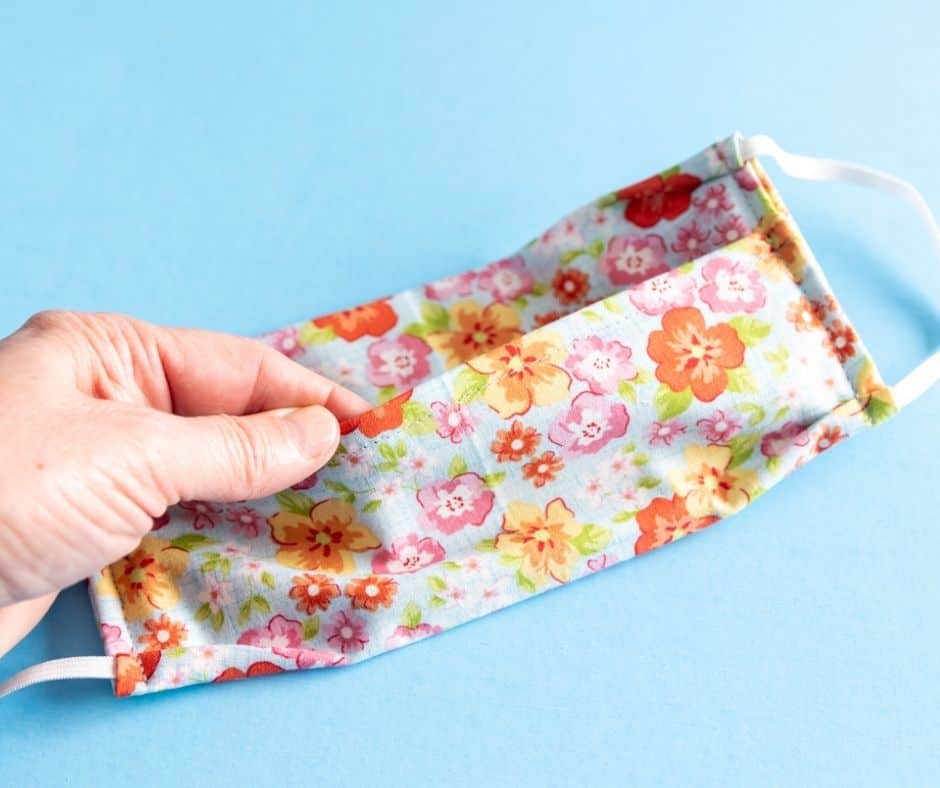
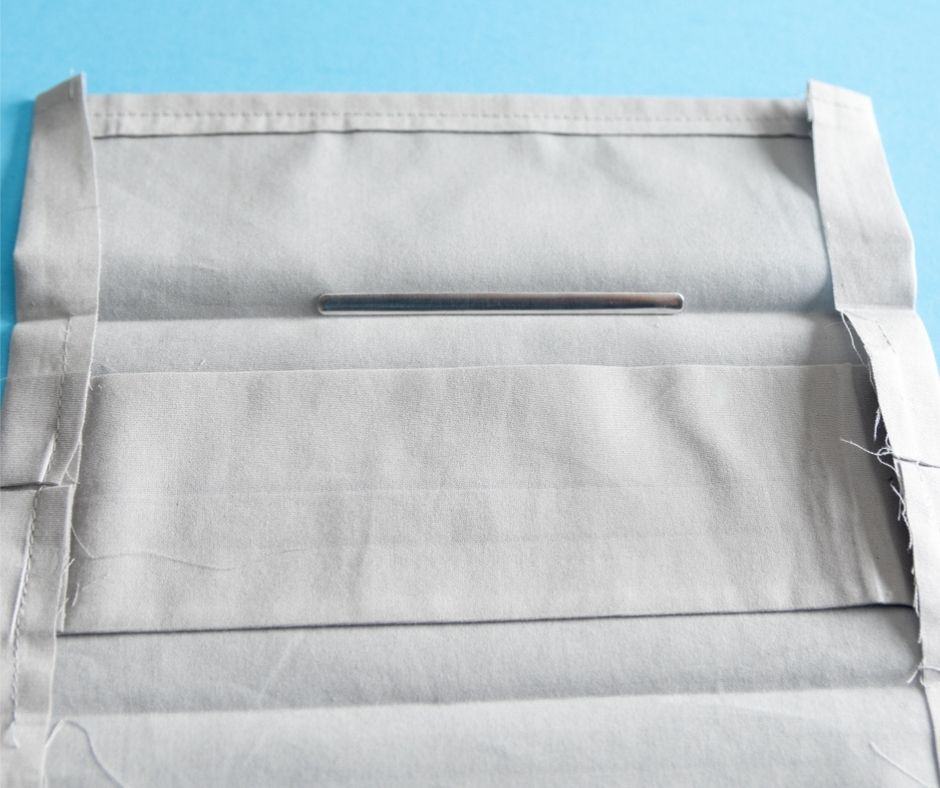
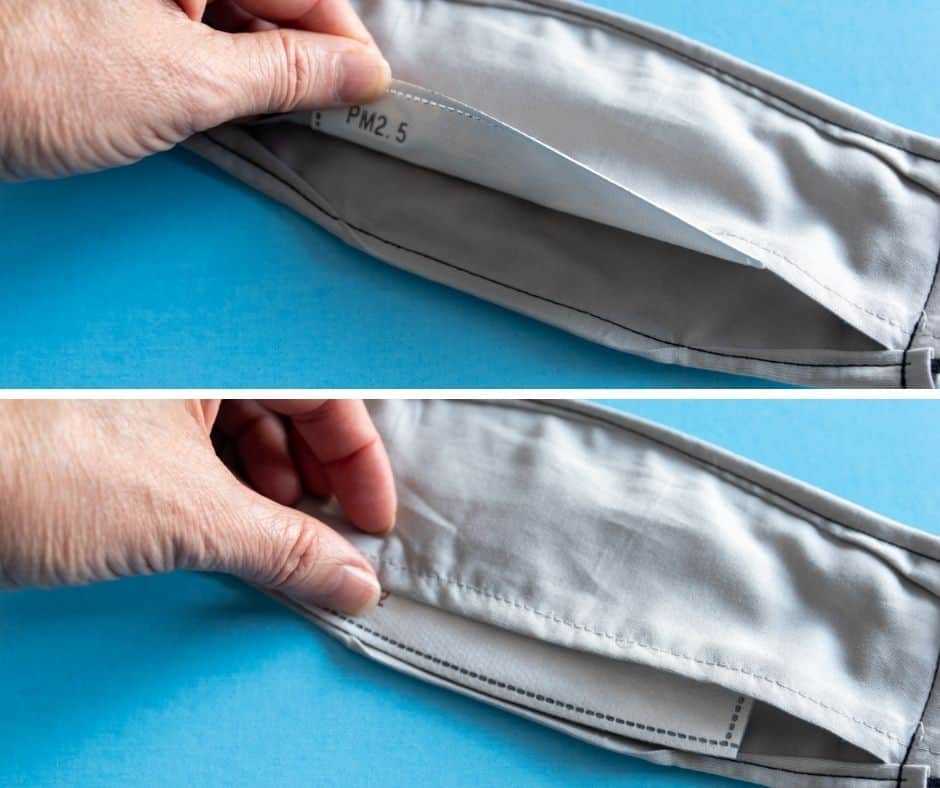
My face mask pattern is constructed from a single piece of fabric that overlaps in the back to form the filter pocket. To add a nose wire, lay the mask front side down so that the back of the mask is facing you. Estimate where the center of the mask is and open the filter pocket. Place the nose wire along the top crease.
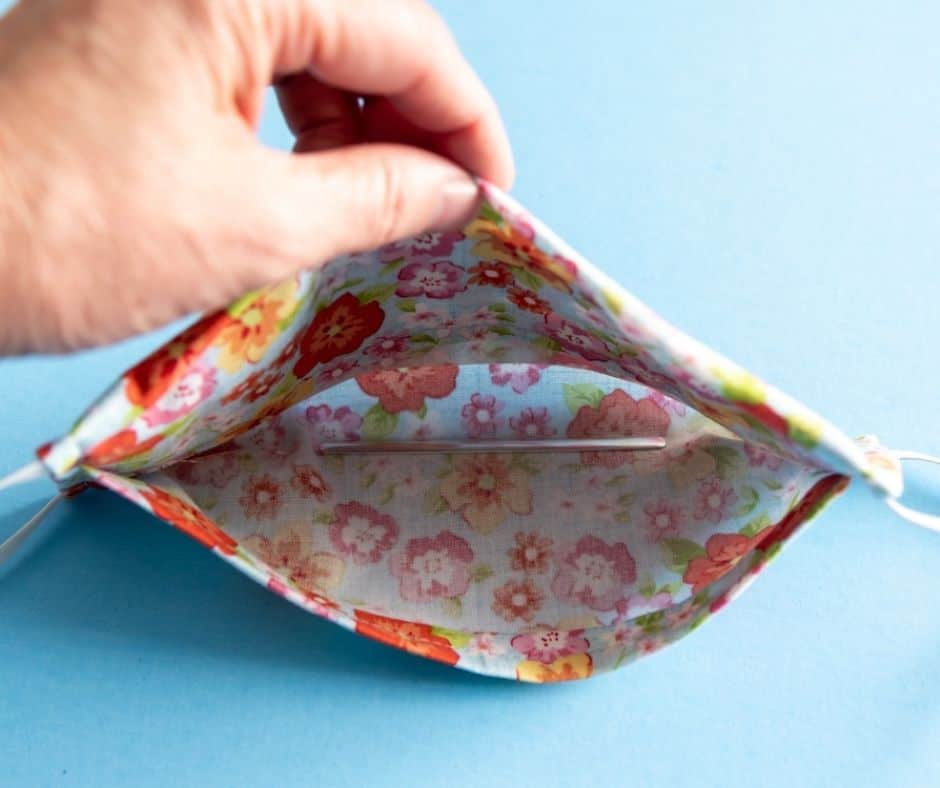
If you are using an aluminum wire with an adhesive strip, place the wire above the crease with the adhesive facing the fabric. This ensures that the rounded side of the wire will face forward.
Now you can stitch around the nose wire along the outside to make sure it stays securely in place. This step is important even if the wire has an adhesive side. Stitching keeps the wire from shifting and makes sure your mask fits comfortably once the nose wire is molded.
For masks that have a rounded cup shape, basically, the same instructions apply, as long as they have an accessible filter pocket in the back. Just be sure to place the wire as high on the bridge of the nose as possible.

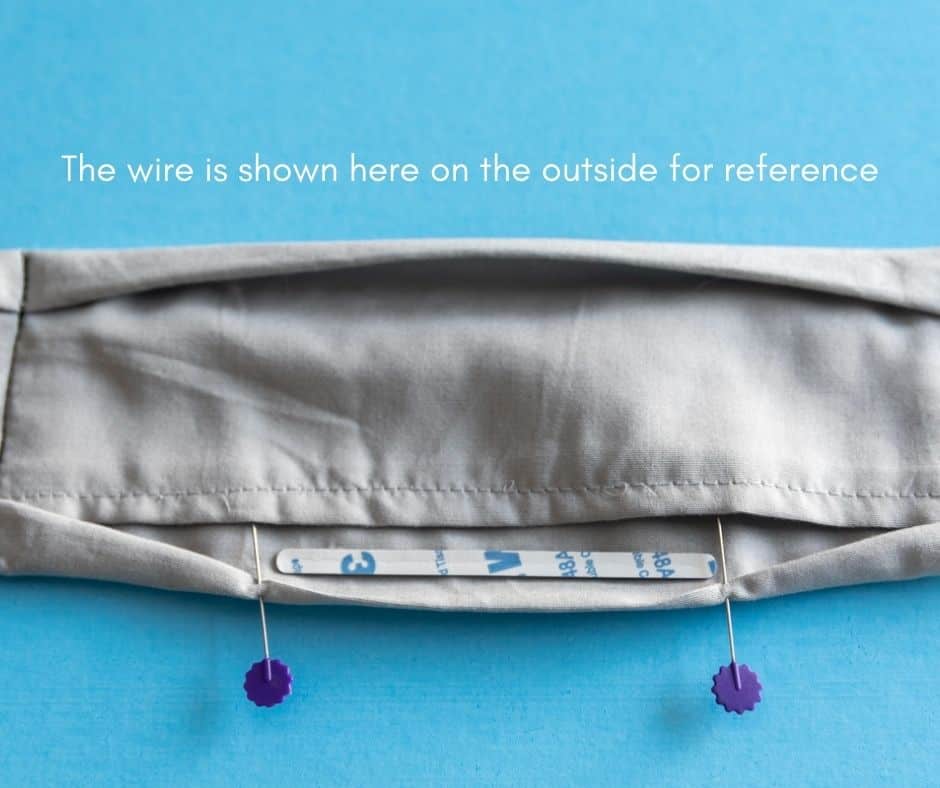
You may have seen nose wires on the outside of some masks and that is certainly an option for wires that have holes to sew them into place. I tried several times to place adhesive wires such as the one shown in the pictures on the outside as well as the inside of the mask without stitching them in. Each time the wire fell off.
ADDING THE NOSE WIRE AS YOU ARE SEWING THE MASK
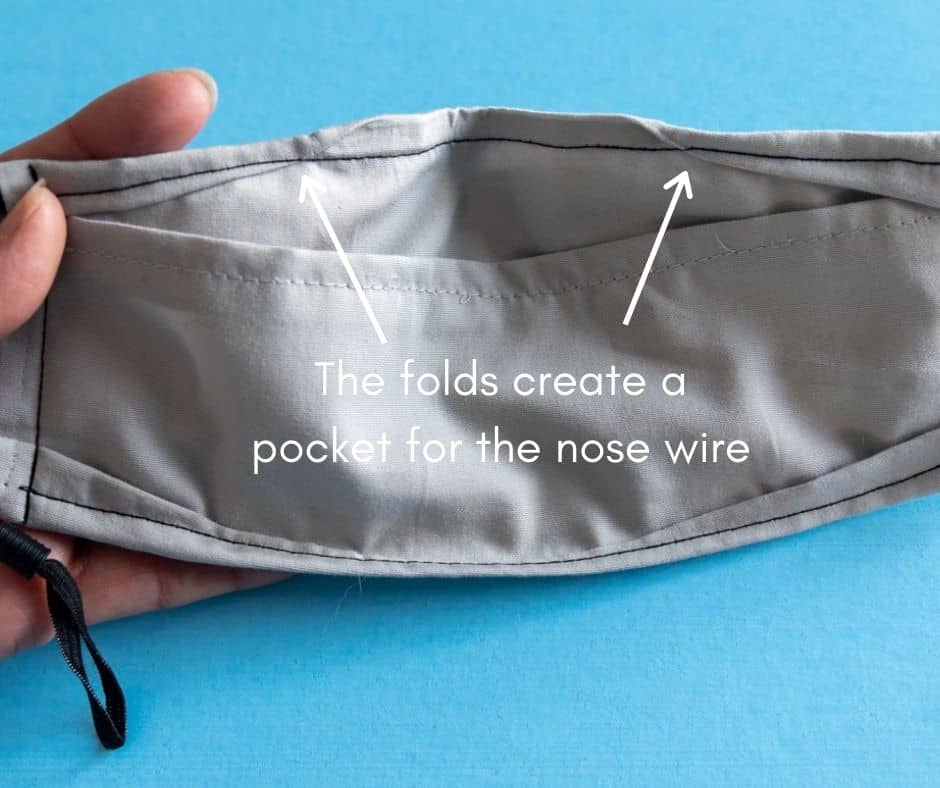
Positioning the wire inside the mask is even easier if you are in the process of sewing the mask from scratch. Just open up the pressed mask before you insert the elastic and place the nose wire.
Just about as easy as the above-described method, this additional step also helps the overall fit and comfort of the mask. Once the wire is placed as shown in the above image, it’s time to place the elastic. My original pattern calls for placing the elastic and rolling the corner over 1/4 inch. To give the mask a closer fit over the nose roll in the fabric 1/2 inch.
To mark the edges of the wire and to keep the folds in place for stitching, place a pin on either side of the nose wire. Stitch along the top of the mask. Repeat the same steps along the bottom edge of the mask without the wire.
This simple adjustment allows for the creation of a perfectly sized pocket for the nose wire with only one extra line of stitching. It is shown here in contrasting thread so you can see it well. By using matching thread, the stitching will be barely visible in the finished product.
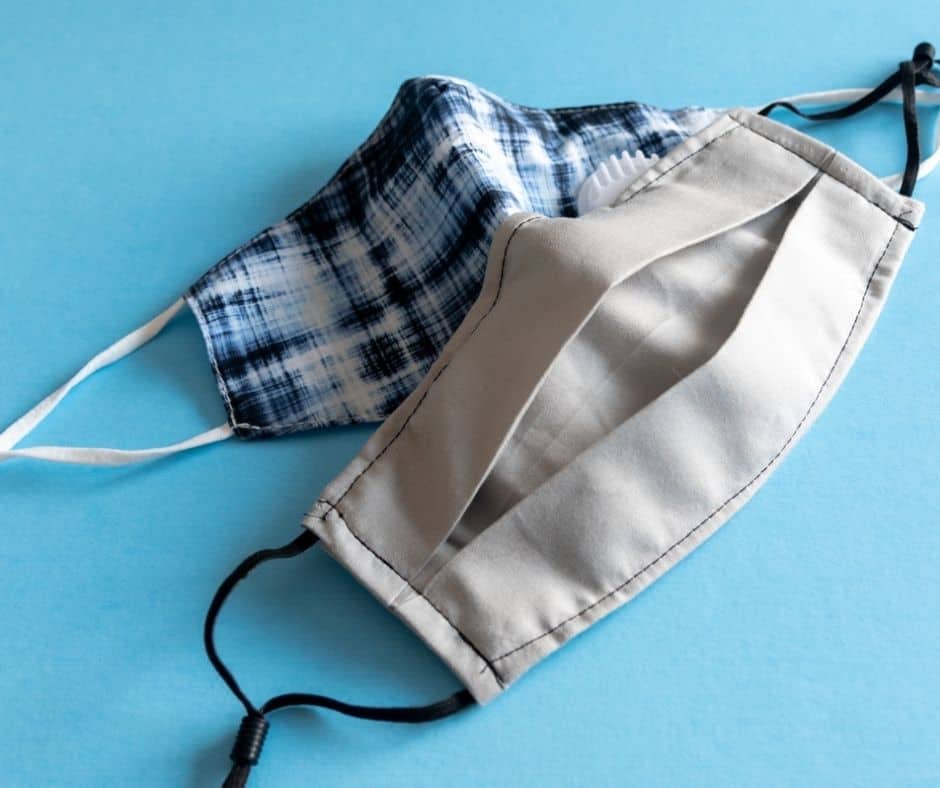
And are the finished masks with their brandnew nose wires.
ADDITIONAL OPTIONAL UPGRADES
Elastic is sturdy and hardworking but can become uncomfortable with frequent and longer wearing. Additionally, it is prone to losing its elasticity with wear and tear over time. While 1/4″ elastic generally works well, opt for a 1/8″ elastic cord to create adjustable ear loops. Be sure to add 2″ to the overall length and use rubber or silicone cord stoppers. Check out my post on how you can make your mask more comfortable.
Since I published my face mask pattern newer and more effective filter materials have come on the market. These carbon-lined PM 2.5 filters are thin, lightweight, and breathable despite offering five layers. They are sized just right to fit most masks and won’t shift or crunch up in your mask as some other materials can. Each filter lasts through 3 days of regular wear.
To modify a childsize mask, trim the nose wire as needed to the proper length.
FINAL THOUGHTS
Masks are proven to be important barriers to the spread of disease. But they work best when used appropriately and if they fit the wearer well. The modifications described here are simple and take only minutes but will result in much greater comfort. I hope you will give adding a nose wire to your masks a try. Please let me know if you do in the comments below!

Good day,
I’ve been trying to obtain a password for the resource library but I have yet to receive it. I’ve checked my junk mail and nothing there.
Please advise if there is another way to get a password.
Thank you
Susanne
Nice post.
Hello there, just became alert to your blog through Google, and found that it is truly informative. I am gonna watch out for brussels. I’ll be grateful if you continue this in future. Lots of people will be benefited from your writing. Cheers!
Good luck!