Welcome to the third part of the “How to paint walls like a pro” series. In this post, we get to the good part at last. It’s time to prime, paint, and clean up!
If you are just joining in, you can catch up on the first two posts in this series here Part One | Part Two.
With walls properly prepped, you are ready to dive into priming and painting.
I have to confess, I am a recent convert to priming my walls. So far I have always had pretty good success using good quality paint that contained primer. That is until I tried to turn blue walls into white ones. My normal two coats and I’m done didn’t even get me close to the desired outcome!
Thankfully, this project was one where I painted one wall at a time out of caution. It was very obvious early on in the process that primer was an absolute must.
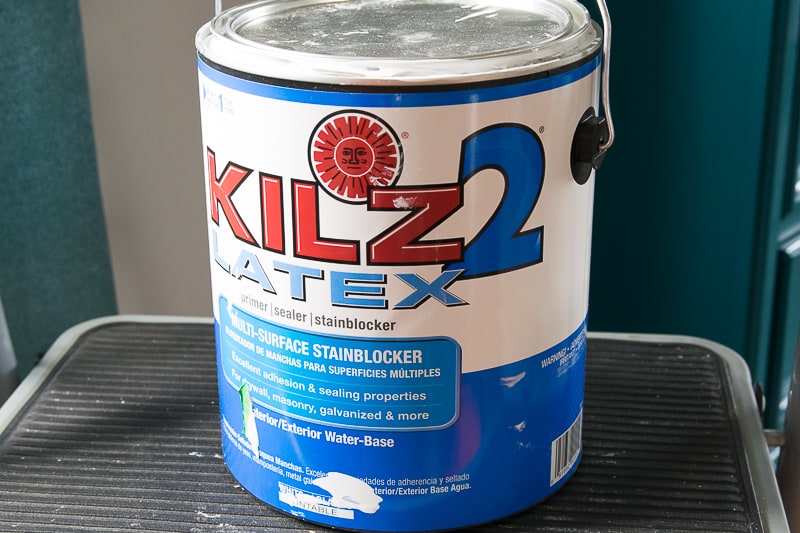
So off I went to the big orange store that starts with Home and ends with Depot to procure me some of my favorite primer.
I have used Kilz primer on many different occasions and especially love their spray versions for projects like my favorite Ikea hack.
Before we go on, a quick reminder: I am not a professional. The process I am describing in this series is one that I have learned through many years of painting interiors in my own home. Always use safety equipment and know your tools and materials before embarking on any home improvement project such as painting.
TODAY WE WILL COVER THE FOLLOWING STEPS:
- Priming
- Painting
- Cleanup
This post contains affiliate links for your convenience. You can read my full affiliate link policy here.
To make this entire process a little easier for you, I created a paint supply master list you can grab as a handy printable from the FREE Resource Library. Just sign up here and the password is on its way to your inbox.
WHEN AND WHY YOU SHOULD USE PRIMER
Let’s take a closer look at why you should definitely consider priming.
While primer may look like plain old flat paint, it is anything but. Primer is specially formulated to provide a protective coat for the surface to be painted. It also allows the paint to adhere better, blocks stains, makes the finished product more durable, and renders colors more accurately.
And as if that weren’t good enough already, it is cheaper than paint. Have I talked you into using it? I thought so.
PRIMER SHOULD ALWAYS BE USED WHEN:
- painting drywall for the first time
- if you plan significant color changes for
- painting wood trim
- painting over wallpaper
As mentioned above, using a primer will also ensure that the color you picked will actually look like the color you picked.
For best results have the primer tinted in a shade close to the final wall color.
If you plan on painting over well-adhered wallpaper, it is important to use an oil-based primer before painting with water-based latex paint to prevent the wallpaper glue from being reactivated. Not following this advice will result in a bubbly, peeling mess down the line.
For all other priming jobs, use a water-based latex primer.
Always use a separate brush and roller, as well as a fresh tray liner for primer.
PROPER PAINTING SEQUENCE FOR BEST RESULTS
Generally, the sequence for priming and painting is:
When it comes to the proper sequence for painting there are a couple of different schools of thought. But they agree that the ceiling is the place to start. It makes sense as you certainly won’t want your walls to be splattered in ceiling paint.
Here is the order that has always worked well for me:
- Ceiling
- Walls
- Trim
To me, it makes the most sense to work top to bottom and from matte to shiny.
Depending on the state of your ceilings, you might get away with minor touch-ups.
Since the material used is the only difference between priming and painting, it’s easiest to just describe them both in the same step below.
Paint
Paint professionals recommend that you mix your paint in one bucket if your paint job requires more than one gallon to assure consistent color. This is called boxing. You can easily do this in an inexpensive 5 gal bucket with a lid from the home improvement store. If you do wind up using a 5-gallon bucket, you might want to use a paint grid rather than a tray.
Never use a flat head screwdriver to open paint cans, they can damage the lid or can. Always mix primer or paint well. Through the years I have developed a real affinity for these paint can lids with pour spouts. I buy one for every can of paint. Just less mess with the pour spout! The spout folds down for easy storage. If you do opt for one of them, be sure to tape a paint chip on the side of your paint can so you’ll always know what color it contains as the paint info is usually on a label on the top of the paint can.
When priming and painting use your cut in brush and paint along trim, ceiling, and corners. Whether you do this before or after you roll on paint is a personal preference. I usually opt to roll primer/paint first, trying to get as close to the edge as possible to avoid a lot of extra brush work. That is the sequence I will cover.
Beginning your Paint Job
Your brand new tray liner is ready, now pour enough paint to nearly fill the bottom troth. Cover your roller in primer/paint and roll off any excess on the top part of the tray. Be sure the roller is evenly saturated but not dripping.
Working from top to bottom and from one side to the next begin rolling on primer/paint. Always overlap each row slightly, applying even pressure, but not too much. Be mindful of any drips along the wall and clean them up quickly. Resist the temptation to go over the same area too quickly and too many times without letting the primer/paint dry thoroughly in between.
Generally, you will repeat this step twice for primer and twice for paint (I know!), especially if painting over dark walls. Primer normally dries much faster and usually can be repainted after one hour. Paint can be repainted after at least 2 hours of drying time.
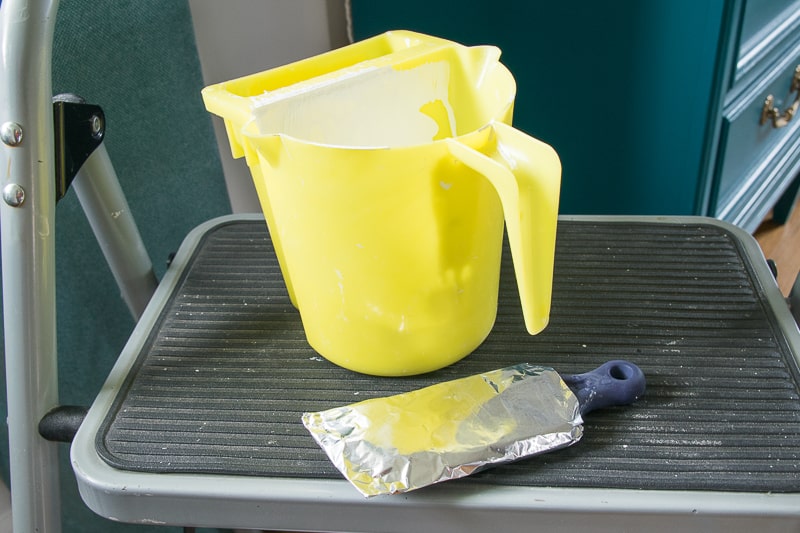
Be sure to wrap your roller in aluminum foil or cover it with a plastic grocery bag and cover the paint tray with a plastic bag to prevent the paint from drying out in between coats. The skin that forms on latex paint in a relatively short time will be deposited on the wall as little thick pieces of paint if you don’t cover your tray.
Brushing corners and edges
While the rolled on paint dries, use your cut-in brush to apply primer/paint to the remaining areas in corners and along edges. Never dip your brush into the primer or paint more than halfway – about 1 -1 1/2″ is just right.
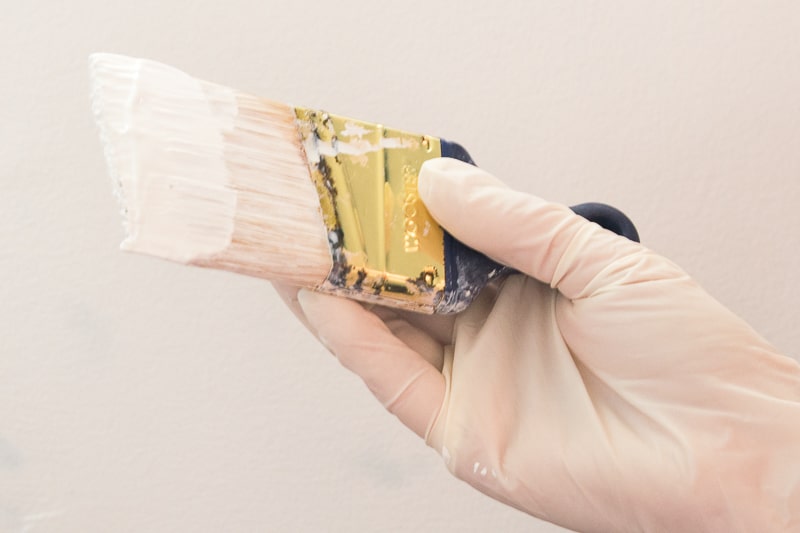
You may want to use a painter’s cup for this step – avoid ones with a separate brush compartment, as they are very hard to clean. To be honest, a cheap plastic measuring cup with a handle from the dollar store works great. They have a wide opening which allows for much easier cleaning down the road. Tap excess paint off against the edge of the container. It’s better to begin with too little paint on your brush than too much. You will get a feel for it quickly. Decide if you will be working from left to right or right to left. I always use my angled cut in brush so that the paint is loaded onto the brush facing away from the wall edge like this:
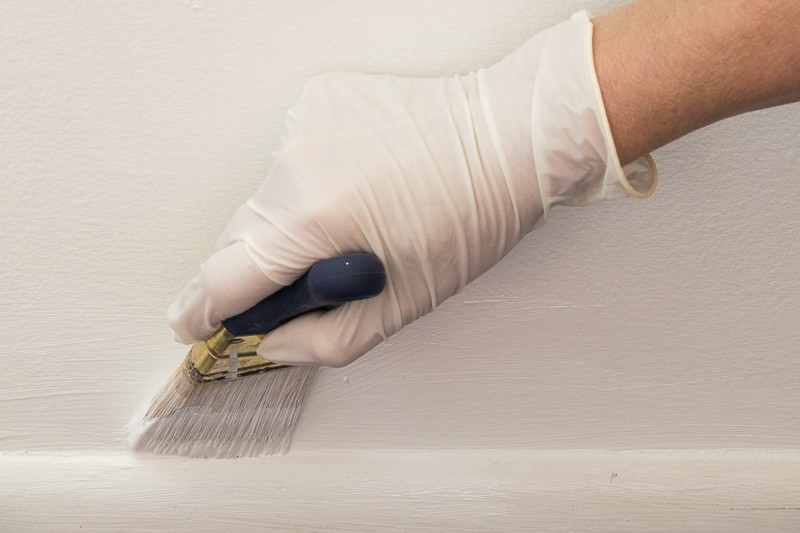
This is the method that will give you the cleanest and straightest edge, especially if you opted not to tape. I rarely tape, mainly because it adds an extra step, time, and cost. My only exception is painting trim. It saves time taping off the floor! With a little practice, you will cut in edges like a pro in no time. Working in the same direction and sequence will save you time as well because you can begin applying your second coat much sooner, while the rest of the room’s paint is still drying.
Which brings me to another important point. Resist the temptation to rush through your job by going over just primed or painted surfaces too soon. Be sure to read your primer and paint’s instructions and follow them closely. Unless you begin early in the morning and have all day for all the paint to dry as specified, prime one day and paint the next.
Be sure to wrap your cut-in brush in aluminum foil or wax paper or put it in a plastic zip bag to prevent it from drying out or having to clean it between coats.
Cleanup
You primed and painted your room! It looks awesome. Time to rest on your laurels. Not so fast. There is still a little more to do, but I promise you won’t regret it.
Chances are you did your own painting to save money. Don’t waste it now, by letting your paintbrushes and rollers dry out. Cleaning your equipment well afterward will give you a head start for your next project and save you money. Even if you painted late into the night and you are just too tired to even think of cleaning, there are some simple steps that will make it easier the next day.
Just soak brushes and roller covers in hot soapy water overnight. Make sure that the brushes and rollers lay flat and are submerged completely. An old plastic tub works well for this. With your brushes and rollers soaking you have time to postpone cleanup for a day or two if you must. Don’t make it any longer than that, though, because brushes contain metal parts that will begin to rust.
After your brushes and rollers have soaked, rinse them thoroughly and let air dry.
Even a brush that has turned stiff can still be rescued. It just takes a little more time and elbow grease or a special brush cleaner solution. No brush cleaner on hand? Vinegar (full strength) or a solution of hot water and plain liquid fabric softener (1/2 gal water + 1/4 cup fabric softener) should do the trick. For stubborn, stuck-on paint, you may have to use a brush comb and a brass brush. You won’t regret making sure your favorite brush is in tip-top shape for next time.
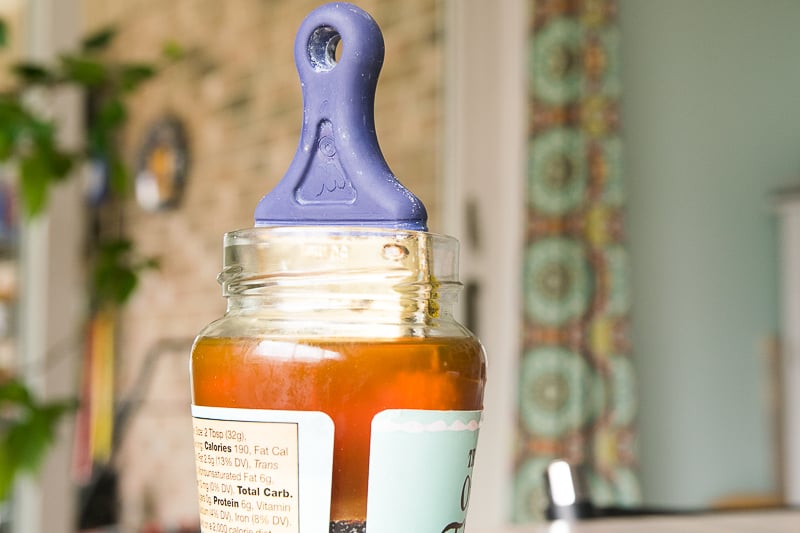
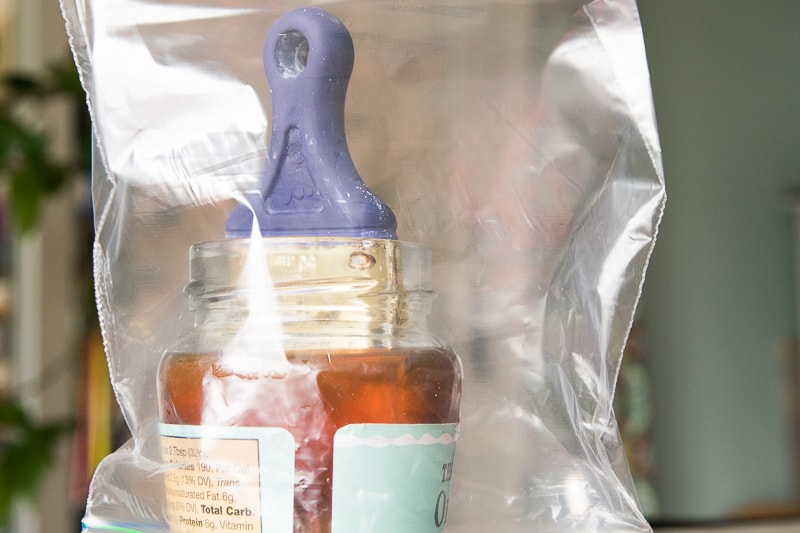
Cover with a plastic bag and store your soaking brush in a well-ventilated area or garage for up to 2 days. I found a glass jar that was just the right size to suspend the brush without the bristles touching the bottom.
Don’t forget to scrape any paint off the roller holder to insure smooth operation next time around.
Finally, inspect your freshly painted room for any paint droplets and carefully scrape them off with your razor tool at a shallow angle to avoid scratching the floor.
In the event of larger drops of paint hitting the floor while you paint it is generally better to let them dry rather than trying to wipe them up immediately.
Once dry, they will come up easily without leaving a mark, unless you are dealing with carpet. In that case, you’re sunk. That is why it pays off to protect your surfaces with a good non-slip drop cloth.
Now you are ready to re-install switch plates and outlet covers and begin putting your room back together.
There you have it. My way of painting interior rooms. Achieving a professional looking paint job isn’t difficult if you have a good plan and great tools on hand. Have you ever tried to do your own paint job? Ever thought of tackling paint, but weren’t sure where to start? I hope you found this little series helpful. I would love to hear some of your experiences and tips!


OMG! Thanks a lot for showing us that by storing our paint brush inside an airtight container or package we could prevent it from hardening too quickly. My son intends to repaint his bedroom once he’s graduated from college next month (at least that was what he told me last week). I’ll make sure he checks out this article so he could complete the task easily.
I am so happy this helps you and your son! Good luck with your paint projects!
The article provides a detailed and insightful guide to painting walls. It offers step-by-step instructions, useful tips, and a positive tone, making it a valuable resource for both beginners and experienced DIY enthusiasts. With its emphasis on proper surface preparation, selecting the right tools, and taking the time for a high-quality paint job, this article stands out as a reliable and inspiring source for mastering the art of wall painting.
Thank you so much!